In this video, we’re going to build an EMP-proof Faraday cage using a metal trashcan and other common items you can get at your local hardware store or online. I’ll walk you through all the items you need, cover the step-by-step process to build this, test it several different ways to show whether this setup really works or not, discuss how to properly store it, look at test results simulating EMPs on an identical setup, and discuss what you should put inside of it. Definitely stick around until the end to see our test results, so let’s jump in.
So what is a Faraday cage, and what problem are we trying to solve here? Simply put, a Faraday cage is an enclosure built to protect electronic devices from electromagnetic pulses or EMPs that can overload and fry them. So, what is an EMP? An EMP, or electromagnetic pulse, is a brief burst of electromagnetic energy. These can be the result of a nuclear blast. Events like Coronal Mass Ejections (CMEs) are large plasma and magnetic field expulsions from the Sun’s corona. Such events have been documented and observed, such as the Carrington event of 1859. I did a video on the channel a few years ago that goes into a lot of detail if you’d like to learn more. By building one of these, we can protect important electrical devices in an affordable setup that allows you to protect electronic items that are important to you.
I will tell you upfront that I combed through many videos on this subject, various online articles, and studied videos that actually used gear that could replicate an EMP. I then pulled all that information into this video for you. Of course, I’ll give credit and provide links in the description section below to the sources I found helpful in researching this video. So, let’s start building this!
ITEMS NEEDED
Here are the items you’ll need. Each one of these items that we’ll cover can be purchased at most local hardware stores and online. Several of the items you may already have.
- All metal trashcan
- Big one: ($34)
- Small one: ($23)
- Aluminum foil ($5)
- Aluminum foil tape ($6)
- Cardboard box (free)
- Tape measure ($9)
- Duct tape ($5)
- Sharpie pen ($4)
- Scissors or knife ($5)
So, if you had to buy all of these, you’d be around $70. I’ll put links below to each of these items.
HOW TO BUILD IT
To be effective, a Faraday cage needs three things:
- 1) Have a continuous conductive metal barrier protecting against electromagnetic signals, which is why we’re using this metal trashcan and aluminum tape.
- 2) Adequately insulate whatever it’s protecting inside. We’ll go into detail to show how to add insulation inside.
- 3) Store the setup on non-conductive surfaces like wood, cardboard, or rubber mats.
So, let’s jump into building this utilizing these three principles.
Seams – Check and Seal
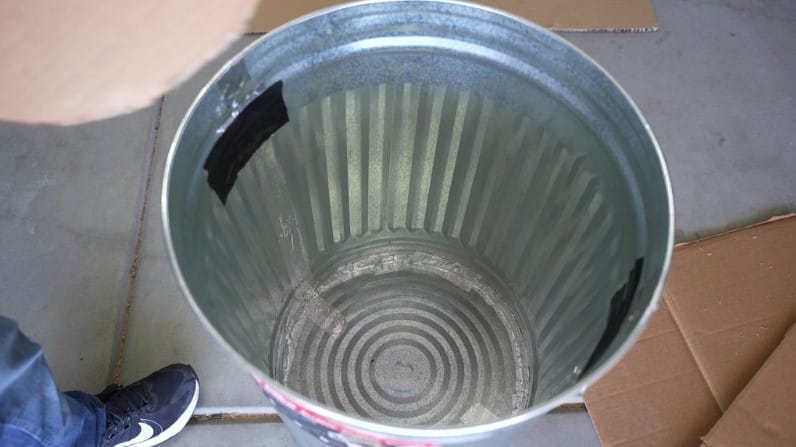
Any break in the continuous metal structure presents a weak point where signals can get into the can. The metal serves as a shield to keep signals out. We have to identify any places in our trashcan where there may be a compromise. So, how do we address this problem?
You have three primary vulnerable points for a metal trashcan. If you look inside the can, you can see holes where the handle attaches to the side of the can. Additionally, the seams, while sealed at the factory, may have small openings that we may not be able to observe. Under our lid presents another point of vulnerability as the lid may not sit completely on top of the trashcan to form the seal we need. We can place a lantern or bright light inside the can both before and after we seal everything up to see if we observe any light escaping. This is a trick I learned from JR of the DIY Prepper YouTube channel in his video on the same subject.
So, let’s begin by sealing holes where the handles connect. On the inside of the can, we’ll apply our aluminum tape. Adding few layers of aluminum tape may not be a bad idea as the metal holding the handles does have sharp edges. Additionally, I put a couple of layers of duct tape on top of the aluminum tape. Why? Once we add the insulation inside, it will rub on this area. Over time, it could compromise the aluminum tape’s integrity. As such, I just want to make sure we provide it with a layer of protection.
Next, let’s seal the seams on the inside of the trashcan. We have seams at the bottom of the can that go all the way around. Additionally, there’s a seam running from the bottom to the top that we need to seal.
Now, regarding the lid. I’ve found three primary approaches to seal this while researching for this video. I’ll show two approaches here that are budget-friendly and mention one more expensive approach later at the end of the video. We’ll also test these approaches of sealing the lid later in the video, along with showing tests performed by Dr. Bradley of the YouTube channel EMPDdoctor in which he simulates conditions similar to an EMP on a metal trashcan. You’ll want to stick around for that as it’s very fascinating.
OK, here are two options for sealing the lid.
The first option is to put an aluminum gasket on the top of the trashcan that our lid sits on. To do this, take a long strip of aluminum foil and fold it on itself several times. Then run it around the top of the trashcan and push the lid down on it. With this option, the advantage is that we can open the can without issue. But does it really work to protect our items inside? We’ll find out in just a moment when we perform tests.
The second option is arguably the safest bet, but it also presents a challenge. Using our aluminum tape, we can tape the lid off entirely after it is placed on top of the trashcan. But of course, that creates a problem in that each time we want to open the can, we have to either cut the tape or carefully remove it, thus damaging the integrity of the seal.
Regarding the 3rd approach, we’ll discuss that more in a moment.
Insulating The Inside
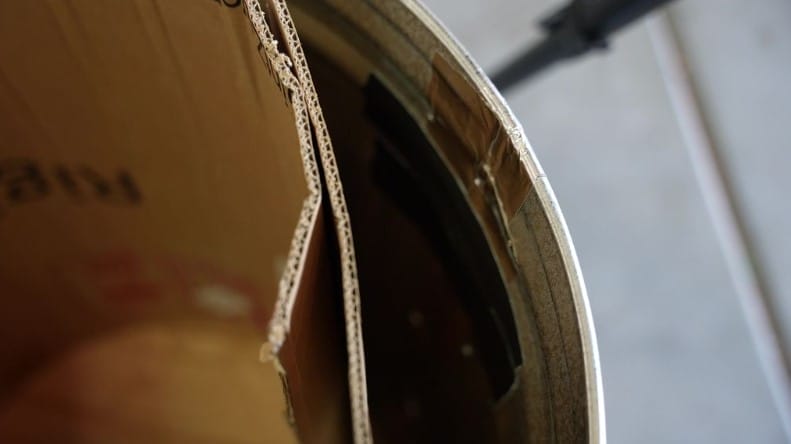
Now that we’ve sealed the seams and any vulnerable parts of our trashcan (and before we seal the lid on top of the trashcan) let’s add the insulation inside. What purpose does the insulation serve? We want to keep anything that we store inside from touching the metal trashcan, as any signal that affects the can be transmitted to the item inside touching it. We want to use an insulating material to keep the items from touching the trashcan.
There are a couple of options here. You can use something like a packing blanket and stuff it inside. Obviously, you’ll have less room inside to add items, but it’s an option nonetheless.
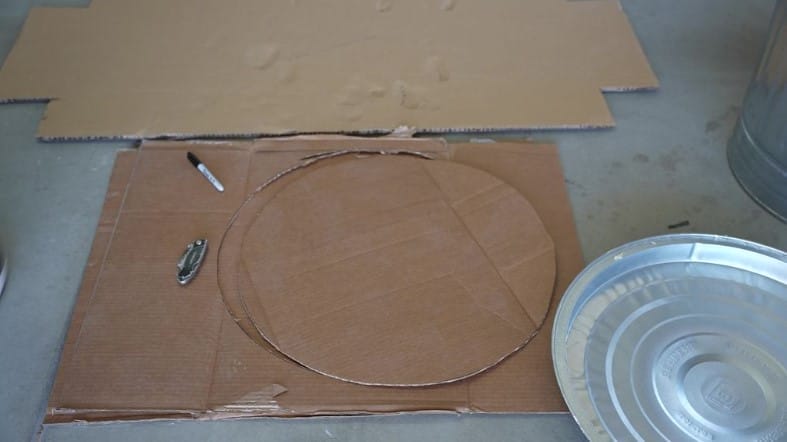
Next, and probably the more popular approach, is using cardboard. Here’s how. To begin with, we’ll add the insulation for the bottom of the can. To do this, set the trashcan on top of a cardboard box. Draw a circle around the bottom of the can with a sharpie, then cut it with a knife or scissor. Next, we’ll take this circular piece of cardboard and put it inside at the bottom of the trashcan. Now, we need to insulate the inside walls of the trashcan. Let’s begin by measuring the depth of our trashcan. We want a piece of cardboard that is this height. Next, mark your cardboard to the same height that we just measured on the inside of the trashcan, and finally cut the cardboard on the line that we just drew on the cardboard. Roll the cardboard you just cut to make it flexible to go inside the trashcan. If you have multiple pieces of cardboard, that’s ok as long as they’re all the same height. The cardboard does not have to be one continuous piece. If you use multiple pieces, just be sure to overlap them when placing them inside the trashcan and tape them so that they don’t move and possibly allow the contents inside to touch the side of the trashcan. Additionally, we want to put insulation on the inside the top of the lid to ensure nothing inside touches it, as it is also a conductive surface. To do this, let’s put the lid on top of the cardboard, draw a circle on the cardboard, and then cut it. Next, we’ll take some tape (you can use regular tape for this) and fold it back on itself so that the sticky side is pointing outward. We’ll create 6 to 8 pieces like this (or as many as you want) putting them on the cardboard and then finally pressing the newly taped cardboard to the inside of the trashcan lid. I also cut the edges off the cardboard as they would prevent me from being able to push the trashcan lid down tightly.
As you can see, we now have a fully insulated trashcan.
Adding Items Inside
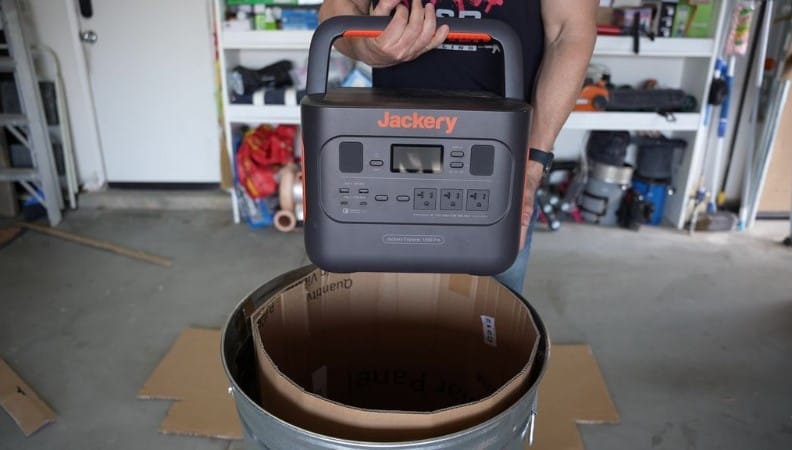
What items do we want to put inside? Well, anything that is electronic that you would want after a disaster. That could be something like a solar generator, a solar blanket, a HAM radio, emergency radio, or flashlights. Or maybe a backup phone, USB thumb drive, or laptop filled with valuable survival PDFs stored on it. You definitely will want to check out our recent video we did on the channel discussing free survival PDFs you can download right now from our website. Additionally, if you’re interested in picking up a solar generator or not sure what they are, you’ll want to check out our 2023 solar generator comparison buyer’s guide video. I’ll post a link in the description and comment section below to both of those videos.
What electronic items would you store inside this setup to protect them from an EMP? Let us know in the comment section below.
Storage
When it comes to storing our trashcan with the items inside, we want to add the can on top of a non-conductive material. So, is concrete a non-conductive material? Well, sort of it. Depending on potential variables beyond this video’s scope, it may or may not be a good insulator should an electromagnetic pulse hit. To play it safe, you can easily place the trashcan on top of a piece of cardboard, a piece of plywood, or a rubber mat.
TESTING OUR SETUP
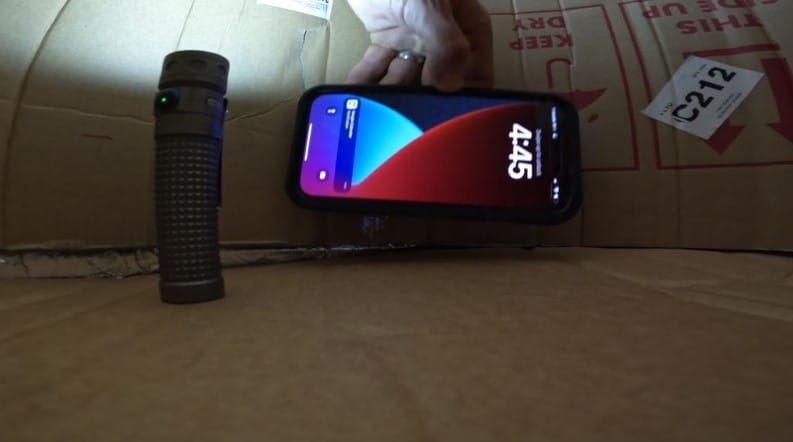
Let’s test our new setup with a radio and a phone. In a moment, I’ll show the results from an individual who used our same setup using equipment to simulate an EMP and we’ll see what he found. But for now, let’s run four different tests using items you probably already have. In the first test, we’ll add our device inside a regular trashcan that has not been modified in any way. In the second test, we’ll simply add the lid without any gasket or aluminum tape, In the third test we’ll run will be with only the alumnium gasket on top of the trashcan, and for the fourth test, we’ll seal the lid completely with aluminum tape.
OK, let’s start with the radio. I’ve got the volume turned up so that we can hear the music and we’ll see what happens when we add it inside the insulated trashcan.
In the first test, we’ll place the radio inside a regular trashcan that doesn’t have a seal on the lid.
As we can see, the music does not play.
Next, I’ll add the radio inside the trashcan that we added the insulation to and sealed the seams inside, but it has no seal on the lid.
As we can see, the music does not play.
Now I’ll add an aluminum foil gasket on the top of the trashcan, add the lid, and drop our radio inside the trashcan again.
As we can see, the music does not play.
Finally, we’ll test the setup with aluminum tape around the top of the lid. I’ll first drop the radio inside the trashcan while it’s on and then tape the lid shut.
As we can see, the music does not play.
So, with a radio signal, it appears the trashcan alone is good enough, but what about a cell phone?
OK, let’s repeat the same four tests but with a phone. As you can see, it’s turned on. Additionally, for each of these tests, we’ll also add a camera inside the trashcan to see if the phone does or does not receive the signal.
Next, I’ll add the phone inside the trashcan that we added the insulation to and sealed the seams inside, but it has no seal on the lid.
When calling from another phone, the phone receives the signal and rings.
Now I’ll add an aluminum foil gasket on the top of the trashcan, add the lid, and drop our phone inside the trashcan and call it. (Note to Miko: use the narration based on the result while filming.)
When calling from another phone, the phone receives the signal and rings.
Finally, I’ve added aluminum foil all the way around the lid completely sealing it off and adding our phone inside the trashcan.
When calling the phone from another phone, the phone does not receive the signal and goes to voicemail.
As I mentioned earlier in the video, Dr. Bradley of the EMPdoctor YouTube channel has the equipment necessary to simulate and test an EMP signal. He ran a test similar to what we had just performed but used his equipment, which can simulate an EMP. I’ll post a link to the video, but in the video, he found a significant drop in signal getting into the can if you sealed it all the way around with aluminum tape on the lid. When he didn’t seal the lid, a signal got in. There was a massive improvement when the lid was sealed. So what’s the takeaway here? Use aluminum tape to seal the lid…we have come to the same conclusion that he did in his trials. It’s the safest bet. It is a bit inconvenient that you have to cut it and reseal it each time, but if you want to seal the items inside, that’s your safest bet. An aluminum foil gasket didn’t really seem to make much of a difference.
Earlier, I also mentioned a 3rd option to seal the lid. In one of Dr Bradley’s other videos, he explains a product he sells that is a gasket that prevents an EMP signal from coming through. The obvious advantage of this is that you don’t have to tear the aluminum tape off the lid. I’ll post a link to that video below. While I can’t test for that scenario, he does provide some compelling data in his videos.
Also, one last thing worth noting that came up a lot in my research: Should you ground your Faraday cage? Again, Dr. Bradley addresses this question using his own equipment. His conclusion is that grounding provides very little to no value. Again, I’ll post a link to that video below if you want to check it out.
Also, be sure to check out our other video on building a Faraday cage with an ammo can, which I’ll post a link to here on the side of the screen. We provide a lot of detailed information in that video if you want to build a smaller setup as well.
As always, stay safe out there.
Additional links:
Faraday cage with ammo can: https://www.youtube.com/watch?v=2s8CpK6F7UM
Solar blanket: https://www.youtube.com/watch?v=oQjapUugVV0
Best solar generator on the market (2023): https://www.youtube.com/watch?v=rB8XR5Brn6I
5 things to know about EMPs: https://www.youtube.com/watch?v=gbQVFOPOHE4
DIY Prepper faraday cage: https://www.youtube.com/watch?v=8-dEDCsYTKM
Free PDF library: https://www.youtube.com/watch?v=DFqU–H2reg
EMP Doctor: seal the lid of the can: https://www.youtube.com/watch?v=uYWhTMmv6bs
EMP Doctor: gasket that will seal the lid of the can: https://www.youtube.com/watch?v=6Cbw-PaW3zI EMP Doctor: Should you ground your Faraday cage? https://www.youtube.com/watch?v=dC2BRC9FDDA

