 After a disaster, your cooking options are considerably diminished. You want food which is nutritious and easy to prepare. Recipes that only require heating water are the best, as they will conserve resources and reduce cooking time. In this video, I will show you how to make 4 different meals you can store in mason jars. Whether you need them after a disaster or for the emergency of not having the time to get to the store, you can simply grab them and prepare them in the time it takes to boil water. Always have a few of these pre-made mason jar meals rotating through your prepping supplies so you can eat them regularly or grab them if you’re bugging out.
TACO CHILI SOUP
This is a filling soup or stew that can be served in a cup or bowl. In this recipe, I use Texturized Vegetable Protein, which is made from soy. You can use freeze-dried ground beef crumbles if you have access to those, but they can be very expensive. The combination of carbohydrates and protein in this meal makes it excellent to keep you feeling full after a disaster or on any given Taco Tuesday. What I like about this meal, too, is that you don’t have to make a whole pot, and it can either be a soup or a chili. Try just hydrating one cup of dry mix in 1 cup of boiling water to start. Add more hot water to get your desired consistency. Because all the ingredients are pre-mixed, you can ration it out after a disaster.
Ingredients:
1 cup Texturized Vegetable Protein (TVP)
Vegetable Mix:
2 cans of chili beans
1 medium onion
2 diced bell peppers
1 can corn
1 can green chiles (optional)
3 tablespoons (or to taste) taco seasoning
1 teaspoon salt
1/3 cup tomato powder
2 corn tortillas (you can do many more than 2)
Oxygen absorbers or vacuum sealer
Mason jars
Preparation:
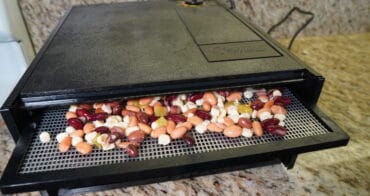
1. Mince onion and bell peppers. I microwave this for a minute and then strain it with a wire mesh strainer to reduce the moisture level since we will be dehydrating it. I dehydrate these separately from the beans, chiles, and corn and combine them after drying since the drying times will be different. Place this strained vegetable mix on paper towels and place in your dehydrator.
2. Combine drained corn, beans, and chiles. Lightly rinse and mix. You will need to dehydrate this as well, so I recommend large batches and preparing over several days.
3. Chop tortillas into 1/4 inch strips that are 2″ long. I dehydrate these on a simple wire pizza screen on the lowest setting of my oven.
Dehydrating:
4. Dehydrate all ingredients until thoroughly dry.
Packing:
5. Mix 1 cup TVP (You could use freeze-dried ground beef here if you have soy allergies, but it’s more costly to do this), vegetable mix, taco seasoning, salt, and tomato powder in a bowl.
6. Mix ingredients well, then place in the jar to within an inch of the rim.
7. Place tortilla strips in a baggie and place them on top.
8. Place an oxygen absorber in the jar and seal it, or use a vacuum sealer.
Rehydrating and Serving:
If making the entire batch. Fill a large pot with 8 cups of water and bring to a boil. Add dry ingredients except for tortilla strips. Extinguish heat and allow to cook and hydrate for 20 minutes, stirring slightly after 10 minutes, until all ingredients are hydrated and tender. Serve with sprinkled tortilla strips on the top.
Here I make just a cup’s worth, which will require a cup to a cup and a half of boiling water to rehydrate in about 5 minutes. This chili tastes like vegan chili in many ways, but it’s a great base to start with. You can leave out the added salt and use a beef bouillon cube for a meatier taste, or spice up considerably more to make it to your preference.
ASPARAGUS RICE SALAD WITH HOLLANDAISE SAUCE DRESSING
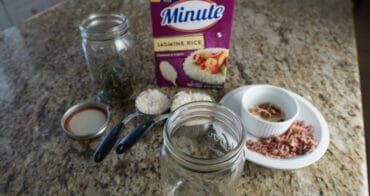 This filling but refreshing rice dish isn’t really a salad, but I call it that because I think it tastes even better when chilled and served cold. You can eat it warm or cold. It’s not your typical rice salad, and it’s not your typical asparagus with hollandaise sauce. Here, I am specifically using Minute Rice. If you use regular rice, you will need to add more water, boil it for longer, and let it sit for longer, and your finished product will be pastier.
Ingredients:
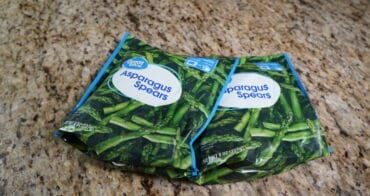
2 bunches of Asparagus spears, either fresh or frozen.
1 Hollaindaise sauce packets. Make sure to select a brand that only requires water to make. The flavor will be milder but you may not have access to butter or other ingredients after a disaster.
1 1/2 cups Minute Rice
2 slices lemon (⅛” rounds that are quartered)
1 small red onion
1 tablespoon Italian herb mix
Oxygen absorbers or vacuum sealer
Mason jars
 Preparation:
1. If using whole spears: Remove the tough end of the asparagus spear (usually the bottom 2 inches). Cut asparagus into one-inch pieces. You can simply start with a bag of frozen-cut asparagus and save processing time. In their freeze-dried form, they will look indistinguishable from their fresh form when cooked.
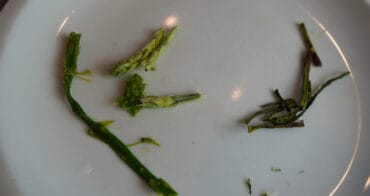 Dehydrated, however, they will get significantly smaller and will need more time to rehydrate. The flavors will intensify in the dehydrated form, and you can get multiple bunches of spears in your mix if you want a high asparagus content and flavor profile.
Blanching and Shocking:
2. Blanch in boiling water for 6 minutes. This will fix the color and lock in flavors.
3. Remove pieces to an ice bath to halt the cooking process.
4. When pieces have cooled, place them in a strainer to allow them to drain fully.
Dehydrating:
5. Arrange asparagus pieces on dehydrator trays.
6. Finely chop one small red onion and dehydrate on screens, paper towels, or parchment paper.
7. Cut 2 ⅛ inch thin slices of the lemon, quarter these rounds, then dehydrate.
8. Dehydrate for 14 hours or until thoroughly dehydrated.
Packing:
9. Place 1 Hollandaise sauce packet in the jar
10. Pack dehydrated asparagus in jars.
11. Place red onion, 8 lemon pieces, then Italian herbs, then rice on top.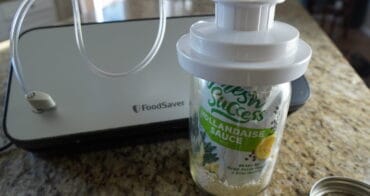 12. Place an oxygen absorber in a jar and seal it or use a vacuum sealer.
Rehydrating and Serving:
To make this, mix the Hollandaise packet with 3 cups water and bring to a boil. Empty the remaining contents of the jar into boiling water and continue on high heat for 1 minute until well mixed. Extinguish the heat source and cover the pot. Allow 10 minutes for ingredients to fully hydrate, then stir and return the lid for an additional 5 minutes. Serve warm or cold.
BROCCOLI AND CHEESE
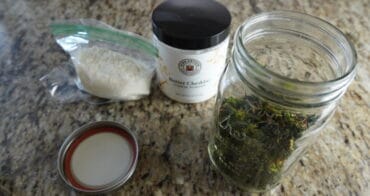 Because we are using dehydrated instead of freeze-dried broccoli, the broccoli will have slightly more intense flavors when rehydrated. Consider cracked black pepper and bits of bacon to accentuate the intensified flavors as additions, if those are available.
Ingredients:
2 large heads of fresh broccoli
1 cup cheese powder (choose a brand that only requires water)
Oxygen absorbers or vacuum sealer
Mason jars
Preparation:
1. Wash and thoroughly dry the broccoli heads. Cut the broccoli into small florets and slice the stem. Again, if you want to make this process easier, you can simply use a bag of frozen broccoli.
Blanching and Shocking:
2. Bring a large pot of water to a boil.
3. Add the broccoli florets to the boiling water and blanch for about 3-4 minutes. The broccoli should be slightly tender but still crisp.
4. Immediately transfer the blanched broccoli to an ice bath to halt the cooking process. Leave it in the ice bath for a few minutes until it’s completely cooled.
5. Drain the broccoli thoroughly in a strainer.
Dehydrating:
6. Arrange the blanched and drained broccoli florets on dehydrator trays in a single layer. Make sure there’s some space between the florets for proper air circulation.
7. Dehydrate the broccoli for approximately 8-12 hours or until it becomes crispy and has no moisture left. Here, too, a freeze-dried version will give you a better-looking final product, but the taste is very similar, with the dehydrated version may be slightly more intense.
Packing for Storage:
8. Once the broccoli is fully dehydrated and cooled, pack it into mason jars or vacuum-sealable bags. 9. Put 1 cup of cheese powder in a ziplock baggie and place on top.
10. Add an oxygen absorber to each jar or use a vacuum sealer. Seal the jars.
Rehydrating and Serving:
To rehydrate the broccoli, simply pour boiling hot water over the dehydrated broccoli in a bowl and let it sit for approximately 10 minutes with the lid on until it’s plump and tender. Strain the rehydrated broccoli of excessive water. In a separate pan, prepare the cheese sauce by adding 1 cup water and gently warming and stirring the mix. Add more water to achieve the desired consistency, but don’t make your sauce runny. Combine the rehydrated broccoli and the cheese sauce in a pan, heat it over low heat, and stir until the sauce is well incorporated, and the broccoli is heated and moist through.
MAC & CHEESE Ingredients:
3 cups elbow macaroni (this will be 6 cups when cooked)
2 cups powdered cheese
1 teaspoon black pepper
Packing for Storage:
1. Place macaroni in the jar first.
2. Put powdered cheese in one ziplock baggie and pepper in another and place in the jar.
3. Add an oxygen absorber to each jar or use a vacuum sealer. Seal the jars.
Cooking and Serving:
Cook macaroni in boiling water until tender. Strain. In a separate pan, combine powdered ingredients with 1 cup water. Gently warm. Stir to combine all ingredients, then add to macaroni and stir until all noodles are covered.
This one is so simple I hesitated to include it, but the reason I like this is because I control the ingredients. So many of us have boxes of this stuff in our emergency pantries because it keeps for so long and is so easy to make, but have you ever read the ingredients label? I’m not sure you would want to regularly eat that much sodium, ferrous sulfate, thiamin mononitrate, sodium triphosphate, and sodium phosphate. If you buy a healthy cheese powder in bulk, you can make a much healthier option for yourself.
Plus, this stuff is great sprinkled on popcorn.
///
There you have it…4 healthy meals for after a disaster that only require boiling water to make. Whether you’re grabbing them and bugging out, or you just simply can’t get to the store and need something for a Tuesday night, these meals in a jar will give you healthy options to grab and fix in minutes. Check out our other content, “4 Stovetop Breads You Can Make With Forever Foods”. These are a perfect and easy complement to these meals in a jar.
As always, stay safe out there.


I have been prepping a very long time. I first lay out my recipe, decide what I can can in a jar and decide what I need to dehydrate. I can any meat as rehydrating is an ordeal although it can be done. Fruits and vegetables dehydrate really well except for some berries. Good luck.