Tag: Prepping Basics

  • Marti’s Corner – 47

    Marti’s Corner – 47

    Marti's Corner at City PreppingHi Everyone,

    NOTES:

    *  I found this “Scout Survival Kit”  It includes suggestions for first aid, shelter, water, fire, food, knife, signals, everyday carry items, compact survival kit, and optional items.  Mountainman’s Mantra: Scout Survival Kit Considerations

    *  Mountain man also has a blog about making fires:  Mountainman’s Mantra: A Fire Kit

    And making a tarp shelter:  Mountainman’s Mantra: Tarp Survival Shelter Weekend

    *  THIS has nothing to do with Emergency Response, but it’s SO cool I just had to share.  This website has thousands of radio stations.  Each green dot is a station.  Just hover over the dot and you will be able to hear stations from all over the world!  https://radio.garden/ 

    LONG TERM FOCUS: Pet Food

    Don't Forget Your Pets in a DisasterTime to think about pets this month.  I DO have a pet.  I do NOT have a year’s supply of food for my pet.  BUT, I “DO” have some storage.  I have 2-3 extra bags of food at any one time, and I just rotate them.  I think I will try to store a few more, maybe take our cat’s food up to 3 months’ worth or so.

    SHORT TERM FOCUS: Butter

    When my kids were young, I always bought margarine.  I have since switched over to butter, and have come to think it’s actually better for you.  I try to keep enough on hand so that if the stores were somehow closed for 3 months or so (how could THAT ever happen?) I wouldn’t run out of butter.  I date the outside of the packages and just rotate them.  I try to get butter for about $2.50 a pound.  If it is a lot less, I stock up.  But if it goes up to $3, then I might wait and use my supply, hoping the price will fall.  I did “can” butter once.  You do it in the oven where you can bring the temperature up to over 250 (the temperature at which botulism spores die).  But, as with any oil, it will go rancid after some time.  The advantage of canning it is that it can sit on the shelf.

    Funny Story:  We invited our neighbors to stay with us 3-4 days as they were cleaning and selling their house.  We have a second refrigerator in the garage (where we keep the butter) and told them they could put whatever they needed into that fridge.  He told me the next day he had NEVER seen anyone have THAT much butter – EVER!!!  Hahahaha.

    72-HOUR FOCUS: Trash Bags

    When we went camping last summer, I was surprised at how many bags we used.  We used one for trash, of course, and one for dirty clothes.  I think we used one for the BBQ grill that was tooTrash Bags dirty to just put in the car.  You could even use them as raincoats.  I can’t remember what else, but I took A LOT with us and was glad I did.  You can put 1-2 in your 72-hour kit, or just put several in the car.

    FOOD STORAGE RECIPES

    Cheesy Sweet Corn Spoonbread

    This recipe was on the back of the Krusteaz box of Honey Cornbread.  I’ve been experimenting with different recipes and I’ve not been happy with any of them yet.  I think the Krusteaz box mix and the Marie Callender mix are SOOO good.  But I can’t duplicate it yet.

    Anyway, this recipe sounds like it would be really good with chili or soup.

    1 package Krusteaz Honey Cornbread mix
    1 can cream-style corn
    1/2 c. melted butter
    1 c. sour cream
    1 1/2 c. shredded cheddar cheese

        Mix all ingredients.  Pour into lightly greased 9X9 baking dis.  Bake 350˚ 48-52 minutes.  Top with additional cheddar cheese if desired.  Let sit 5 minutes before serving.

    If you are using freeze-dried cheese, just spritz it with water to rehydrate before using.

    Ham Hocks and Beans

    When my babies were young, we had a period of time when we needed assistance from the church with groceries.  Although we got to choose several items we received, the meat was given out by weight.  We were given a certain number of pounds of meat, and couldn’t always choose what we got.  One time, I got ham hocks.  Now, I’m a big city girl and had never even heard of them – much less know what to do with them.  But my neighbor, who was from Georgia, came to my rescue.  I enjoyed them so much, that I made ham hocks and beans just last week and used leftover ham from Thanksgiving instead of the ham hocks-  same idea.

    Ham hocks usually come frozen (at least at Winco) and are VERY inexpensive.

    I used a 1 pound bag of white beans.  The night before I rinsed and put in a large pot with a lot of water.  Boil for 4-5 minutes.  Then turn it off, cover, and let sit overnight.

    If you forget to do this at night, you can do it in the morning and let the beans sit for 2-3 hours (or until you get ready to continue)

    Drain the old water and start with clean water.  Put the ham hocks right in the water with the beans and start cooking.  I add salt here (do NOT add on the first batch of water).  Let the beans simmer for 1 1/2 – 2 hours.  

    Hush Puppies

    At some point toward the end, scoop out the ham hocks and let them cool a bit so you can get the meat off of them.  Then you can add carrots, celery, corn, whatever vegetables you want.  (I usually just stick with carrots and celery).  This year I used my dehydrated carrots and celery.  No chopping.  Taste it and add salt, pepper, and Accent (which really brings out the flavor).  Accent got a bad rap several years ago, and all the hype was based on a rumor.  Add back in the meat, and you have a hearty, yummy meal.

    I usually make rolls or cornbread to go with it.  My Georgian neighbor makes hush puppies.  YUM!!!

    I haven’t talked to her in YEARS, but I think I’ll try to contact her and get this recipe again.

    Pumpkin Dessert Cake

    I got this recipe when I was working in the Labor and Delivery Section of Provo Hospital as a secretary.  We had a potluck during the holidays, and someone brought this.  My family has enjoyed it ever since.

    1 package yellow cake mix (reserve 1 cup for topping)
    1/2 c. melted butter
    1 egg
         Mix and press into the bottom of a greased 13X9 baking dish.
    2 c. solid-pack pumpkin
    2 1/2 tsp pumpkin pie spice
    dash salt
    2 eggs
    1 tsp vanilla
    1/2 c. brown sugar
    1/2 c. sugar
    1/3 c. canned milk
    1/3 c. regular milk
         Mix and pour on top of the crust.

    Topping:
    1 c. reserved cake mix
    1/4 c. cold butter
    1 tsp cinnamon
         Cut in the butter and mix till crumbly
    Sprinkle over the filling
    Bake 350˚ for 1 hour 5 minutes.

    Check it after 45 minutes and watch for that.  You want the top to be set but not burned!  Serve warm with whipped cream.

    Play Dough

    Have you ever made your own play dough?  Oh, it’s SOOO much better than store-bought.  And easy to do.  I used to give this as birthday gifts when my kids were young.  AND every Christmas atPlay Dough recipe least one of the kids got a tin full of play dough.

    2 1/2 c. flour
    1/2 c. salt
         Mix salt and flour together

    In a pan:
    1 3/4 c. boiling water
    1 TB alum (I’ve looked for this in the bulk section at Winco and it’s not there.  Probably over by the spices in the regular section of the store)
    2 TB oil.  

    Boil the water mix and dump in the flour/salt.  Mix fast because it thickens almost instantly.  It will be soft and pliable.  Divide into balls, make an indentation and add a few drops of food coloring.  Then knead to mix.  Do it on tin foil or parchment paper so you don’t get the coloring on the counter.  

    Store in baggies.
    A note about alum:  It’s used to “clear” water.  If you have a pitcher of dirty water, and you add alum, it will cause all the particles to “clump” together.  It’s amazing.  Then you can strain off the liquid.  You still have to boil or filter that water, but it gets rid of any dirt or debris. 


    Whew, Christmas!  For a time of peace, it can sure be hectic! 

    Marti

  • Marti’s Corner – 46

    Marti’s Corner – 46

    Marti's Corner at City PreppingHi Everyone,

    NOTES:

    *  Have you considered buying or making a solar oven?  Check out this guy’s 13-minute video about the different kinds of solar cookers.  Review of Best Solar Cookers and Ovens – YouTube.

    Solar OvenKris also did a more detailed review of the All American Sun Oven Solar Cooker

    *  Speaking of sun ovens, my daughter’s electricity was turned off on THANKSGIVING day and she was left wondering how she was going to cook her turkey.  I suggested a slow and low BBQ, but they were out of propane.  Luckily they found some and the turkey was a success.  The MORAL of this story – BE PREPARED.  Don’t be caught.  Fill your propane tanks THIS week.  If you don’t have a BBQ, think about how you would cook without electricity and make plans to fix this situation.

    *  I don’t usually include recipes in this section of the blog, but this is not really a recipe from food storage.  Mostly it’s a recipe to use my leftover mashed potatoes that I made WAY too much of for Thanksgiving.

    5 slices bacon.  Cook, set aside, keep the drippings.  

    Mix:  4 c. cold mashed potatoes, 2 well-beaten eggs, 1/2 tsp onion powder, 1/2 tsp salt, 1/2 tsp pepper.  Stir in the crumbled bacon and 1/2 c. shredded cheddar cheese.  

    Form 8 patties and fry in the bacon drippings until crisp on each side (about 4 min per side)

    LONG TERM FOCUS: Powdered Sugar

    When my kids were little, I put powdered sugar on their french toast.  Now, it’s a little TOO sweet for me.  But I use powdered sugar to frost cookies, and for Texas sheet cake, and a few otherPowderedSugar things.  A professional cook told me once that he adds a small amount of powdered sugar to his Krusteaz pancake mix.  Sneaky.  But it IS really good!  It’s on sale this time of year (only about $.70 a pound at Winco).  Just stock up.  Four or five 2-pound bags will probably last you at least 6 months if not the whole year.

    SHORT TERM FOCUS: Bandaids & Antibiotic Cream

    I decided to dehydrate one of those really BIG bags of carrots (20-25 pounds??? for $6)  I peeled, then sliced on the mandolin slicer.   Mine is pretty basic.  But I lost the protective slicer part that protects your fingers.  And, of course, I thought I would just be extra careful.  But I cut a big slice in my right-hand ring finger.  That was 5 days ago, and even though I’ve tried to keep it covered with Neosporin and a bandaid, it still hurts a little and bleeds all over again if I bump it.  At least it’s not infected.  Which is my point exactly.  If we are on our own for any length of time, we will need to be cautious about infections.  Just get some antibiotic cream and a box of bandaids next time you go shopping.  Then put some of those bandaids in your 72-hour kit (and maybe another tube of cream).

    MISCELLANEOUS FOCUS: Scotch Broth

    Scotch BrothI’ve seen two recipes in the past day or so that are very similar.  They are for a “soup” called Scotch Broth. It is a bean and rice stew.  The ingredients are easy to buy and store.  The LARGE amounts will make enough to feed 4 people for 6 months (one meal a day).  The SMALL amount will fill 1-quart jar.  It will make one meal for a family.  Beans and rice make a full protein, so it is very nutritious.  The thing that caught my eye was that I could put them in 1 quart Mylar bags and give them as gifts.  For my kids, I can make up several Mylar Bags and know they will have food in an emergency.  

    LARGE AMOUNTS:

    25 lb. barley
    25 lb. lentils
    25 lb. kidney beans
    6 lb. green split peas
    6 lb. garbanzo beans
         Mix together.
    100 lb. rice – Store separately.

    To make, boil 6-7 cups water and add the beans.  Simmer till ready (about 1 1/2 hours).  Then add 1 c. rice and continue to cook another 20 minutes.  OR cook rice separately in 2 c. water, and serve the beans over the rice.  

    SMALL AMOUNTS:

    1/3 c. kidney beans
    1 c. barley
    1/2 c. lentils
    3 TB. green split peas
         Mix and put in a 1-quart jar.
    1 tsp bouillon
    1/2 tsp salt
    1/2 TB onions
    1/2 TB dehydrated celery
    1/2 tsp tarragon
    1/2 tsp pepper
    1 tsp garlic powder
          Mix and put in a small snack baggie in the jar.
    1- 1 1/2 c. rice – Put in a small sandwich bag and add to the jar.
          Vacuum seal the jar or add 1 oxygen absorber.
          A 1 quart Mylar bag will work just as well.

    The nice thing about this soup is that you can add fresh or dehydrated vegetables, or meat to make it more hearty.  

    FOOD STORAGE RECIPES

    Thank you to Megan Smith for all the wonderful information on her website.  My Food Storage Cookbook – Tried and Tested Food Storage Recipes.

    *  Here is a downloadable collection of Food Storage Recipes 

    On her homepage, there is a video for a “Wonder Oven”.  It’s a thermal “pillow” kind of thing that will allow your food to continue cooking even though it is not using energy.  Thermal Cookers are the same idea.  Kris demos this cooker in his video 12 Ways to Cook After a Disaster, and there is a link to the WonderBag there if you’re interested. 

    Homemade Clam Chowder Quick Pantry Clam Chowder – My Food Storage Cookbook

    I can’t wait to explore more recipes, but this one for Clam Chowder looks good.  I’ve never made clam chowder from scratch but might try this one.

    *  Make your own Hamburger Helper using food storage.  The advantage to this is you control the ingredients.  There is nothing you can’t pronounce.  No preservatives or chemicals.  Homemade Hamburger Helper: 9 varieties – My Food Storage Cookbook

    *  Make a fancy dinner, worthy of company.  

    Chicken Cacciatore with Herbed Polenta – My Food Storage Cookbook

    Seriously, scroll down and check out the pictures.  It looks delicious!


    Look for something to store this week.

    Marti

  • Marti’s Corner – 45

    Marti’s Corner – 45

    Marti's Corner at City PreppingHi Everyone,

    NOTES:

    *  Beans – Even though this is not the month for beans, I wanted to pass on this site about cooking beans.  He did several experiments with storing beans and then cooking them.  He also talks about sprouting and growing beans.  IF you have beans in your storage, this article is full of good information.  Beans: An Important Survival Food for Hard Times | Robert Wayne Atkins, P.E.

    *  Food Storage Recipes.  I sent this out a while ago and there were several people who were not able to open the file because of formatting.  I have re-typed all the recipes and have included them below in a pdf format.

    LONG TERM FOCUS: Brown Sugar

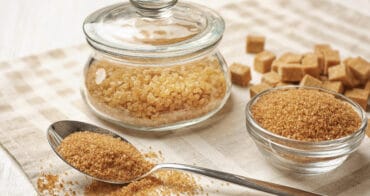
    Brown SugarI tried storing brown sugar in a #10 can.  It turned black everywhere it had touched metal.  Don’t do that.  Besides, we can’t do our own canning in those #10 cans anymore anyway.  My next effort was vacuum sealing.  I was worried that the sugar would clump, but I’ve had a lot of success doing this.  I snip a small cut in the bag and then vacuum seal so that the air is removed from inside the bag as well.  It stores like a brick clump, but when it is opened, it is soft and fluffs right up.  If your sugar DOES get hard, I use a piece of bread to soften it again.  The bread draws the moisture out of the sugar.  Works like a charm.

    But you CAN make your own brown sugar.  1 c. white sugar + 1 TB molasses.  Mix a little and voila!!

    DIY BROWN SUGAR | Make Your Own Pantry Staples = better than storebought! – YouTube

    Not sure which is more convenient:  to store the brown sugar or store the molasses.  

    Other than making cookies, I use brown sugar on my oatmeal, for marinades for chicken, for BBQ sauce, and stuff like that.  I find it’s easy to store 6 or 7 2-lb. bags stacked up on the shelf, and then rotate them.

     This is a good time to buy them.  Most stores have them on sale for about $.75/pound.

    SHORT TERM FOCUS: Chocolate Chips

    I have friends who never eat chocolate.  It’s hard to believe there ARE people like that!  My own son wanted chocolate chip cookies without the chips, so I had to set aside cookie dough just for hisChocolate Chips chocolate-less cookies.  

    So, can you store chocolate chips?  The short answer is yes, but not long-term.  Do Chocolate Chips Go Bad? – Storing Chocolate Chips – Foods Guy

    I have mine in the refrigerator.  If you store chocolate in the freezer, it will sometimes change color.  According to the link above, it is still good and will not lose flavor, and will dissolve back when you melt it.  BUT, what if you don’t WANT to melt it and you want to use it in cookies?  Yeah, that’s why I don’t do that.  I think of chocolate chips as a decadent treat for when I’m tired of eating beans and rice.

    I also store peanut butter chips.

    All this yummy baking stuff is on sale for the holidays, so pick up some extra bags.  You can get chocolate chips in the bulk section at Winco, and I think they are a LITTLE cheaper, but not much.

    MISCELLANEOUS FOCUS: Sanitation

    DIY Emergency Toilet

    What if you lose the ability to flush your toilets?  

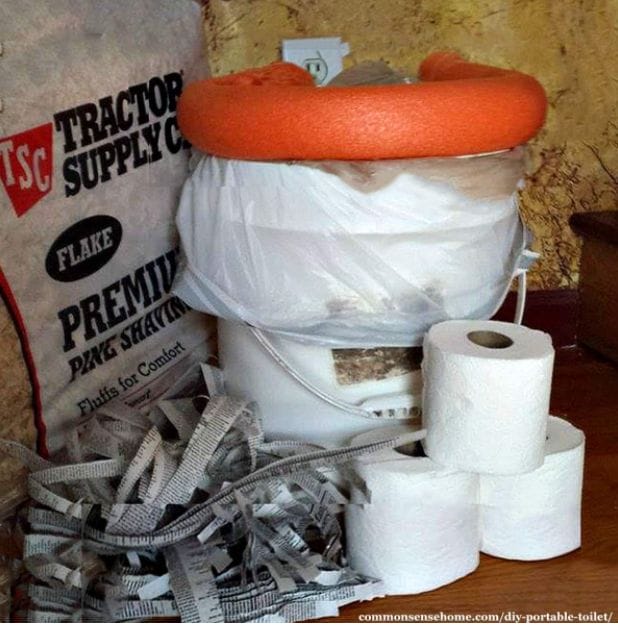
    As explained in an email a few weeks ago, I’m all for the “trench” method of latrine building.  BUT, this might not be practical – depending on the situation.  Here are some alternatives to outdoor latrines:  DIY Portable Toilet (Emergency Use Bucket Toilet).

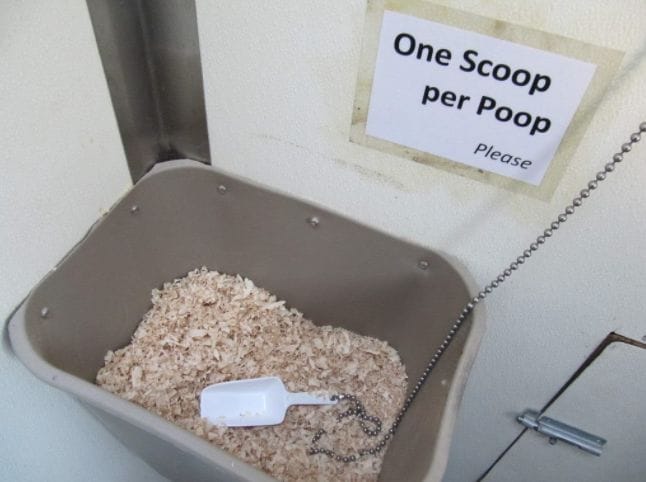
    In her case, they actually had to do this when the plumbing in their house went out.  She explains how to build a portable toilet, and tips to handle the smell.  Here is another article:  3 Ways to Make a Camping Toilet – wikiHow.  Both sites use empty buckets and plastic bags.  They also use sawdust,Potet 2 pine chips, peat moss, dried used coffee grounds or kitty litter to absorb the waste.  Comments below the article also suggest sand, dirt, newspapers.  Also garbage bags – lots of them!!!  

    Five-gallon buckets are suggested.

    You CAN use pool noodles, sliced lengthwise for a comfortable seat, OR you can just buy one.  Emergency Zone Brand Honey Bucket Emergency Toilet Seat.

    I think they even have them at Walmart.

    Just like everything else, this is easy to set aside because you don’t need it right now.  But when you do need it, suddenly it will be THE most important thing you WILL need.  (Remember the toilet paper hoarding in 2020???)  Just pick up a bucket at Lowes, get some bags at the store, and put it together later.

    FOOD STORAGE RECIPES

    Chili

    I made chili for dinner last night.  It was nothing special, believe me.  BUT, I used dried beans (I don’t do that often).  I had to be gone all day, so I boiled them for about 3-4 minutes in the morning, turned off the heat, and let them sit until I got home in the afternoon.  I drained the water, and started with freshwater, and boiled them for about an hour, to really soften the beans.  You are NOT supposed to add salt until they are ready.  When they were done, I drained MOST of the water, added tomato soup, rehydrated chopped onions, a jar of canned hamburger, some chili powder, salt, and diced tomatoes.  Everything was from my food storage.  Coupled with Marie Callender’s cornbread (no time to make it from scratch!) and it was pretty good!

    Beef Ragu With Garbanzo Beans

    I shared this about 1 1/2 years ago, but I just made it for dinner the other night and really like it.  I have everything on my shelf (including the hamburger), so it’s an opportunity to use my storage and rotate my food.

    2 large carrots – chopped finely (I used carrots that I dehydrated last summer)
    2 large celery stalk – chopped finely (yes, dehydrated celery that I did when it was on sale)
    1 onion (yes, dehydrated onion, about 1 heaping TB)
         From this point on, I halved the recipe because there are only two of us.
    2 lbs ground beef, browned and drained (I used 1 jar, which is only 1 pound)
    2 14-oz cans diced tomatoes, undrained
    2 14-oz cans beef broth (I use Knorr’s powdered beef bouillon and mix 1 tsp per cup of water)
    1 15-oz can garbanzo beans, rinsed and drained
    3 TB tomato paste (I usually save the rest of the can of tomato paste, then throw it away when it grows mold.  LOL)
    2 tsp sugar
    1 1/2 tsp dried Italian seasoning
    1 tsp crushed red pepper (We are not spicy people over here, so IF I use this, I just add a small pinch or so)
    Put it all in the crock pot.

    Cook for 4-6 hours on high.

    Add 2 lbs (1 pound for me) of Rigatoni, already cooked and drained.  The last time I made this, I added more water and let the pasta cook IN the crockpot.  I didn’t have time to monitor the pasta separately.  

    Serve with Parm cheese (I ALWAYS forget to do this, and it works anyway)

    Chantel’s Peanut Butter Bars

    Another cookie-sheet bar cookie.  SO GOOD!

    1 c. butter
    1 c. peanut butter
    1 c. white sugar
    1 c. brown sugar
    2 eggs
    1 tsp vanilla
    1 tsp baking soda
    1/2 tsp salt
    2 c. flour
    2 c. oats
    1 package of chocolate chips or peanut butter chips

    (Her kids prefer the pb chips.  I have not tried the chocolate, because I like the pb chips too)

    Press onto a greased cookie sheet.  Bake 350˚ for 15 minutes.

    When I made this last time, I added 1/4 c. flour because it felt “too” sticky.

    Julie’s Cornbread

    (Just so you know I “could” have made it by scratch if I’d really wanted.  LOL)

    2 sticks butter melted
    1 1/3 c. sugar
    4 eggs – Add and blend with a wooden spoon
    2 c. buttermilk
    1 tsp baking soda
    1 tsp salt

         Mix.  Then add

    2 c. cornmeal and
    2 c. flour

         Barely blend, and pour into a greased 13 X 9.  Bake 375˚ for 30-40 minutes until the toothpick comes out clean.


    Try cooking at least one thing this week from your food storage.  If you can’t, then you know what you have to do!!!

    Marti

  • Marti’s Corner – 44

    Marti’s Corner – 44

    Marti's Corner at City PreppingHi Everyone,

    NOTES:

    *  My husband said it was time to inventory what was under the beds.  Ugh.  I’ve pulled out everything under the bed in the empty bedroom, now I just have to decide what to put back under there.  MY bed is next.  The mental image of me on the floor, trying to push out all the boxes, makes even ME cringe.

    *  My garden on the north side of my house is winding down.  It is getting limited sun now, and I’ve pulled out all the squash.  I’m still holding out for the last tomatoes to ripen.  It’s like watching a bad TV show, but not changing the channel because you keep hoping it will get better.  That’s me and my garden.  But when I finally pull out those struggling plants and do some cleaning up, I find a sense of peace about it and how good the bare garden looks.

    *  Meanwhile, I have plants that are in the sun and doing well.  The gardening lady I watch (An Organic Farm, Paonia CO – The Living Farm) is always reminding viewers to look at the back of the leaves.  Here is what I found today.

    Back of Leaf

    Those are aphids.  I spray with BT twice a week, and those little buggers STILL survive!!!  You really have to stay on top of this.  This was the worst leaf, and I just cut it off and threw it in the trash.  I sprayed the rest.

    *  I’m still planting in the garden (one of the advantages of living in the mild climate of So. Cal.)  When I took out the potatoes, I prepared the bed for carrots.  Once it cools off a little more, I’m going to try some peas.  They do NOT like it really hot, so I’m going to wait a while still.

    *  The Kellogg’s gardening guide I sent last week recommended cutting back all the grape and fruit vines.  I worked yesterday and today to really prune the grapes and blackberries.  Looks so much tidier now.  

    LONG TERM FOCUS: Sugar

    Sugar lasts a LONG time.  If you have #10 cans of sugar, just keep them in a closet and they will last for years!  After the canneries shut down, I started vacuum-sealing bags of sugar right from the store.  Now, the current advice is that you should NOT use oxygen absorbers when you store sugar, whether in plastic buckets or mylar bags.  But, doesn’t vacuum sealing do the same thing?  THIS was the question I asked myself.  So last week I pulled out a 4 lb. bag of sugar that I vacuum-sealed in 2015.  Six years ago.  I opened the sealing bag, and sure enough, the sugar was hard as a rock.  It sat on my counter for a few days as I thought about the best way to “unstick” the sugar.  I finally poured it into a big bowl.  Only PART of the sugar was clumpy.  The rest poured easily.  

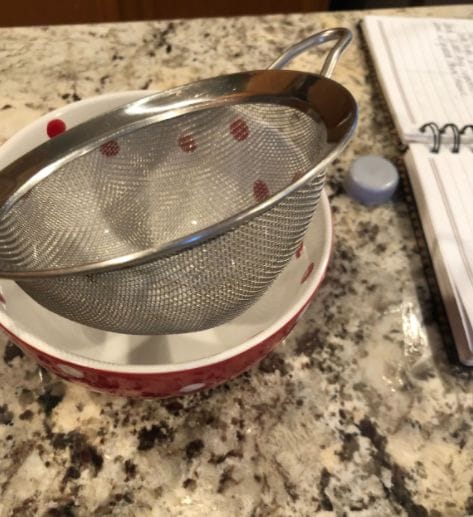
    I used a strainer, about the size of a soup bowl, and just sifted the sugar.  It took all of 5 minutes to do the whole bag.  Sifter for Sugar

    Results:  I’m going to continue to vacuum seal sugar to kill the bugs and keep ants away.

    When I’m shopping for sugar, I try to look for prices about $.50/pound.  That would be $2 for a 4-pound bag.  Even Winco is not this cheap.  BUT, in their bulk section, it IS that cheap.  

    When you are watching for prices to drop on baking items, check the sugar.  If it gets down to $2, buy lots of them.  Enough to last the whole year.

    THAT’S how you save money.  Buy low and preserve it.

    Comfort recipes using sugar are below.

    SHORT TERM FOCUS: Cake & Brownie Mixes

    I NEVER use cake mixes.  Well…I hardly make cakes anymore, but when I do, I have a few recipes that I really like, so I use them.

    I also have some good homemade brownie recipes, but I find a brownie mix works well for me, so I do store those.  Plus, cakes have leavenings in them, and those expire.  Brownies don’t, so they last longer.

    If this is something you use often, pick up a couple when they are $.99 each and stick them away.  They will be good for at least a year.

    72-HOUR FOCUS: Matches

    ZMatchesThere are several ways to “waterproof” matches.  One way is to dip them in wax.  I did this once.  I wrapped about 10 matches with dental floss.  After tying a knot, I held one end of the floss and dipped the matches in melted wax.  I let them dry on some wax paper and dipped them several times.  BUT, what I found was that if I put more than one into a baggie, and into my kit, when it got hot in the car, the wax tended to melt together and I got this BIG match waxy thing.  LOL

    You can make the wax matches and individually wrap them in plastic wrap, or tin foil.

    You can get a BIC lighter, just remember that the fluid will go bad after a year or so.

    What I do now, is get a big box of matches, and vacuum seal them into small bags that fit neatly in the backpack.  You just have to make sure you have a pocket knife to open that bag when you need the matches. 

    You can get little square “snack baggies” and put matches in there.  I’m just leery about how “waterproof” those bags are.

    Frankly, if we are in a real disaster scenario, matches will be truly valuable.  Get lots – and then get more.

    MISCELLANEOUS FOCUS: Small Folding Shove

    These are really handy.  Extremus Trench Folding Shovel, Carbon Steel Handle And Blade, Folds to 8”, Storage Bag.

    Folding Shovel Zombie Killer

    If you keep it in your car, you can use it if you get stuck, or if you have to bury a body.  Hahaha.

    Actually, if you need to make an emergency latrine, in the wilderness, or even in your backyard, you’ll have a tool.  I don’t keep mine in my backpack, but it is in the car with the spare tire.

    My son has a story about being stuck on a mountain dirt road in early spring, patchy snow on the ground, above Seattle.  His tires were spinning and he was stuck.  No traffic anywhere near.  He gets out of the car and starts looking for rocks, or sticks, or something to wedge under the tires for traction.  Suddenly, a man appears walking down the road.  He is carrying a shovel.  He says, “It looks like you could use this.  Here, just keep it when you are done.  I have others.”  And on he walks.

    FOOD STORAGE RECIPES

    Marti’s Chocolate Cake

    I think I found this somewhere and altered it just enough to call it my own.

    3/4 c. butter
    2 c. sugar
         Cream together
    2 eggs
    1 tsp vanilla
         Add and beat 1 minute (does anyone actually EVER time this?)
    Mix separately
    2 c. flour
    3/4 c. cocoa
    1 1/4 tsp baking soda
    1/2 tsp salt
    Then in a measuring cup mix
    3/4 c. buttermilk and 3/4 c. water
    Add the flour to the sugar mix, a little at a time, alternating with the liquid.
    Pour into a greased and floured 13 X 9 baking dish.
    Bake 350 degrees for 40 min until a toothpick comes out clean.  I made a note in my recipe book that it took me 55 minutes for my last cake to bake completely.  Ovens vary.
    Frosting (my favorite for this cake)
    1 stick butter softened
    8 oz. cream cheese softened
    1 lb. powdered sugar
    1/2 tsp vanilla

    Texas Sheet Cake
    I love this for a large crowd because you make it on a baking sheet as you would use for cookies.  It is very rich, so you can cut small squares, and it just makes a lot.

    2 sticks butter, 1/2 c. shortening, 4 TB cocoa, 1 c. water
         Boil this together.  While it is heating, mix separately:
    2 c. flour
    2 c. sugar
          Then pour the heated chocolate mix into the flour mix and stir well.
    1/2 c. buttermilk – add and stir in to reduce the temperature
    2 eggs – add and mix
    1 tsp baking soda
    1 tsp vanilla
         Add and mix.
    Grease a baking sheet and pour mix into the pan.  Bake 375˚ for 20-25 minutes.  Remove immediately.
    While the cake is baking, rinse out the pan you heated the butter in and reuse it for the frosting.

    Frosting:
    Melt together:
    1 stick butter
    4 TB cocoa
    6 TB milk
    powdered sugar to make it VERY stiff.
    nuts are optional (I like them but others may not)

    As SOON as the cake comes out of the oven, begin to drop little spoonfuls of frosting on the cake.  The heat of the cake will melt the frosting, and allow you to spread it over the cake.  Be careful as you spread NOT to break the top of the cake and get crumbs.  Just go slowly.  The frosting will cool and harden back up.  

    They taste like frosted cake brownies.  SO GOOD!!!

    Chantel’s Brownies

    This recipe is from my daughter-in-law.  She says she grew up making them.  They are REALLY good.

    2 c. sugar
    2/3 c. cocoa
    dash salt
         Combine
    4 eggs – mix in
    3/4 c. minus 1 TB flour – add
    2 sticks melted butter
    1 tsp vanilla
    1 c. chocolate chips
         Spread in a greased 11X7 glass pan.  Bake 350˚ for 25-30 minutes.

    ( I wanted to make them in a 13X9 and increased the ingredients:  3 c. sugar, 1 c. cocoa, 1/4 tsp salt, 6 eggs, 1 c. + 1 TB flour, 3 sticks melted butter, 1 1/2 tsp vanilla.)


    Hope you are all looking forward to the holidays.  This time of year is busy for me.  I have to work at NOT stressing!!!

    Marti

  • Marti’s Corner – 43

    Marti’s Corner – 43

    Marti's Corner at City PreppingHi Everyone,

    NOTES:

    *  Here is an article by Christopher Parrett – Communications – that outlines pretty well some choices for communications in case of emergencies.

    *  We’re in November.  Here’s what you can do in the garden.  Kellogg Garden Organics™: Blog | Kellogg Garden Organics™

    *  If you have seeds leftover from any gardening you might have done, here is a helpful Seed Storing Guide from Johnny’s Seeds:  seed-storage-guide.

    LONG TERM FOCUS: Flour

    Flour and BreadYou can no longer purchase flour at Home Family Center.  In fact, you cannot purchase online either because they are out.  I don’t like to buy flour in the #10 cans anyway.  I think it develops a “smell”.  I just purchase flour when it goes on sale about this time of year and then vacuum seal it.  Just last week, I bought it at Winco for $1.88.  

    In this video, she freezes her flour and then brings it to room temperature before she seals it.  This is to kill any bugs or eggs that may be in the flour or in the glue.  Vacuum Sealing Flour for Long Term Food Storage – YouTube  BUT, I don’t have room in my freezer, so I just put the store bags right into the vacuum bags and seal them.  The vacuuming takes out all the oxygen, which will kill the bugs anyway.  I try to rotate this flour throughout the year.  I have never had any problems doing it this way.  When I open the bag, I usually sift it as it goes into my Tupperware storage container.  

    I always buy unbleached flour.  Do you know how they “bleach” flour?  With bleach!!!!  Ewwww.

    I also store wheat, of course.  But going to a strictly wheat diet will be hard on your system.  So having a little flour to do some 50/50 cooking will be better.

    If you need to substitute whole wheat flour in your recipes (you might want to practice doing this once in a while), for every 1 c. white flour, use 1 c. wheat flour minus 2 TB.  Wheat flour is denser.  

    Flour is something I use all the time, which makes it easy to store and rotate.

    SHORT TERM FOCUS: Baking Soda & Baking Powder

    Baking soda and powder only have a shelf life of 1 year.  So every fall, I just buy another container of both and toss the old ones.  Baking soda can be used for a number of things (from removingBaking Soda smells in the fridge to brushing your teeth!)  22 Benefits and Uses for Baking Soda  So you can repurpose it.  And it turns out that baking powder also has multiple uses:  10 Clever Other Uses for Baking Powder – Real Advice Gal

    My daughter admits that she never buys baking powder.  After all, cookies only use baking soda.  But, if you intend on making homemade pancakes, or biscuits, you’ll want some baking powder.  It costs about $1.67 and will be handy to have on hand when you can no longer buy “frozen” waffles.  LOL

    72-HOUR FOCUS: Small Cooking Stove

    In my worst-case scenario, I’m in San Diego or Pomona, or Riverside, and there is a big earthquake and I have to walk home.  Because of this, my 72-hour kit has enough food to keep me alive for 3-4 days, but some of it has to be cooked (like instant oatmeal).  So, each of my backpacks has one of these:  AceCamp Lightweight Collapsible Camping Stove, Ultralight Foldable Pocket Stove or something similar.  You can get this stove from Coleman at Walmart.  They usually come with fuel tablets, but you can use a Sterno can as well.

    Camp StoveCooking at home without electricity offers many more options — and you should have SEVERAL options in your back pocket.  But it wouldn’t hurt to have this small stove in your 72-hour kit, in the trunk of your car just in case.

    FOOD STORAGE RECIPES

    Pancakes

    from the kitchen of Shemay Matson (Thanks for sharing, Shemay!)

    In a blender

    2 c. water
    2 eggs
    2 TB oil
    2 tsp. vinegar

        Blend 1 minute

    2/3 c. nonfat powdered milk

        Blend 1 minute

    1 c. white flour
    1 c. wheat flour
    2 TB sugar
    2 TB baking powder

        Blend

    What do you do if there is no power?  Well…. you stir very fast.  OR you can get one of these:  Amazon.com: OXO Good Grips Egg Beater: Home & Kitchen

    This is what I really want:  Hand Crank Blender (Hand Powered) | Lehman’s, but I’m too cheap to buy it.  LOL, It’s number one on this guy’s list as well.  3 Best Hand Crank Blender – Hand Operated Food Processor. I guess I’ll with the egg beater

    Applesauce Oatmeal Cookies

    About 6 years ago, I canned a lot of applesauce.  Those jars are starting to get old, and I’m not sure we are going to eat all that applesauce.  So I’m always on the lookout for recipes that use it.  This one is from Simple Recipes Using Food Storage, printed by Cedar Fort, Inc.

    1 c. shortening
    2 c. sugar

            Cream together

    2 c. applesauce
    2 eggs

             Add and mix well, then add remaining ingredients

    2 tsp baking soda
    1 tsp cinnamon
    1 tsp nutmeg
    1 tsp cloves
    3 1/2 c. flour
    1 tsp salt
    1 c. chopped nuts
    2 c. oatmeal
    1 c. chocolate chips (optional)
    1 c. raisins (optional)

    Mix again and drop by spoonful onto a greased baking sheet.  Bake at 350 degrees for 10-12 minutes.

    Muffin Mix

    This is from the website from Sallys Baking Addiction. She calls it “One Batter for Infinite Muffin Recipes”

    1 3/4 c. all purpose flour
    1 tsp baking powder
    1 tsp baking soda
    1/2 tsp salt
    1/2 tsp cinnamon
    1/2 c. unsalted butter, softened to room temperature
    3/4 c. packed light brown sugar (or granulated)
    2 large eggs at room temperature
    1/2 c. sour cream or plain yogurt
    1 1/2 tsp vanilla
    1/4 c. milk

    Preheat oven to 425˚.  Spray a 12 count muffin pan with nonstick spray or line with cupcake liners.

    Beat the button on high speed until smooth and creamy, about 1 min.  Add the brown sugar and beat on high until creamed, about 2 min.  Scrape down the sides and bottom of the bowl as needed.  Add eggs, sour cream, and vanilla.  Mix until combined well.  Add dry ingredients and beat on low speed until just about combined.  Add the milk and continue to beat on low until combined.  Fold in any add-ins listed below.

    Spoon the batter into each cup, filling each all the way to the top.  Bake the muffins for 5 minutes, then keep in the oven and reduce the temperature to 350˚.  Bake an additional 15-18 minutes or until a toothpick inserted in the center comes out clean.  Total time is about 22-23 minutes.  Allow muffins to cool, then transfer to a wire rack.

    White Chocolate Raspberry Muffins:  Add 1 c. raspberries and 3/4 c. white chocolate chips.

    Apple Cinnamon Muffins:  Add 1/2 tsp cinnamon and 1/4 tsp ground nutmeg.  Fold in 1 cup peeled chopped apple and 1/2 c. chopped pecans or walnuts.

    Lemon Poppy Seed Muffins:  Leave out the cinnamon and use granulated sugar instead of brown.  Mix 2 TB poppy seeds into the dry ingredients.  Add 2 tsp lemon zest and the juice from 1 med. lemon into the batter when you mix in the milk.  Sprinkle with coarse sugar before baking.  Drizzle with lemon glaze:  1 c. powdered sugar, 2-3 TB fresh lemon juice

    Mixed Berry Muffins:  Fold 1 1/2 c. mixed berries into the batter.  Drizzle with lemon glaze

    Chocolate Chips Streusel Muffins:  Fold 1 1/2 c. semi-sweet chocolate chips into the batter.  Press crumb topping into muffins before baking:  1/3 c. brown sugar, 1 TB granulated sugar, 1 tsp cinnamon, 1/4 c. unsalted butter melted, 2/3 c. all-purpose flour.

    Double Chocolate Chip Muffins

    Sorry, I couldn’t resist adding this one last muffin from the same website

    This recipe makes about 14 muffins.
    2 c. flour
    1 c. granulated sugar
    1/2 c. unsweetened cocoa powder
    1 tsp baking soda
    1/2 tsp salt
    1 3/4 c. semi-sweet chocolate chips
    2 large eggs at room temperature
    3/4 c. full fat sour cream or plain yogurt at room temp
    1/2 c. vegetable oil
    1/2 c. whole milk at room temp
    1 1/2 tsp vanilla extract

    Whisk the eggs, sour cream, oil, milk, and vanilla together.  Mix all dry ingredients and add in the wet ingredients.  Fold together until completely combined.  Batter is quite thick, avoid overmixing.

    Spoon into muffin liners, billing them all the way to the top.  Bake for 5 minutes at 425˚, then reduce the oven to 350˚ and bake 15-16 min more until toothpick comes out clean. 


    I’ve got to get better organized!  Have a good week everyone, and watch for ways to save on food and preserve it!

    Marti

  • Marti’s Corner – 42

    Marti’s Corner – 42

    Marti's Corner at City PreppingHi Everyone,

    NOTES:

    *  If you want to store some food for emergencies and are looking for some low-carb ideas, check out this site:  30 Low-Carb And Keto Emergency Food list – get the printable lists NOW

    *  Want to try dehydrating but don’t want to buy a dehydrator?  Try the oven.  How to Dehydrate Food Without a Dehydrator « Food HacksDehydrator jerky

    This site shows you how to use an oven, a toaster oven, a microwave, and the sun.  The author even shows you how to make your own dehydrator.

    *  Garden Notes – Even though the weather is still warm here in So. Cal., the days are gradually getting shorter, which also means that the sun does rise as high in the sky, which means that the plants don’t get as much sunlight even during the day.  Last year I gardened all winter long, and frankly, the plants did NOT do very well, except for the lettuce.  So this year, I’m not going to do that.  I will take the plants out as production decreases and just let the garden rest, except for the lettuce.  My zucchini and yellow squash that I planted in the spring is just about done.  But the zucchini and squash that I planted about two months ago are now starting to produce.  Somehow the aphids got away from me and seemed to be everywhere—spray, spray, spray.  I’m using BT, an organic spray for the aphids.

    LONG TERM FOCUS: Fruit

    Last week to gather cans of fruit, fruit roll-ups, dehydrated fruits,  jams, powdered fruit drinks, and other types of fruit.  Cans of fruit, although bulky and heavy, have sweet syrup that will giveFruit needed calories in an emergency. 

    SHORT TERM FOCUS: Raisins, Craisins

    I’m not a huge raisin fan, and please don’t try to pass off oatmeal raisin cookies as the same as chocolate chips.  BUT, there are some things I DO like raisins in.  Granola is one of them.  I also enjoy GORP (good old raisins and peanuts – trail mix). Okay, maybe I sneak some M&M’s in there, but I like the salty nuts.  So, I store and rotate raisins.  I vacuum seal them (both in jars-if I have any- and in bags).  You should get at least six months if packed in air-tight containers.

    72-HOUR FOCUS:

    Alcohol WipesYou can get individual packets of hand wipes and keep several in each 72-hour kit.  OR you can pick up an extra box of “wipes” and keep them in the car.  You’ll be amazed how often this will come in handy.  I got something like this: Premoistened Sanitizing Hand Wipes, Towelettes Individually Wrapped, 100/box.  I don’t have to worry about them drying out.

    MISC FOCUS: Rubbing Alcohol

    Here is a good article on ten good uses for alcohol:

    10 Household Uses for Rubbing Alcohol.  Just have a few spare bottles of alcohol and keep them under the bathroom sink.

    FOOD STORAGE RECIPES

    Canning Apple Pie Filling:

    Ingredients:

    5 apples
    1 c. sugar
    1/4 c. corn starch
    1 tsp ground cinnamon
    1/2 tsp ground nutmeg
    1/2 c. water
    3/4 c. apple juice or apple cider
    2 tablespoon lemon juice

    Directions:
    Core, peel, and slice apples. Place in boiling water for 1 minute. Set aside and keep hot. Boil remaining ingredients until desired thickness. Barely let it reach a full boil. Fill hot sterilized quart jars alternating apples and syrup until it is almost full. Run a knife down the side to remove air bubbles. Add more apples and syrup. “Process in boiling water bath. Put jars in water bath pan or one that allows you to put water over the jars about 1 inch. Boil for 25 minutes”.

    And in time for Thanksgiving…

    Copycat Texas Roadhouse rolls by I am Homesteader:  Copycat Texas Roadhouse Rolls – I Am Homesteader

    1 tablespoon water, lukewarm
    6 tablespoons granulated sugar, divided
    2 1/4 teaspoon active dry yeast
    1 cup whole milk, heated and then cooled slightly (Can use skim or 2%)
    6 tablespoons unsalted butter, melted
    1 teaspoon salt
    1 large egg, room temperature
    3 1/2 cups bread flour
    1 tablespoon unsalted butter, melted for brushing over baked rolls

    CINNAMON HONEY BUTTER

    • 1/4 cup (1/2 stick or 56.7g) unsalted butter, softened
    • 2 tablespoons confectioners’ sugar
    • 2 tablespoons honey
    • 1/2 teaspoon cinnamon spice

    Instructions:

    ROLLS

    1. In the bowl of a stand mixer, combine the water, 1 teaspoon of sugar, and yeast, letting it sit for about 5 minutes (or until sugar and yeast are dissolved). (Note, this will be a thick mixture)
    2. Add in the remaining sugar, milk, butter, and salt and stir.
    3. Whisk an egg into the mixture.
    4. Add the flour to the yeast mixture, beating with the flat beater for about 3 minutes at medium-high speed. Scrape the dough into the center of the bowl.
    5. Using the dough hook attachment, knead the dough for 3-4 minutes.
    6. Place the dough into a greased bowl, turning the dough to grease the entire ball of dough.
    7. Cover the dough with a clean kitchen towel and let it rise for 1-2 hours (or until doubled in size).
    8. Prepare a 9×13-inch pan by lightly greasing it.
    9. Gently punch down on the risen dough to deflate it. Divide the dough into 12 equal pieces. (You can do this by continuing to divide the dough in half until you are down to 12 pieces. Or, roll the dough into a log and use a bench knife or stiff spatula to cut it into 12 pieces.)
    10. Round each piece into a smooth ball and place it on the greased pan, evenly spaced.
    11. Cover the rolls with a kitchen towel and let them rise for about 30 minutes. They should be nice and puffy.
    12. Preheat the oven to 350°F when the rolls are just about done rising.
    13. Bake for 12-15 minutes, or until golden brown.
    14. Remove from the oven and brush with melted butter. Let them cool a bit before turning them out onto a wire rack. Serve warm with the cinnamon honey butter.

    CINNAMON HONEY BUTTER
    In a small bowl, combine the butter, confectioners’ sugar, honey, and cinnamon. Mix with a mixer or by hand until well blended. Serve with the rolls.


    I’ve got to get better organized!  Have a good week everyone, and watch for ways to save on food and preserve it!

    Marti

  • Marti’s Corner – 41

    Marti’s Corner – 41

    Marti's Corner at City PreppingHi Everyone,

    NOTES:

    What's Eating My Tomato

    *  Garden stuff.  I went to pick this tomato today.  In my view, it was lovely and ripe.  Then this is what I found.

    Is this from birds?  Squirrels?  Argh.  I am not growing tomatoes for THEM!!!  Any advice from anyone?  Maybe I’ll have to try bird netting to protect them.  Although my daughter said she used bird netting, then sat and watched as a bird carefully lifted up the netting and slipped under it to feast on the fruit.  

    *  I found this SpiceChart on the internet.  

    Again, not sure if it’s cheaper to store all the ingredients for pumpkin pie spice mix or to just store some pumpkin pie spice.  Right? 

    LONG TERM FOCUS: Fruit

    Canning fruit is easy to do, because you just need to boil the jars, not pressure can them.  Peaches, pears, cherries, and tomatoes are probably theFruit easiest.  We have kind of missed that season, though.  Plus, here in So. Cal. we don’t really get “cheap” fruit, even at the Farmer’s Markets.  I try to watch the sales at Sprouts or Cardena’s and see if I can get fruit for less than $.75 a pound.  I checked out prices for canned fruit last week and It can be $1.95 a can!!!  If you have room, consider planting a fruit tree.  It probably won’t bear fruit for a few years, but now the road, it could be invaluable!  Berries are another fruit easy to grow.  In my yard, I have blackberry vines that grow like weeds.  Literally, in some places they ARE weeds.  You have to be careful they don’t overrun everything.  I also have blueberry bushes.  Unfortunately, I never get enough fruit to can or make into jam.  The reason is that I just eat the berries as I pick them!!!  LOL  Did you ever read the book, Blueberries for Sal?  As a side note:  I do the same thing with the cherry tomatoes.  All that garden fruit just explodes with flavor in your mouth.  Mmmmmm.

    SHORT TERM FOCUS: Batteries

    Batteries EmergencyOctober and April are my “check-your-batteries” months.  In fact, all our smoke alarms went off last week and we had to replace all the 9-volts.  I also bought a large pack of AA’s and several C’s and D’s and went around checking all the flashlights (in the nightstands, and in the cars).  Batteries are pricey, but you just gotta bite the bullet and do it.  This is a good time, because batteries are usually on sale right before Christmas.  Your batteries should last 1 year.  Still, check every 6 months.

    MISC FOCUS: Diapers

    I’ve heard that there might be an upcoming shortage of diapers.  Parents with babies, you should SERIOUSLY consider getting some cloth diapers just to have on hand.  I don’t have any particular recommendations, ask a friend, or search online.  But get something.  And put some in a baby backpack that you could grab in an evacuation emergency.  

    I read a very sad story about a mother after Hurricane Katrina who had no diapers and was reusing the same diaper day after day, scraping it clean when needed.  She was begging at a gas station for anyone to help her buy diapers.

    FOOD STORAGE RECIPES

    Granola Apple or Peach Crisp

    From the book, Cookin With Home Storage by Peggy Larson
    (I wanted to make this one because I have about 5 dozen jars of canned peaches that we are just not eating.  I’ll try this dessert, and then maybe just dehydrate some of them so I can use the jars for other things.)

    5 medium apples, sliced or 4 c. canned peaches, drained
    Place apples or peaches in a square baking dish.
    1/3 c. flour
    1/2 c. brown sugar
    1/3 c. butter or margarine, melted
    1 tsp cinnamon
    1 1/2 c. granola

    Combine other ingredients.  Mix well.  Sprinkle over fruit.  Bake 25-30 min at 350˚.  Serve warm or cold with milk or whipping cream.

    Caramel Apple Dump Cake

    This recipe was created for a solar oven, but can be cooked in a conventional oven at 350˚.  It tastes like apple pie and can be put together very quickly at a campsite or tailgate party and baked in a solar oven right on the spot.

    2 cans apple pie filling
    1 box yellow cake mix
    2 sticks of butter, melted
    1/2 jar of caramel sauce (like ice cream topping)
    1 c. chopped nuts (walnuts, pecans, etc)
    Pre-heat the solar oven while preparing the recipe.  Dump the apple pie filling into a 9X13 pan.  Add the caramel sauce and stir to mix.  Spread evenly in the pan.

    Sprinkle the dry cake mix evenly over the top.  Carefully spread it evenly over the top with a knife or spoon if needed. Pour the melted butter over the top of the dry cake mix.
    Place the pan into a hot, pre-heated solar oven.  Do not cover.  Bake about 1 1/2 – 2 hours until the cake is browned on top and bubbly around the edges.  Serve with ice cream or whipped topping if desired.

    Apple Fritters
    Apple FrittersFrom the Better Homes and Gardens Cook Book

    1 c. flour
    1/2 c. milk
    1 tsp baking powder
    3 TB powdered sugar
    1/8 tsp salt
    1 egg, well beaten

    Blend dry ingredients, add milk and egg.  

    Add 2 medium-sized apples (1 1/2 c.), pared, cored, and cut into narrow strips about 3/4 inch long.  Drop from tablespoon into deep hot fat (365˚-375˚) 2-5 minutes.  Drain on absorbent paper.  Sift with powdered sugar.  Serves 4-6.

    Corn Fritters (okay, not a fruit – but they still sound good)

    1 1/3 c. flour
    1 1/2 tsp baking powder
    3/4 tsp salt
    2/3 c. milk
    1 egg, well beaten
    1 1/2 c. drained whole kernel corn.

    Mix and drop into hot fat.  Drain, serve with maple syrup.

    Apple Fritter Bread

    (This was just shared with me today and doesn’t it sound so yummy!!!  From the webpage:  houseofnasheats.com)

    3/4 c. milk.  Heat in a small pan until bubbles appear around the edges.  Do not boil.  Add:
    1/4 c. butter, stir till melted and let cool

           In a large bowl:

    3 c. flour
    1 TB yeast
    1/2 c. brown sugar
    1/4 tsp salt

         Mix well.  Add…

    1/4 c. apple cider or water
    1 egg lightly beaten

    Warm butter/milk mix.  Stir until the dough forms into a ball and knead for 5 minutes, until smooth.  This can be done in a stand mixer using a dough hook.
    Transfer the dough to a clean, oiled bowl and cover with plastic wrap.  Let rise to double, about 1 hour.

    While the dough is rising, prepare the apple filling.

    3-4 apples peeled and diced
    1 c. brown sugar
    2 TB butter
    1 TB lemon juice
    1 tsp vanilla
    1 tsp cinnamon
    2 TB cornstarch

    Apple Fritter BreadCombine in a large skillet and cook over medium heat, stirring occasionally, until the apples soften and release their juices.  The juices will thicken slightly from the cornstarch, but it will be very syrupy.  Remove from the heat and allow to cool while the dough rises.

    Assembly: Prepare 2 large bread pans with a parchment sling.

    Divide the dough into two equal-sized portions.  On a very clean, lightly floured surface, roll out one portion of dough into a rectangle.  Evenly spread half of the apple filling mixture, including juices, over the dough.  Roll the dough, starting from the long edge, cinnamon-roll style.  Don’t worry about the syrup leaking out too much as you roll.

    Using a bench scraper or sharp knife, cut the loaf diagonally in 1-inch slices, then change your angle and cut again in the other direction, creating an “X” pattern and slicing the rolled dough into small chunks.

    Scoop the chunks of dough and apple filling into the prepared bread pan, using the scraper to scoop up and add any spilled syrup into the pan.  This part gets messy but it’s the best way I’ve found to make sure there is an even distribution of apples and syrup throughout the bread loaf.  Repeat with the remaining bread dough and apple filling, then cover the loaves lightly with plastic wrap and let rise for 30 more minutes.

    Heat oven to 350˚.  Bake loaves 35-45 minutes until brown on top and cooked through.  When done, immediately remove the loaves of bread from the pans and place on wire racks.

    Prepare the glaze:

    Whisk together
    3/4 c. powdered sugar
    1 TB melted butter
    3 tsp apple cider or milk
    1 tsp vanilla

    Drizzle over the top of both loaves of warm bread and allow to set before slicing.


    Marti

  • Marti’s Corner – 40

    Marti’s Corner – 40

    Marti's Corner at City PreppingHi Everyone,

    NOTES:

    *  So I decided to follow my own advice and can some vegetables this week.  I bought 20 pounds of potatoes for $6 and then went here:  Canning Potatoes  Last time I canned potatoes, I did NOT soak them first to get the starch out.  When I opened them, I had to rinse them really well to use them.  PLUS, after about 6 years, they have “grayed” somewhat.  I have to kind of sort them and discard the gray pieces.  This week’s final tally:  20 pounds of potatoes = 33-pint jars. 

    *  AND I dehydrated some corn.  It was $1.39 at Winco.  (prices are climbing!!)  This was all sparked by a recipe I found for Wild Rice and Vegetable soup.  I’ve included the recipe below.  Add meat if you want.  But I’m thinking I’ll make some “Mylar Meals” and give them to my kids for Christmas.  The recipe says it serves 6-8 (that will work for all my kids) and it only uses 1 TB of corn, carrots, etc.  So the 5 pounds of corn that I dehydrated should work.  LOL

    *  My garden is still producing.  The cooler temps are allowing the plants to set fruit again.  My lettuce is growing again.  Here is an October guide for zones 9-10.  October Garden Checklist Zones 9-10 | Kellogg Garden Organics™

    *  THIS week is the Great California ShakeOut.  The official event will happen on Thursday, October 21, at 10:21.  Your church or school may choose to have their drill on another day, but it will be sometime around then.  Be SURE to talk to your family members about what to do when there is a real emergency.

    *  Paul Diffley shared this link with me.  He says they still have stock.  He asked for a discount and they gave him 10% off his second order.  MREdepot.com – Your Disaster Preparedness Online Superstore. Remember, when disaster strikes, the time to prepare has passed!  They are located in San Clemente, so you “could” just head on down there and check it out.

    LONG TERM FOCUS: Fruit

    Fruit leather is a great alternative to canned or fresh fruit in an emergency.  Here is a guide to making your own fruit leather.  She tells you how to use your oven OR a dehydrator.  How to Make Fruit Leather from Fresh, Canned, or Frozen Fruit

    SHORT TERM FOCUS: Applesauce

    You can make your own applesauce with one of these food mills (or strainers)

    Apple strainer Old fashioned design Apple Sauce maker

    Cut apples into chunks and cook in a large pan.  No need to peel or seed or anything.  Just cut in chunks.  Put a little water in the pan so the apples don’t burn, not much, because the apples will render water as they cook down.  When the apples are soft, just scoop them into the food mill.  The applesauce will seep out through the holes and the mill will trap everything else.  Add sugar to taste.  You can put in jars and water bath process so they can store on the shelf.  It’s pretty easy, and you control the ingredients.

    72-HOUR FOCUS: Notepad & Pencils

    As the pioneers traveled across the plains, they often left messages for those who were following.  The messages were carved on rocks or even buffalo skulls.

    Pioneer writing on rocksPioneer writing on skull With paper and pencil available, you can leave messages, document what is happening, let others know your location, and entertain children.  I have a small box with paper, colored pencils, a deck of cards, a ruler, and a pair of scissors.  A box is not ideal for a 72-hour kit, but a small pad of paper and a pencil should be considered.  The box can go with you if you need to evacuate.

    MISC FOCUS: Sterile Gloves

    I have had gloves in my first aid kit since AIDS first made everyone leery about touching blood.  After COVID, many people bought gloves.  Put 2-3 pairs of gloves in a small baggie and stick them in your first aid kit or in your backpack.  You just never know.  AND, you still shouldn’t be touching blood from a stranger.

    FOOD STORAGE RECIPES

    Wild Rice Soup

    1/3 c. hulled barley or pearl barley
    1/3 c. wild rice
    2 TB green split peas
    2 TB yellow split peas
    1 TB dried corn
    1 TB dried carrots
    1 TB dried onions
    1 TB dried celery
    1 TB dried green beans
    1 TB dried leeks
    1/2 TB dried green bell pepper
    1/2 TB dried red bell pepper
    2 tsp chicken bouillon granules or 2 chicken bouillon cubes

    Directions:  Bring 2 quarts of water to a boil in a large saucepan or Dutch oven.  Stir in all the ingredients.  Return to a boil.  Cover and reduce heat.  Simmer for 1 hour.  Serves 6-8.

    See http://www.simplyprepared.com/home_canning1.htm for instructions on how to dry most of the ingredients.

    This would look so pretty in a jar.  But, jars have been in short supply for over a year now.  Lids, too.  There is a lot of talk online about people not wanting to give away their jars.  OR, giving them as gifts and asking that the jars be returned.  I can verify this.  I check for lids and jars EVERY time I shop.  Last week, there were none.  More and more people are canning food from their gardens, or storing food in jars.  They are rodent and insect-proof.  I get it.

    Applesauce Oatmeal Cookies
    from Simple Recipes Using Food Storage, Cedar Fort, Inc., Springville, Utah

    1 c. shortening
    2 c. sugar
    2 c. applesauce
    2 eggs
    2 tsp baking soda
    1 tsp cinnamon
    1 tsp nutmeg
    1 tsp cloves
    3 1/2 c. flour
    1 tsp salt
    1 c. chopped nuts
    2 c. oatmeal
    1 c. chocolate chips (optional)
    1 c. raisins (optional)

    Cream together shortening and sugar.  Add eggs and applesauce.  mix well and then add the rest of the ingredients.  Mix well again and drop by spoonful onto greased baking sheet.  Bake at 350˚ for 10-12 minutes.


    A big shout out to those who share things with me.  I really appreciate it.  

    Press on.  Keep plugging away.  Just do it.

    Marti

  • Marti’s Corner – 39

    Marti’s Corner – 39

    Marti's Corner at City PreppingHi Everyone,

    NOTES:

    *  Here is another person who believes that shortages are coming.  We should ALL be gearing up:  take inventory, determine needs, purchase what you can. Electricity Shortages in China Mean Coming Empty Shelves HERE | The Glenn Beck Program

    *  Augason Farms, a large supplier of emergency food supplies, has just announced that it is suspending operations for 90 days.  They cannot fulfill orders due to critical supply chain failures.

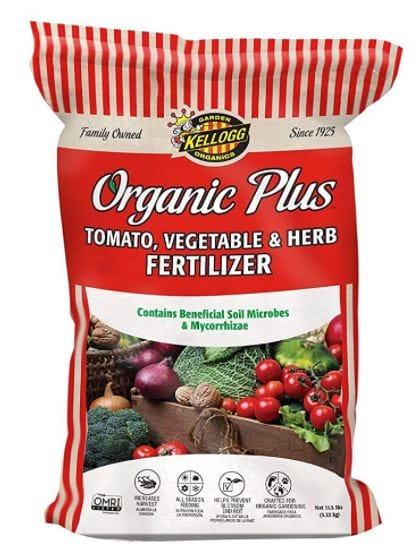
    Fertilizer Bag*  Time to feed the garden.  I give EVERYTHING some of this:  Tomato, Vegetable & Herb Fertilizer.  I get it at Lowes.​

    I also like to give them a little nitrogen (not the beans or peas).  If you have a good compost, use that.  If not, I use this:  Worm Gold Plus 100% Organic Worm Castings 8qt (Approx 13lbs).  If you get the worm castings at Armstrong Nursery (or ANY type of worm castings from any store) it is probably a little cheaper than online.  If you have never used worm castings, they do NOT look like worms!  LOL.  It actually looks and feels like rich, black, fine soil.  Your plants will love it.  If you want your plants to produce for you, you need to feed them!!!

    The Great California ShakeOut is coming up.  It will happen on October 21 (always the third Thursday) at 10:21.  IF you are NOT participating in this drill with any kind of church or community organization, you may want to consider doing this with YOUR family.  At least talk about it!!!  What should your kids do if they are at school?  How will you reach them and bring them safely home?  What if they ARE at home?  What should they do? ShakeOut- CA 

    The more you talk about it and drill, the less scared they will be. The Great California ShakeOut – Get Ready to ShakeOut!

    *  I was thinking of purchasing some dehydrated corn.  I found this:  Augason Farms Freeze Dried Sweet Corn 1 lb No. 10 Can.  It is a #10 can (1 pound) for $29.99. (And now you can’t get it anyway) But I also found this:  Harmony House Foods Dried Corn, whole (14 oz, Quart Size Jar)  This will save you over $.40 per ounce.  Then, I just decided I would dehydrate my own.  Just buy frozen corn (about $1.29 at Winco I think), and spread it out on the trays.  Harmony House corn = $1.43 per oz.  Do-it-yourself corn = $.08 per oz. 

    LONG TERM FOCUS: Dehydrated Apples

    Apple slices are currently unavailable through the Church store.  BUT, I know that many of you have purchased them in the past, so we will talk about using them.  To rehydrate them, add 1 c. apple slices to 1/2-3/4 c. hot water.  Let sit for 15 minutes, then drain off excess water.

    It looks like cinnamon apples ARE available here:  Emergency Essentials® Freeze-Dried Cinnamon Apple Slices Large Can – Be Prepared – Emergency Essentials

    If you do some math (who doesn’t want to do math???)  The apples above are $2.19 per serving.  You can buy fresh apples for MUCH less, even when they are NOT on sale.  YOU just have to do the work of dehydrating them.  I was gifted an extra dehydrator and so I have one to lend out.  Just LMK if you would like to borrow it.  

    If you watch the sales, you can sometimes find apples for as little as $.50 a pound.

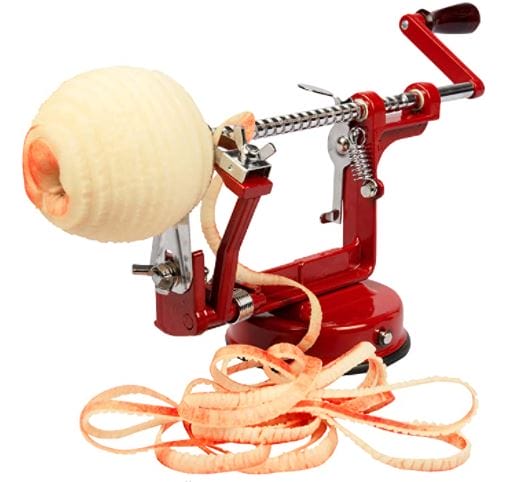
    Easy Apple PeelerIf you are dreading peeling and slicing apples, YOU have never had one of these:  Apple Peeler and Corer by Cucina Pro – Long Lasting Chrome Cast Iron with Countertop Suction Cup: Home & Kitchen

    It peels, cores, and slices all at once.  There are several varieties.  I don’t know how I lived without one!  

    I just opened a pack of dehydrated apples (with cinnamon and sugar on them) that I dehydrated about 4 years ago.  They had been vacuum sealed.  They tasted wonderful!!!

    SHORT TERM FOCUS: Canned Fruit

    Fruit is getting expensive, just like everything else.  Just get 1-2 cans EVERY time you shop.  If you are hungry, cold peaches or pears will taste like candy!!!.  Plus, the sugar juice will add needed calories.

    72-HOUR FOCUS: Scriptures

    Most of us have scriptures on our phones now.  (Isn’t that amazing that we can do that?)  But if there is no power, and no way to continuously charge your phone, you will not be able to access them. There are very small scriptures you can buy for your 72-hour kit.  Frankly, there is no way I could read them even if I had them.  One suggestion would be to tuck a set of scriptures in the trunk or glove compartment of the car.  OR, if you have a grab-and-go bag in case of evacuations, you can put it there.Child reads religious text

    Remember in the Book of Mormon, the Lord considered the scriptures so important, that Lehi’s sons risked their lives to go back and get them.  Later on, King Benjamin tells his sons, “If it were not for these records and these commandments, we would have suffered in ignorance.  For it were not possible that our father, Lehi, could have remembered all these things, to have taught them to his children, except it was for the help of these plates.” (Mosiah 1:3-4)

    Whatever your faith is, you will want a copy of your holy scriptures if there is a true emergency.

    MISC FOCUS: Isopropyl Alcohol

    Here is a good site that lists some of the benefits of rubbing alcohol:  Rubbing alcohol uses: How to use it, safety, and what to avoid

    FOOD STORAGE RECIPES

    Today’s recipes are from a document called “CANNERY COOKBOOK

    Dutch Apple Pie

    1 c. dried apples firmly packed
    2 c. boiling water.
      Pour water over apples and let set for about 15 minutes.

    Mix together:
    1/3 c. sugar
    1/2 tsp cinnamon
    2 TB flour
      Add to the apple mix and continue cooking until thick.  Stir constantly to prevent scorching.  Pour mixture into pie shell and dot with 1 TB butter.

    Topping:
    1/3 c. packed brown sugar
    1/2 c. flour
    1/4 c. butter
    Cut in the butter until crumbly.  Sprinkle over the apple mixture and place in 350˚ oven for 55 minutes.

    Apple Filled Cookies

    Filling:
    Chop or break 2 c. dried apples into small pieces.  DO NOT RECONSTITUTE as in other recipes.
    Place chopped apples in a saucepan and add:
    3/4 c. water
    1/2 c. sugar
    1/2 c. chopped nuts
    1 TB flour
    Cook together slowly, stir constantly to prevent scorching until thick.  Cool
    Cream together
    1 c. butter
    1 3/4 c. brown sugar
    2 eggs
    1 tsp vanilla
    1/2 c. water

    Mix well and add:
    1/2 tsp salt
    1 tsp baking soda
    1/4 tsp cinnamon
    Add:  3 1/2 c. flour (wheat or white)
    Drop by teaspoon onto an ungreased cookie sheet.  Make a depression in the middle of each drop and place filling in the depression, then place 1/2 tsp of dough on top of filling.
    Bake at 350˚ about 12 minutes.

    Applesauce

    2 c. dried apples
    2 c. boiling water
    Pour water over apples and let sit 15 minutes.  Put this mix in the blender and you will have applesauce.  For variety, add some sugar or cinnamon.


    We cannot see the road ahead.  But we can read the road signs, and listen to those who have.

    Marti

  • Marti’s Corner – 38

    Marti’s Corner – 38

    Marti's Corner at City PreppingHi Everyone,

    NOTES:

    *  Here is a great article about storing water:  Drinking Water Guidelines.

    *  I came across a FaceBook group called, “Simply Prepared With CFD Publications.”  From there I found this website: CFD Publications  You will find a lot of good information in both places.  You will also find a book called Pantry Cooking by Cheryl Driggs, which offers over 350 shelf-stable recipes.

    *  Beginning in late 2020, the Church of Jesus Christ of Latter-Day Saints began to publish “Local Area Preparedness Guides.”  Go here to find YOUR area:  Local Area Prepare    Here is the one for So. Cal:  Temporal-Preparedness-Guide-North-America-Southwest-Area-Guide-May-2021

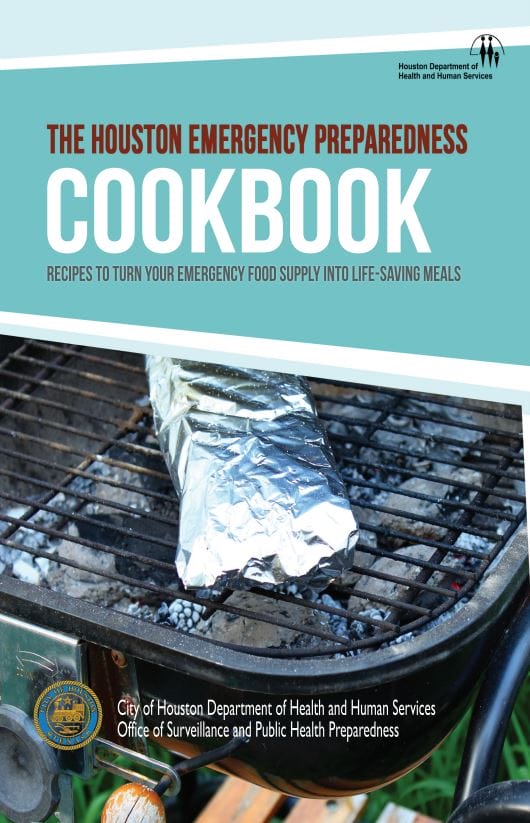
    *  I apologize if I’ve offered this before, but it’s really great:  Houston Emergency Preparedness Cookbook  You can download it now and look at it later.Emergecy Preparedness Recipes - Cooking

    **  Garden Update.  For several weeks, something has been eating my lettuce – AS SOON AS IT SPROUTS!!!  I tried sprays and diatomaceous earth.  I finally dug up all the lettuce and started over in new tubs.  Same thing.  I took pictures and sent them to a master gardener.  She suggested mice, rabbits, or squirrels.  I bought some sticky mouse traps and laid them right in the tubs.  BUT, then I decided to move the tables away from next to the house.  If it’s a mouse, I thought, it won’t be able to climb up the table if it’s away from the wall.  Soooo… I did not catch a mouse, only a bunch of flies in the sticky goo.  BUT, moving the tables has seemed to work, and I’m now harvesting lettuce again.  In addition, I have also gotten zucchini and yellow squash from plants that I sprouted only a few weeks ago.  Yay!!!  I feel that the plants are finally starting to bloom again after the summer heat.

    LONG TERM FOCUS: Milk

    Milk - Powdered MilkFoods made with powdered milk will have fewer calories and less cholesterol than those made from whole milk.  Adding additional milk to the recipe will enhance the nutritive value of the recipe.  In any recipe calling for milk, simply add the dry milk to the other dry ingredients, then add water for the milk called for in the recipe. In mashed potatoes: mash cooked potatoes, then add 1/4 c. dry milk for each cup of potatoes.  Use either the water the potatoes were cooked in or fresh milk to give the right consistency.

    72-HOUR FOCUS: Deck of Cards

    I grew up playing cards with my grandpa.  His favorite card games were Gin Rummy and Hearts.  I guess MY favorite card games are Gin Rummy and Crazy Eights.  Playing cards would be a fun family home evening – Crazy Eights and popcorn.

    MISC FOCUS: Hydrogen Peroxide

    Check this out:

    Hydrogen Peroxide Cleaning Hacks

    FOOD STORAGE RECIPES

    Fruit Smoothies (a good way to use bottled fruit)

    2 c. bottled fruit with juice
    3/4 c. nonfat powdered milk
    1-2 drops almond flavoring, or vanilla, or 1 TB lemon juice. (Use almond flavoring with cherries and large stone fruits, lemon juice with berries.)
    Put in blender and blend until smooth.  Add 1/2 tray ice cubes and blend until smooth.
    To use fresh fruit, use one cup of fruit and 1 c. water and sweeten to taste.  

    Peanut Butter Chews:

    1 c. powdered sugar
    1 c. peanut butter
    1 c. corn syrup or honey
    2 c. instant dry milk (or 1 c. non-instant)
    Mix milk and sugar thoroughly.  Add peanut butter and syrup mixture.  Knead with hands.  Press into a cake pan or roll into walnut size balls.
    Variations:  Add nuts, or Rice Krispies.  Dip in chocolate.

    Tootsie Rolls

    1 c. honey
    1/2 c. cocoa
    1 tsp vanilla
    1 c. non-instant powdered milk
    Cook honey to 255˚.  Do not overcook.  Remove from heat.  Add vanilla.  Mix cocoa and powdered milk well and stir into honey.  Pull like taffy until gloss is gone and roll into rolls.


    Food prices are rising.  Stay prepared!!!

    Marti