Tag: Prepping Basics

  • Marti’s Corner – 08

    Marti’s Corner – 08

    Marti's Corner at City PreppingHi Everyone,

    NOTES:

    * I read several comments from people in Texas who went without power and supplies. One of them made a list of things they wish they had and things they were thankful that they DID have. That information is attached below. Spelling and grammar are original.
    * I also saw THIS image:
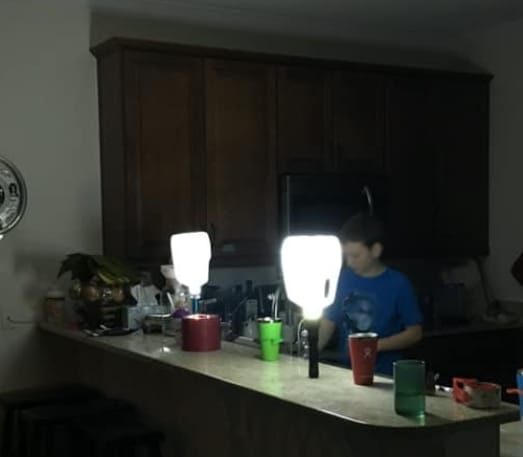
    Milk Carton Lights

    I thought this was a good idea. The milk cartons diffuse the light from the flashlights to create more light.
    We have maybe 2 dozen outside solar lights in our yard. In an emergency, we could just bring them inside at night.
    A 100+ Hour candle or a  Kerosene Lantern might be a good investment.

    * How will you charge your cell phones with no power? You can always sit in the car and charge it there. But that will be about 1/2 an hour of going nowhere just to charge your phone. I have some of these: Solar Power Bank Portable Charger 20000mah Waterproof Battery Backup Charger Solar Panel Charger with Dual LED Flashlights and Compass for iPhone Android CellPhones. There are several different brands, most about $25 more or less. What I like about them is you can recharge them with the sun. It will take about 1/2 an hour to charge your phone and about 4-5 hours to recharge the battery. Solar power works SLOWLY!!!

    * You can buy larger solar cells for a little more money.  Solar Panel Travel, Nekteck 21W Solar Charger, IPX4 Waterproof Portable Camping Gear Solar Powered Charger with 2 USB Port Compatible with iPhone, iPad, Samsung Galaxy S, and Any USB Devices. The difference between this and the portable charger is that this does not have a battery. You can only charge when the sun is shining. The smaller one can charge during the day, and you can use it at night because it stores the power in a battery.

    * I couldn’t help myself and planted most of my garden last week, including the tomatoes, peppers, cucumbers, and all the warm, loving vegetables. Today I looked at the weather and saw that the night temps would get low in a few days. Watch, watch, watch, and be prepared to cover them up if the weather predicts less than 37. Give yourself a 5-degree leeway.

    LONG TERM FOCUS: Beans & Legumes
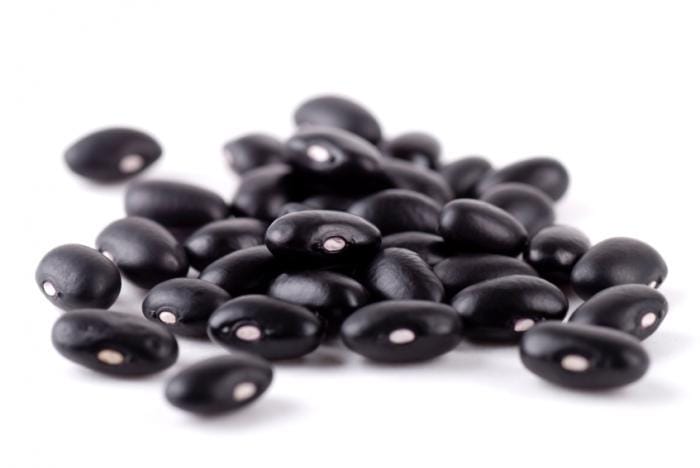
    Black Beans

    Did you know you can substitute black beans for oil and butter in desserts? Legumes have a wonderful way of keeping desserts moist and chewy while cutting back on calories and adding fiber and protein. (Black Bean Brownies, by Leigh Zaleski at ydr.com) Pureed beans can be substituted for oil or butter or flour. The recipe for brownies using black beans is below. Just a note. I tried this. BUT, my blender did not blend as fine as I would have liked. Don’t get me wrong. The brownies “tasted” wonderful!!! BUT, there were bits of bean skins that didn’t get blended enough, and I couldn’t get past the texture.  I have a better blender now and might try this again.

    When you substitute beans, use a 1:1 ratio if the recipe calls for 1 c. butter, use 1 c. beans instead. Be sure to match the beans to the color of the baked goods. Brownies: black beans. White cake: white beans.

    SHORT TERM FOCUS

    If there is no water, it makes it difficult to clean dishes. A pack or two of paper plates and cups would be a good thing to include. Find a place in the garage to keep them – just in case.

    MISC. FOCUS: Getting Clean Water

    There are three ways to make water safe:

    1. Boil: According to the CDC, Making Water Safe in an Emergency | Water, Sanitation, & Hygiene-related Emergencies & and Outbreaks | Healthy Water boiling is the surest method to kill disease-causing organisms, including viruses bacteria, and parasites. Strain dirty water through a cloth or coffee filter, then boil for 1 minute. Above 6,500 feet, boil for 3 minutes. Let cool.
      There are several YouTube videos about distilling water at home on your stove or over a campfire. I did it once at school. I used a large container of very dirty water (I let the kids add the dirt and trash. LOL), then I covered it with some Saran Wrap and placed a small rock in the middle so that as the water evaporated, it would drip down the center of the plastic wrap and into a clean cup. We just put it in the sun and let it evaporate. No fuel is needed.
    2. Add disinfectant: You can use bleach. For one quart, add 10 drops. One gallon, add 40 drops. (1/2 tsp), and for 5 gallons, add 2 1/2 tsp bleach. Stir and let stand for 30 minutes before drinking.  You can get these:  Potable Aqua Germicidal Water Purification Tablets – 50 Count. The bottles are tiny and easy to carry. It takes 2 tablets to purify 1-quart water. This twin pack will purify 50 quarts of water. Follow the directions.
    3. Filter – The Seychelle filters from last week are an example of this. Berkey filters are expensive but easy to use. You can make your own primitive filter using a 2-liter bottle upside down with the end cut off. In the bottle, layer a coffee filter, some charcoal (fish supplies at Walmart), sand, another filter, small gravel (fish supplies again), and a filter on top. The first batch will come out black because of the charcoal, but it will clear up and actually work pretty well. It’s bulky and not very efficient, but it DOES work.

    FOOD STORAGE RECIPES

    Boston Baked Beans
    This recipe was included in a food storage package that we bought from Perma Pak.

    2 c. navy beans. Wash and drain. Cover with cold water and bring to a boil. Let sit for 1-2 hours. Drain. Cover again with 4 c. water, bring to a boil, and simmer, uncovered, for 1-2 hours, or until tender. (Do not boil rapidly, or beans will burst.) Drain, reserving liquid.
    Preheat oven to 300 degrees.
    Layer beans with 2 TB chopped onions in an ungreased 2-quart casserole dish. Stir together
    1/4 c. cooking oil or butter
    1/4 c. brown sugar, firmly packed
    3 TB molasses or honey
    1/4 tsp dry mustard
    1/8 tsp pepper
    1 c. of the reserved liquid. Mix and pour over beans. Add enough of the remaining reserved liquid or water to almost cover beans. Cover. Bake 3 1/2
    Removing the cover and stir in
    1/2 c. bacon-flavored TVP, or chopped fried bacon. Continue baking uncovered for 30 more minutes.

    Black Bean Brownies
    From the article: Black Bean Brownies: Substitute beans for butter, oil
    By Leigh Zaleski at ydr.com

    2 cans of black beans rinsed and drained. Add to a food processor with 1/4 c. water and puree for about 1 minute or until smooth.
    Transfer puree to a large bowl and add:
    1 c. sugar
    6 TB Stevia (1 c. sugar)
    1/2 c. skim milk
    1 tsp vanilla
    1 1/2 c. whole wheat flour
    1/2 c. dark chocolate unsweetened cocoa
    1 tsp salt
    1 tsp baking powder
    1 tsp baking soda
    1 c. dark chocolate chips
    Spray 13 X 9 inch pan with cooking spray. Pour batter into pan.
    Bake 350 degrees for 35-45 minutes, or until a toothpick comes out clean.

    Healthy Flourless Chocolate Cake
    It makes one 9″ layer cake.

    Preheat oven to 325 degrees. Spray a 9″ cake pan with cooking spray or grease with shortening.  Dust cocoa all around the inside of the pan. Cut a round of parchment and line the bottom of the pan. Spray the parchment lightly.

    1 15-oz can unseasoned black beans Drain and rinse.
    OR 1 1/2 c. cooked beans, any color, drained and rinsed.
    Place beans and…
    3 large eggs
    1 TB vanilla
    1 tsp stevia extract (1/2 c. sugar)
    1 tsp salt
    into a blender. Blend on high until beans are completely liquefied.
    In a separate dish, beat…
    6 TB butter
    1/2 c. honey (or 2/3 c. sugar) until light and fluffy. Add
    2 eggs, beating for 1 minute after each addition.
    Add bean batter and mix.
    Stir in…
    6 TB unsweetened cocoa powder
    1 tsp baking powder
    1/2 tsp baking soda and beat on high until smooth.

    Scrape into pan. Tap on the counter to release any air bubbles
    Bake 40-45 minutes. Cool 10 min. Turn out cake from pan. For the best flavor, let sit overnight.

    Don’t be caught, not prepared. Please don’t put it off. Do something—–soon!!!

      
    Marti 

    Texas Storm List:
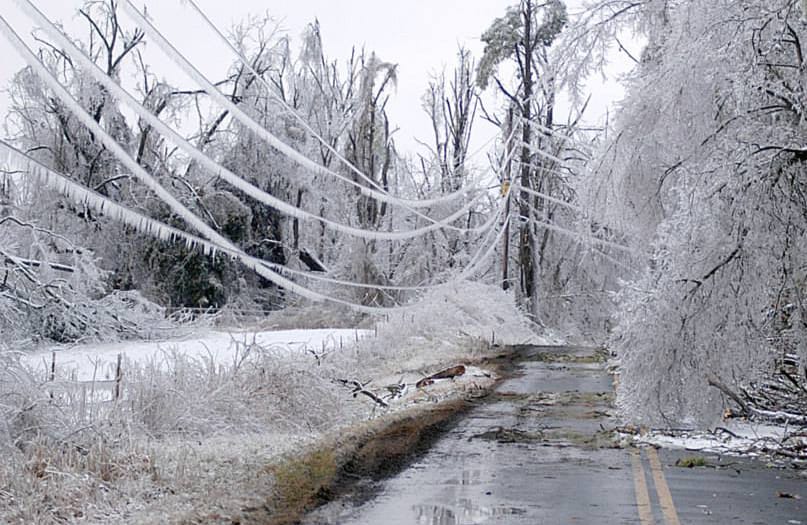
    Texas Snowpocalypse TestimonialMany of you are aware of the situation in Texas, but I thought I’d share a couple of things I am grateful we’ve had on hand here in TEXAS.  Our town was like the Whos on the show Horton Hears a Who. We were on the rolling blackout schedule at first. Then they dropped our border town, saying we didn’t need help… There is a natural spring in town. Our town’s water plant required electricity to run and had no backup generator.  What a blessing to have the creek for those that needed it. Then toilets backed up into it, contaminating it because the processing plant also relied on power and was overflowing into it. Parts of our town were without power for days with no water. We couldn’t do the dishes and couldn’t wash clothing. Everything in our freezer thawed even though it was cold in our home. Our children loved this ‘glamping’ experience, and we did well, but many of our neighbors were mentally and physically not okay. Our town distributed bottled water the best they could, and we didn’t need to take any so others could be okay. The town also opened up the swimming pool so everyone could haul water for plumbing. They also provided free meals to those that could get to them. Pipes burst for many. Windows aren’t insulated in many homes. Roads were never cleared (no way to do it).

    What I’m grateful we had:

    • Zip ties
    • Pushpins to secure blankets over windows when power was out
    • Berkey water filtration system
    • Gas range (burners work with lighter, the stove didn’t work as it was electric we didn’t know that was a thing to put gas burners and electric underneath–had no way to start it without power)
    • Disposable plates and utensils
    • Candles/flashlights
    • Empty buckets
    • Plastic garbage bags
    • Plastic store bags to shove in cracks of doorways to keep cold out best we could
    • Tape
    • Food to eat that required nothing extra (we need more variety in the future)
    • Can opener
    • Books- we homeschool, and my husband reads to the family at night. Adding candlelight was magical.
      Large Cooler
    • Craft supplies and games (we don’t let the children play on devices, but they do watch movies, but they didn’t ask once for one as this was too much fun for them)
    • Inviting friends in as it was warmer together
    • Peace of mind–we were ok. We have holes and ways to improve, but these things were necessary.

    A couple of things that would have been more comfortable:

    • Generator and small portable heater
    • Clean home to begin with– we just moved and have boxes of things to unpack still, our laundry was backed up–washer and dryer both had wet clothing in them when the power went out, dishes hadn’t been fully done when the power went out.
    • We have 5 children, 7 and under, two adults, and a dog.

    This isn’t over, and we might lose power and water again, but for the last 12 hours we’ve had these things back, we have been counting our blessings. There is more to add, I’m sure, but here is a start.

  • Marti’s Corner – 07

    Marti’s Corner – 07

    Marti's Corner at City PreppingHi Everyone,
    Being prepared means trying to plan for a variety of contingencies. Having no power is one of those possibilities. I’m sure that most Texans could NEVER have foreseen having no power in the middle of freezing weather. In Texas!!!! Now is a good time to ask, “What if that happened here?” My Indiana peeps are saying, “And your point is….????” California peeps—– could you stay warm? Could you cook dinner? As our hearts reach out to friends and family who are experiencing these extreme difficulties, just keep in mind that you could be next, whatever the disaster may be. THAT’S why we prepare.  This woman’s wet hair froze as soon as she stepped outside | Your Morning – YouTube

    NOTES:

    * Garden Update. I have planted some of my broccoli seedlings and cauliflower seedlings into the ground. My other plants are just hanging out, waiting for March 1. I’ve been leaving them outside at night unless the temps are in the low 40’s, then I bring them in. They are actually okay as long as it doesn’t freeze. But I’m still babying them along.

    * Facebook Page: Our Prepared Community also has a ton of information. If you click on the videos button, you will see about 25 videos covering everything from natural remedies to evacuation plans. It’s a great resource! Here is a link to the Water Sanitation Class.

    LONG TERM FOCUS: Lentils

    Lentils are legumes – cousins to beans. Lentils can be green, red, yellow, black or brown. They are full of nutrients with no fat and lots of fiber and protein. Lentils cook much faster than dry beans and don’t need to be soaked. To cook, just rinse and boil 3 cups of water to 1 cup of lentils. They are tender in 15-20 minutes.
    SHORT TERM FOCUS

    Think about all the extra ingredients that you would need to make your beans, or lentils, or split peas taste NOT blah. You can dehydrate carrots and celery quite easily. Just wait until they go on sale. You can get 25 pounds of carrots for about $7. And if you watch, you can get celery for 3 or 4 stalks for $1. I almost never use fresh celery. I’m not a fan of fresh celery, so after I put two or three stalks in the dinner, the rest just spoils in the fridge. Instead, I just keep a pint jar of dehydrated celery on my shelf and sprinkle in 1-2 TB. Same with bell peppers. Watch for sales – 4 peppers for $1 then buy a lot and dehydrate!!!

    The recipes below call for:

    Next time you go to the store, just get something on this list. Maybe it will be something you use often. Stick it aside and rotate it in.

    You can dehydrate carrots and celery quite easily. Just wait until they go on sale. You can get 25 pounds of carrots for about $7. And if you watch, you can get celery for 3 or 4 stalks for $1. I almost never use fresh celery. I’m not a fan of fresh celery, so after I put two or three stalks in the dinner, the rest just spoils in the fridge. Instead, I just keep a pint jar of dehydrated celery on my shelf and sprinkle in 1-2 TB. Same with bell peppers. Watch for sales – 4 peppers for $1 then buy a lot and dehydrate!!!

    72 HOUR KIT FOCUS: 

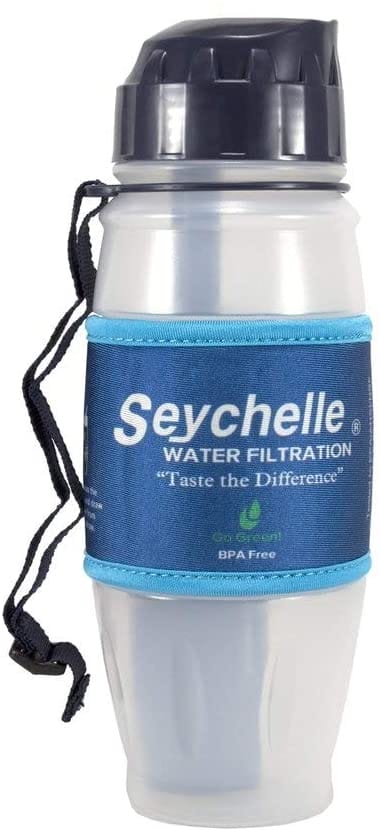
    Water filtration These are really handy to have in your kit.
    Seychelle 28oz Flip Top Water Filter Bottle StandardThis bottle treats up to 100 gallons of water. It eliminates viruses and bacteria 99.999%. AND, the filter is replaceable. In terms of your pack, it will allow you to gather water from anyplace, then transport that water and filter it for use. Even if you didn’t get one for each pack, but had one per family, you would be able to give everyone a cup of purified water from any source.

    FOOD STORAGE RECIPES

    Perfect Pot of Lentils
    From the webpage: Cooking Light. https://www.cookinglight.com/recipes/a-perfect-pot-of-lentils

    Heat a medium saucepan.
    Add 2 TB oil and swirl to coat. Add
    3/4 c. sliced carrots
    3/4 c. chopped shallot
    4 cloves minced garlic
    2 TB tomato paste
    Cook 4 minutes, stirring frequently.
    Add:
    2 c. green or brown lentils
    1 TB chopped fresh thyme
    4 c. water
    Bring to a boil. Cover, reduce heat, and simmer 30 – 35 minutes or until lentils are tender. Remove from heat. Let stand 10 minutes. Stir in:
    2 TB soy sauce
    1 TB Dijon mustard
    1/2 tsp salt
    1/4 tsp black pepper

    Lentil Soup
    This soup is really delicious – and hearty. It makes a ton, so I usually freeze the leftovers or share it with someone.

    Rinse 1 lb. lentils. Put lentils in a pot and cover with boiling water. Let sit for 15 minutes. Drain and remove from the pan.
    Using the same pan, sauté:
    3 large onions diced
    4 c. leeks
    1 TB chopped garlic
    1 TB fresh thyme
    1 tsp cumin
    1 TB salt
    1 1/2 tsp pepper
    When onions are tender, add:
    4 diced carrots
    3 stalks celery diced
    Saute with the onions for a few minutes to let them absorb some of the flavors.

    Then add:
    2 quarts chicken stock
    1/4 c. tomato paste
    drained lentils
    2 Kielbasa sausage sliced
    splash red wine (optional)
    Simmer 1 hour.
    To serve, sprinkle with Parmesan cheese

    Lentil Barley Stew

    1 medium carrot sliced
    1 medium onion diced
    1 medium parsnip peeled and sliced
    3/4 c. lentils, rinsed
    1/2 c. barley, rinsed
    28 oz. vegetable (or chicken) broth
    2 tsp dried parsley
    1/4 tsp pepper
    Bring to boil and reduce to simmer for 25 minutes until done.

    That’s all for this week.  
    Marti 

  • Marti’s Corner – 06

    Marti’s Corner – 06

    Marti's Corner at City PreppingHi Everyone,
    Disclaimer: I’m NOT an expert at anything. But over the years, I’ve had a lot of experiences and tried a lot of things: canning, sourdough baking, gardening, knitting, cooking, etc. At the same time, I’m still learning about canning, sourdough baking, gardening, and a host of other things. This is a continuing adventure for me. Preparedness is part of my routine and never far from my thoughts.

    NOTES:

    * Planning my garden. Another disclaimer: I don’t really have a “garden” plot. I more or less have pots everywhere. I find this system is NOT my favorite, but my husband has strong opinions, and so I don’t always get my way. I’ve been debating how to stake up my tomatoes.” Last year, the plants were about 10 feet tall. I had a ladder out by the fence that I climbed up and down to put the shade cloth on and off. It was such a pain. I started with tomato cages (the large ones), then added a 6-foot stake in the center of the cage, then ended up putting another cage on top of the first one (upside down). I have GOT to find another way. This gardener shows a dozen different ways to trellis a plant up. 10 Trellising Options for Containers & Earth Beds: Tomatoes, Cucumbers, Squash, Melons & More!  I like the idea of weaving. This gardener talks about the pros and cons of staking and caging.  Staking vs. Caging Tomato Plants – PROS and CONS of Each Method | How to Support Tomato Plants.

    * I wanted to show you one more thing. I have been using fabric planting bags. See the picture below. There are 3 sizes: 10-gallons, 7-gallons,Fabric Pots 5-gallons. They are perfect for me because I can move them around (they have handles). Amazon.com : Cavisoo 10-Pack 7 Gallon Plant Grow Bags, Heavy Duty 300G Thickened Non-Woven Aeration Fabric Pots with Reinforced Handles

    * Even if you don’t plan on having a garden, it would be a good idea to pick up 5-6 (or more) packs of seeds at the grocery store. Just include them as part of your preparedness JUST IN CASE!!

    *

    Apple Peeler

    Apples are on sale locally this week for 2 pounds for $1. I’ve been thinking about making and canning some apple pie filling. Canned Apple Pie Filling Recipe | Allrecipes. This recipe calls for 6 pounds of apples ($3) and makes 7 quarts. It takes 2 quarts for 1 9-in pie. You just need a pot big enough to cover the jars with water. My daughter bought me one of these and I don’t know how I EVER lived without it. They are AMAZING!!


    LONG TERM FOCUS: Beans

    Beans, Beans, BeansIt is recommended that you soak beans before cooking them. They need rehydrating.
    Long term soak: wash and sort and put in a pot of cold water overnight. Okay, let’s be frank. Who can remember to do this? Ugh.
    Short term soak: my favorite: Boil for 2-3 min. Turn heat off, cover, and let sit for 2 hours – or until you get back from doing all your errands. Dry beans absorb the same amount of water in the short soak as they do in the long soak. The short soak helps reduce hard-to-digest complex sugars by 80%. This helps cut down on intestinal gas. (Preparedness Principles, Barbara Salsbury, p62). Don’t add salt or any spices until after the soaking.

    Always, always, discard the soaking water and start with fresh water when you get ready to cook. Really helps the beans digest easier.

    What about old beans? THAT’S the question everyone wants to ask because we all have those 20-year-old cans of pinto beans under the stairs. As beans get old, the outside skin gets tough and won’t soak up water. Many people use a little baking soda in the water. Baking soda is an alkali. “Some nutritionists do NOT approve of using baking soda because it tends to destroy the thiamine or Vitamin B content.” (Preparedness Principles, Barbara Salsbury, p62).

    Don’t throw old beans away. You can “crack” them and open them up so they will absorb water.
    #1 Use a grinder and add the beans a little at a time. Don’t “grind” into flour, just crack.
    #2 Use a sturdy blender and pulse a few times
    #3 Put the beans in a double baggie and smash it with a hammer or run over it with the car.
    Don’t mix old beans and new beans when cooking.

    SHORT TERM FOCUS: Tomatoes

    People have asked me about tomato powder. I bought some once. It’s pretty cool. Add a little water, get tomato paste. Add more and get tomato sauce or tomato juice. BUT, after just a few weeks, that tomato power was hard as a rock. No amount of scraping could get any out of the jar. I threw it away.

    THEN, I tried making my own. I dehydrated some tomatoes and tried running them through a grinder. All I got was a sticky, gooey mess. (Were they not dry enough? Not sure, but I never did that again!) In fact, I’ve not had good luck drying tomatoes at all. I HAVE heard from people who dehydrate tomato sauce. It turns out like fruit leather. Then they take it camping or backpacking and use it in meals. Kinda cool.

    What I have always done in the past is to just can “diced” tomatoes. This is what I cook with most. If I find a good buy on tomatoes this year, I might try making the sauce from last week and canning it. But diced tomatoes are my go-to item. Here are some items you might want to just purchase extra of catsup, tomato sauce, diced tomatoes, tomato paste, crushed tomatoes (although in a pinch, you could just run your diced tomatoes through the blender), and chili sauce (I like to use this for sloppy joes). Store what you eat. Catsup turns brown after about a year (maybe sooner if it is stored in a warm place). Tomato paste also does not last long. But tomato sauce will last for several years. I have 2-3 flats that I rotate. They are in a cupboard up in the laundry room. 🙂

    72 HOUR KIT FOCUS: 

    In an emergency, if you have to evacuate (especially in case of fire), you will want to take things that cannot be replaced: pictures, documents, etc. Having all the scrapbooks together in one location is a good idea. Having a notebook with insurance, mortgage, medical records, birth certificates– is a great idea. BUT, just as great would be to just have pictures of these things on your phone or on a flash drive. You can tuck a flash drive into EVERYONE’s kit. If it is overwhelming to try and get it into a notebook, just take out your phone and snap away. You can even take pictures of every page in the scrapbook.

    FOOD STORAGE RECIPES

    Award-Winning White Chili
    Yes, it’s true. I won first place at the Church Halloween Party. LOL

    1 lb canned chicken OR 2 chicken breasts cut in small pieces. If using raw chicken brown chicken in
    1 TB oil with
    1 chopped onion (1 TB dehydrated reconstituted)
    3 cloves garlic chopped
    1 tsp cumin
    If using canned chicken, just add everything to the beans.
    In a large pot, add 3 cans of Northern white beans, 1 can of garbanzo beans, 1 can of white corn, 1 can chopped green chilis, 2 tsp chicken bouillon. I don’t drain anything. AND I don’t have to add any extra liquid.
    Simmer together for 1 1/2 hours. Top with jack cheese if desired.

    Southwest Chicken

    4 boneless, skinless chicken breasts
    1 c. picante sauce
    1 pkg taco seasoning
    2 c. water.
    Let the chicken simmer in the water for 10 min. Then add:
    2 c. Minute Rice
    1 c. drained black beans. Stir in.
    1 c. cheddar cheese sprinkled on top.
    Cover and let cook 5 min.

    Split Pea Soup
    I fell in love with split pea soup when we lived in Utah and could buy Lysander’s soup at the grocery store. But, it is not widely available online or in the store. I don’t know what seasonings are used, but the soup is just delicious. Here is the recipe I used last time. There are no “seasonings” except salt and pepper. The added ingredients add flavor, but when I get the chance, I’m stocking up on the Lysanders!!!

    Soak 1 lb peas in water overnight (see above)
    Brown 1/2 lb bacon (I’ve used ham as well)
    Add 1 diced onion (1 TB dehydrated, rehydrated)
    2 celery stalks diced
    2 diced carrots
    1/2 lb pork sausage
    Drain the peas and add to the meat/onion mix
    Add 2 quarts of chicken broth. Simmer until peas are soft and thickened.

    That’s all for this week.  Do something to be prepared.
    Marti 

  • Marti’s Corner – 05

    Marti’s Corner – 05

    Marti's Corner at City PreppingHi Everyone,
    I hope you enjoy learning along with me as I practice being prepared.

    NOTES:

    * I want to call this the tale of two sprouts. Planted on the same day.

    These are tomatoes

    Tomato Sprouts compared

    These are broccoli

    Broccoli Sprouts grown in window sills compared

    I wish I could say that the healthy plants are mine. But alas, not so. All these plants were planted on the same day. My daughter took hers home. SHE grew the ones on the left. MINE is on the right. So what went wrong? She put hers in her kitchen window. So did I. But my kitchen window has a tint film on it to block afternoon heat. It also blocks sun UV rays, which plants thrive on. You can see that the broccoli plants are long and “leggy.” They are looking for the sun. They stretch too long, and the stems can’t support the weight, then they fall over and die. I even bought grow lights, but evidently, they just didn’t give the plants enough light.

    LUCKILY, I always double and triple plant. In other words, I put 2-3 seeds in each little planting space. So I went to my daughter’s house, and we separated all her healthy plants, and she shared with me. Now, if I can just keep them alive for another few weeks…

    Because I have no good light inside, I’ll just have to take them outside during the day and bring them in at night. (It’s a pain to be sure!) HOWEVER, you have to be careful with this too. Start slowly. One hour the first day. Then add an hour each day. This is called hardening off. Meanwhile, I’m going to replant and see if I can get better results by taking them outside as soon as they sprout. Gardening, for me, is just practicing – and learning!

    WHY, you may ask, don’t I just go to the Gardening Center and buy plants? Don’t think I haven’t thought about it. But I want to grow some specialty tomatoes (bred to avoid splitting caused by wide fluctuations in temperature) and some heirloom veggies. You don’t always get those at the garden center.

    LONG TERM FOCUS: Beans

    Beans, Beans, BeansThe whole category of “legumes” includes beans, split peas, lentils, and nuts. They are a great source of protein. “One cup of cooked adzuki beans contains 17 grams protein and only .2 grams of fat.)”

    Variety is the key to any great diet. Many prepper websites offer black beans, white beans, and pinto beans in #10 cans. But you can also buy adzuki beans, Anasazi beans, garbanzo beans, and lima beans (yuck). LOL Peas include green peas, snow peas, snap peas, split, and black-eyed peas. Peas are also high in protein and low in fat. Lentils can be yellow, orange, green, brown, and black. The nutritional value does not change with color. BUT, sprouted lentils contain additional amino acids, vitamins, minerals, chlorophyll, and enzymes. In addition, sprouted legumes are more easily digestible. Lentils are my personal favorite thing to sprout. I buy this: Organic Lentil Salad | Crunchy Lentil Fest Sprouting Lentils
    This week, consider what legumes you have stored. Think about adding some diversity. If you have #10 cans of beans, consider buying some other types (lentils, garbanzo beans, etc.) from the store on your regular grocery shopping trip. Here in So. Cal, I know that Stater Brothers has a good selection of dried beans, split peas, and lentils.

    SHORT TERM FOCUS: Tomato Sauce
    Invariably, tomato sauce will go on sale for 5 cans for $1. THEN, I’ll buy 2 flats of 24 cans each. 48 cans + 2 = 50 cans for $10. It takes me almost a year to use a flat. Then I just replace it. I’ve never made tomato sauce. Frankly, it’s a toss-up when you compare the cost of tomatoes plus the work involved. BUT, I always have hope that my tomatoes will produce a lot, so I watched a few videos and found this one.  No More RUNNY Sauce! I WISH I knew THIS when I started. She doesn’t use ANY special equipment, and her sauce looks great!!!

    I have opened tomato sauce that is 5 years old, and it’s fine. However, tomato paste does NOT last that long. After 1 – 1 1/2 years, it starts to brown. It probably won’t make you sick, but it is unappetizing, and I just throw it away.

    I watched another video where the cook made fresh tomato sauce with garlic and basil.   How to Make Tomato Sauce From Fresh Tomatoes: Italian Cuisine.  It looked really good, and fresh, and was probably delicious. But I wanted something where the final product was similar to what I was used to using.

    72 HOUR KIT FOCUS: Emergency Contacts

    If you are like me, I am not even sure what my husband’s phone number is. I’m lucky I can remember my own number. At a minimum, your family should have an out-of-state number in case of emergency.

    If you have young children, you should have an emergency contact list posted where the babysitter can find it. It should include both parents’ numbers, the number of the out-of-state contact, and the number of a nearby neighbor they can call if needed. ALSO, it should have your address. Sometimes in a panic, you can’t remember anything, and even though most emergency agencies have GPS, it would be wise to be able to give them your address.

    Your 72-hour kit should include a list of emergency numbers: parents, children, neighbor, church clergy, etc. Print it up on a 1/4 – 1/2 sheet of paper. Make a copy for EVERYONE’s bag. Go down to the Fed Ex store and laminate it. It’s pretty cheap. It should slide right into the pack. Consider including passwords to any off-site storage units or gates. Don’t include those addresses (I don’t want to help any crooks), but it might help you if you are stressed.

    MISC FOCUS: Toilet Paper

    Get some!!! Then, get some more. Put it in the attic, put it in the garage rafters, put it in large clear trash bags, and store it on the side of the house. Just do it. Figure 1 roll per person per week. It takes up a lot of space – I get it. But we all saw last year what it was like to have no supplies coming in. Don’t want to store a year? Store 3 months. Next week, I’ll talk about what to do when/if you really DO run out!

    FOOD STORAGE RECIPE

    Rice & Beans with a Bam
    From Survival Mom by Lisa Bedford
    Remember: rice and beans make a full protein. It’s a good combination.

    1 TB olive oil – heat and sauté
    1/2 c. chopped onion (about 1 TB dehydrated – reconstituted)
    1/4 c. chopped red bell pepper (you can use either freeze-dried or dehydrated). Cook for about 5 minutes.
    Add 3 minced garlic or 1/2 tsp garlic powder and simmer for about 1 min. more.
    Add:
    1 c. water
    2 tsp chili powder
    1 tsp salt
    1 tsp ground cumin
    1 tsp dried oregano
    1/2 tsp dried coriander
    1/4 tsp ground red pepper, optional
    3 15-oz cans black beans, rinsed and drained. (This is the same as 1 lb. dry black beans soaked and cooked)
    Bring to a boil, reduce and cover. Simmer for 10 minutes until thoroughly heated.
    Meanwhile, cook rice: 4 c. water, 2 c. rice, 2 tsp salt.
    Serve beans over cooked rice. Sprinkle with cheese.

    Chili
    From Survival Mom by Lisa Bedford
    Everyone probably has their own chili recipe. In fact, I find chili to be kind of a dumping pot. Throw in some bell peppers, or corn, or mushrooms, or whatever! The base of this soup is tomato sauce, but I’ve used tomato soup before and liked it just as well.

    Combine in one pot:
    4 15-oz cans kidney and/or black beans
    strained and rinsed
    3 8-oz cans tomato sauce
    2 TB dried chopped onions
    2 TB chili powder
    2 tsp cumin
    1/2 tsp garlic powder
    1/8 tsp pepper
    1-2 c. cooked ground beef
    Simmer for about 30 minutes to let all the flavors blend together.


    That’s all for this week.  Do something to be prepared.
    Marti 

  • Marti’s Corner – 04

    Marti’s Corner – 04

    Marti's Corner at City PreppingHi Everyone!!

    NOTES:

    * Sooooo, thank you Robert DeVault who contacted me about my blueberries. It prompted a search on how to increase the yield of my plants. The low production might be because I need to lower the Ph in my soil. My problem has always been knowing what the Ph is in the first place!!! Then I found this: How to Use Vinegar and Baking Soda to Increase and Decrease PH in Soil.

    BlueberriesYou don’t need a testing kit. You just need vinegar and baking soda. The short version is to mix two small samples of soil with distilled water. Add 1 TB of vinegar to one and 1 TB of baking soda to the other.

    If the vinegar starts to fizz and bubble, the soil is alkaline. Plants that love alkaline include: asparagus, beets, cauliflower, kale, sweet peas, garlic, pumpkins, spinach

    If the baking soda sample starts to fizz, the soil is acidic. Plants that love acidic include blueberries, azaleas, hydrangeas, daffodils, marigolds, gardenias, sweet potatoes, parsley, peppers, potatoes, beans, broccoli, carrots, cabbage, cucumbers, squash, grapes, raspberries

    You can add vinegar to the soil to make it more acidic. 1 c. vinegar to 1-gallon water. OR you can add baking soda to the soil to make it more alkaline. 1 TB baking soda to 1-gallon water.

    Although Robert insists I should get a real testing kit that gives me more precise Ph numbers, I’m probably just not going to do that. My initial easy soil test says my soil is slightly acidic. So, as soon as the rain subsides, I’ll add some vinegar and call it good for a while.

    Vanilla beans

    * Making your own vanilla. Have you seen the price of real vanilla lately? My entire life I always used “imitation” vanilla. UNTIL I tried the real thing. Now I can’t go back. My last bottle I bought at Costco was about $25!! (Of course, it should last a year at least) But, Yikes! So, I started researching how to make my own. I cleaned out my cupboard and found two great bottles (I think one was Worcestershire sauce and the other was rice vinegar) Anyway, I’ve cleaned the bottles and I’m just waiting for my vanilla beans to arrive. Homemade Vanilla Extract – How to Make Vanilla Extract From Scratch.

    * Ham Radio Test. I found this online. You can use this app to study for the test.‎ HamStudy.org on the App Store. The app is $3.99. I did NOT use it and claim no knowledge of its efficacy. THIS is the one I used. HamTestOnline™ I had to pay $39 for a year’s subscription, but it taught me so well, that I passed the test easily. There is also a Radio Club that created YouTube videos. I should go back and review them myself.  West Desert Amateur Radio Club – YouTube

    LONG TERM FOCUS: Oats
    Oats

    Somebody asked me about steel cut oats. So here is the skinny, taken from Food Storage Powerhouse, by Claudia Orgill.
    There are four kinds of oats:
    1. Whole oats, sometimes referred to as oat groats. These are oats in their whole form. They can be sprouted, tossed into soups, cooked, and eaten as a warm cereal. They can also be ground and used in gluten-free breads.
    2. Steel-cut oats. These are whole oats that have been cut down into smaller pieces. They can be tossed into soups or ground into flour. They are also good for hot cereal. My daughter thinks they are a game-changer. Me? Not so much.
    3. Rolled oats – old fashioned – These are pressed and flattened whole oats. They cook more quickly than whole oats or steel-cut oats. Old Fashioned oats are more nutritious than quick oats or instant oats. They also have a longer shelf life.
    4. Ground Oats. These are oats that have been ground down to a powder. Not recommended for long term storage. But the oats you do store can be ground and made into powder.

    Storage: Oats in airtight containers with oxygen absorbers or diatomaceous earth will be good for 30 years or more. You can use 2-liter bottles, Mylar bags, or buckets.

    And how much? The back of the oatmeal container says ½ c. dry oats = 1 serving. That’s true, but it’s not much if it is your whole breakfast. Better plan for ¾ c. dry oats instead.
    So let’s do some math. There are 2 of us. That’s 1 ½ c. for each breakfast. If we have oatmeal twice a week, for 6 months, that’s 52 oatmeal breakfasts times 1 ½. 78 cups of oatmeal. One container has 15 cups. 78 / 15 = 5.2 So, 5 48-oz containers will last not quite 6 months.

    In actuality, we don’t eat oatmeal twice a week. But I try to have 5-6 containers on hand.

    SHORT TERM FOCUS: What else can you store for breakfast?
    This month we’ve talked about hot cereal, cold cereal, and syrup. What else would you need?
    If you are going to store “add water only” pancake mixes, you won’t need much else. But remember, those are only good for about a year, then the leavenings go bad. So you might want to store baking powder. BUT….. it will also go bad after a year or so, so buy 2 of them about 6 months apart, and rotate!!!

    And what about eggs? I prefer to buy dehydrated whole eggs instead of freeze-dried scrambled eggs. Emergency Essentials® Whole Egg Powder Large Can. I was worried about how they would taste. So I made some scrambled eggs. My husband didn’t notice any difference. In fact, if you have ever had complimentary breakfast at a hotel, or in any place where they serve cafeteria style, you are probably eating powdered eggs. The link above says the eggs are about $29. IF you watch and search a little, you can probably find them for about $21. Then – buy up. And, you can dehydrate your own eggs. So next time eggs are really cheap, usually around Easter, you might want to get several dozen and try this.  Dehydrate all those eggs! – YouTube. He shows you how to dehydrate overnight, and then reconstitute.

    72 HOUR KITS

    Make your kit fit your needs. Does EVERY person need a backpack? Where do you keep them anyway? How often do you have to update them? I can’t answer that for you. I can only tell you what “I” do. We have two packs, one for each of us, and we keep them in the cars we drive the most. If we are ever together in the car and need those packs, we are going to have to fight over who gets the sleeping pad and who gets the 98 cent rain cover. LOL Other than that, each kit (car) has a first aid kit, flashlight, small stove and matches, food, etc. Each pack weighs about 15 lbs. Every spring (usually the first part of April) I take out the food and decide what to keep and what to rotate. Some of the food in the packs we don’t normally eat i.e. instant oatmeal or Chef Boy R Dee mini-meals. But they work in the packs because they are lightweight and easy to prepare.

    You probably have food on your shelves that you can throw in the pack right now: granola bars, Top-Ramen, fruit snacks. In a later post I will show you exactly what “I” have, but you might want to think about what will work for you.

    If you have small children, consider 3-4 “tubs” you can stack in your garage. One could be “cooking” things, one could be first aid and sanitary things, one could be extra clothes and blankets. If you had to leave in a hurry, you could just load the tubs in the car and be off.

    MISC: Water

    Are you wondering how to store water in 55-gallon drums? Or in 5-gallon bottles? Here are some good sites that will give you that information.

    Videos:
    8 Best Water Storage Options for Emergencies – Kris here at CityPrepping shows a couple of options.
    How to store backup water in your garage in 55-gallon barrels – Kris, again, explaining the 55-gallon barrel option.

    Webpages:
    How to Store Water for Drinking or Cooking
    How to Store Water Long Term: 12 Steps (with Pictures) – wikiHow
    5 Myths about Water Storage – Be Prepared – Emergency Essentials

    FOOD STORAGE RECIPE: More oatmeal recipes

    Delicious Oatmeal Pancakes
    from Basic Food Storage Cookbook, from the South Jordan Utah River Stake, 2003

    1/2 c. whole wheat flour
    1/4 tsp salt
    1/3 c. powdered milk
    2 TB sugar
    2 tsp baking powder

    Stir until blended.
    In a small bowl, beat 2 egg whites until stiff. Set aside.
    Combine 2 eggs yolks, 1 c. water, 3 TB oil, and 1 c. oats. Mix with dry ingredients, then fold in egg whites.

    Testing Comment: “The recipe was a little complicated when preparing, but my family enjoyed the taste just as much or perhaps more than traditional pancakes. They were much more filling than a traditional pancake.

    Oatmeal Cake
    from Basic Food Storage Cookbook, from the South Jordan Utah River Stake, 2003

    Mix the following and let sit for 20 minutes
    1 1/2 c. boiling water
    1 c. oatmeal

    Cream together:
    1 c. sugar
    1 c. brown sugar
    1 stick softened butter
    2 eggs

    Add oatmeal mix to creamed mixture and beat until blended. Then add:
    1 1/2 c. flour
    1 tsp baking soda
    1 tsp salt
    1 tsp cinnamon
    Pour into greased 9 X 13 pan. Sprinkle with topping:
    3 TB butter softened
    2/3 c. brown sugar
    1/2 c. chocolate chips
    1/2 c. nuts, chopped (pecans or walnuts)

    Bake 375 degrees for 25-30 minutes

    Barbecued Beef Patties or Meatballs
    from Basic Food Storage Cookbook, from the South Jordan Utah River Stake, 2003

    Mix 1 lb. ground beef
    1/2 c. rolled oats
    1 TB dry onions (note – I like mine reconstituted)
    1 egg
    salt
    pepper

    Shape into patties or meatballs and brown in skillet. As they cook, mix together
    1 TB Worcestershire sauce
    2 TB vinegar
    1/2 tsp sugar
    2/3 c. catsup
    1/3 c. water
    2 TB dry onions (again – soak in hot water for about 10-15 min)

    Pour the sauce over the meat. Turn patties or meatballs in sauce now and then. Cook for about 15 minutes. Serve over rice, or potatoes, or pasta.

    Buy something for your preparedness this week,
    Marti Shelley

  • Marti’s Corner – 03

    Marti’s Corner – 03

    Marti's Corner at City PreppingHey Everyone!!

    NOTES:
    * I got to use my 72-hour kit!!! We had gone shooting out in the desert with some friends. One of the men brought his 10-year-old son. In a freak accident (that could have been much worse), part of the gun barrel exploded on firing, and a small piece of what was probably very hot metal grazed the boy’s neck. No one quite knew what had happened except that the boy suddenly started crying. After determining the cause, I was able to find my first aid kit in my pack. I had individual packets of “burn cream” and a large bandaid. Burns hurt because of the air. When you put on cream and cover with a bandaid, you take away the air, and the hurt decreases. Yay for being prepared!
    * I decided to plant my green peppers inside. It’s a good thing I did because they didn’t sprout. I still have time to plant more. Plus, I’m going to “test” the seeds. Put a piece of paper towel on a plate. Sprinkle 5-10 seeds on the paper towel. Cover with another paper towel and squirt with water. Spritz with water several times a day. After a week or 10 days, check for sprouting. If the seeds don’t sprout, they are dead. But, if they are sprouting, they can then be planted.
    * Garden seeds keep longer if you keep them in the fridge. I have not been doing that. I have a second fridge outside. I’m going to make room for my extra seeds. I hate to see them go to waste.

    LONG TERM FOCUS: Oats
    OatsGenerally speaking, the less a food has been “processed,” the better the nutritional value. Regular oats have more nutrition than quick oats, which have more than instant oats. But they each can have a place. I have instant oatmeal in my 72-hour kits, but I have regular oats in my long-term storage. If you store quick oats, be sure to rotate them more often.

    Oats can get boring, especially with extended use. Think of what YOU could put in it to vary the texture and taste. You could add dehydrated fruit, sunflower seeds, or nuts. Maybe you’d like cinnamon? Or honey? I have two blueberry bushes, and in the spring, we like to put a handful of fresh berries in our cereal.

    I’m going to interject and say a word about blueberries. If you grow blueberries, you need two bushes of different varieties to cross-pollinate each other. My bushes are in two large pots and get good afternoon sun and are very happy. I feed them in the spring and add compost once or twice in the summer. And, I don’t like blueberries – at least I THOUGHT I didn’t like them. But blueberries right off the bush taste different than those you buy. I never have enough for a blueberry pie with two bushes, but I have enough to add them to my pancakes, waffles, oatmeal, or muffins. Those bushes were a good investment and are now about 6 or 7 years old. So, yay!

    You can also store other hot cereals like Cream of Wheat or Malt-O-Meal. Personally, I LIKE Cream of Wheat. I have 2-3 boxes stored. I just vacuum sealed the entire box. You could also store in jars that have been vacuum-sealed or in empty, clean 2-liter bottles. In the short term, you probably don’t need oxygen absorbers, but it wouldn’t hurt in the long term.

    SHORT TERM FOCUS: Syrup
    Do you HAVE to store syrup? Do you USE syrup? If not, then DON’T STORE ANY!!!. But if you like syrup on pancakes or waffles, you should use either store a bottle or two OR make your own. (The recipe is below) MY husband likes peanut butter AND syrup on his pancakes. So, although we don’t eat many P B & J sandwiches, I have peanut butter stored just for him. Pancake syrup is one thing where you could easily have one open and 2 on the shelf ready to go.

    72 HOUR KITS

    As you start building your kit, you should think about what your kit will be used for.
    Ask yourself, which is the most likely scenario:

    a) you will be stuck on the freeway for hours
    b) you will get snowed in or delayed in your car
    c) there will be an earthquake that will destroy all bridges and overpasses, thereby stranding you someplace desolate
    d) there is a fire, and you have to evacuate
    e) the zombie apocalypse will happen on the very day you have to leave home for a meeting an hour away.

    Okay, you get my point. Probably NOT the last one. So for any MINOR reason, you will probably only need some granola bars, a little water, a blanket, a few dollars, a solar cell phone charger, and a deck of cards to keep you busy.

    But…… I always like to be prepared for the worst that could happen. My scenario is that I’ve gone to San Diego (about an hour and a half away), there is an earthquake, the roads are unusable, and I have to walk home. I’ve packed my kit accordingly.

    Get input from your family. Make some decisions, and start packing – even if it is just a change of socks.

    MISC: Water

    Did you know you can “gather” dew? This guy was able to fill a 16 oz. glass in about 3 minutes. It might be worth it to keep a “Shamwow” towel with your kit. For the sake of space, you could cut a towel in 1/2 or 1/4 and put a piece in each backpack.  Dew Collection for Survival Water

    Here is another useful item. Amazon.com: LifeStraw Personal Water Filter

    It’s called a personal water filter. There are several types. Basically, it’s a small water filter that can easily be packed or carried – for individual use. I have one of these in each of our packs. You can filter gutter water if you need to!

    FOOD STORAGE RECIPE:

    Maple Syrup

    1 c. corn syrup
    1/2 c. brown sugar
    1/2 c. water
    few drops of maple flavoring
    1 TB butter

    But wait….. there’s more….. You can make your own corn syrup:
    1/4 c. water
    1 1/4 c. sugar
    Mix and heat until sugar is dissolved.

    But wait….. there’s more….. You can make your own brown sugar too. This website has a video so you can watch how she does it. How to Make Brown Sugar – Gemma’s Bigger Bolder Baking

    So…… you can store syrup,
    OR you can store brown sugar and Karo syrup
    OR you can store white sugar and molasses

    Banana Oat Breakfast Cookie
    from Taste of Home Brunch and Breakfast Magazine

    1 c. mashed ripe bananas (about 2 medium bananas)
    1/2 c. chunky peanut butter
    1/2 c. honey
    1 tsp vanilla
    Mix until blended.
    2 tsp cinnamon
    1/2 tsp salt
    1/4 tsp baking soda
    Add and mix
    1/4 c. nonfat dry milk powder
    1/2 c. whole wheat flour
    Add and mix
    1 c. dried cranberries or raisins
    Mix in by hand.

    Drop by 1/4 cupfuls 3 inches apart on a greased baking sheet. Flatten to 1/2 inch. Bake 350 degrees for 14-16 minutes. Cool on pans for 5 minutes. Remove to wire racks. Serve warm or at room temperature. To reheat, microwave for 15-20 seconds.

    Till next week,
    Marti Shelley

    LIST OF LINKS:

    http://tacticalintelligence.net/blog/dew-collection.htm
    “Dew Collection for Survival Water by Tactical Intelligence.net

    https://amzn.to/3t0aYIn
    Amazon link for the “LifeStraw Personal Water Filter”

    https://www.biggerbolderbaking.com/make-brown-sugar/
    “How to Make Brown Sugar” by Bigger, Bolder Baking

  • Marti’s Corner – 02

    Marti’s Corner – 02

    Marti's Corner at City PreppingHey Everyone!!

    NOTES:
    * If you don’t have 2 weeks of food, PLEASE, do that immediately. This can be easy. Hamburger Helper, pasta and spaghetti sauce, Mac and Cheese, beef stew with an extra can of beans and corn, Fish sticks, 2 cans of chili and hotdogs (that can go in the freezer), whatever. Get 14 meals that you can stick under the bed (or in the freezer) and not use. Please, do this soon.
    * I planted my peppers. They are now hanging out in the kitchen with the tomatoes.

    LONG TERM FOCUS: Oats
    OatsOats are just one choice for storing “whole grains.” Other choices include amaranth, barley, rice, corn (cornmeal, popcorn, etc.), quinoa, rye, spelt, and wheat. Whole grains contain fiber and other nutrients. A good goal is to have 1/2 of the grains you eat be whole grains.  “The protein in oats is higher than that in wheat or rice. The protein in oats is nearly equal to meat, milk, and egg protein.” (Food Storage Powerhouse, Orgill, p34) Oats also provide vitamin B1, phosphorus, manganese, biotin, and other vitamins and minerals. This is one reason it’s a good storage choice. If you store oats in an airtight container and use either a dry ice technique, oxygen-absorbing packets, or food-grade diatomaceous earth, the oats will last 30 years or more. If you can store oats inside, in a closet, protected from water or rodents, they will last several years – long enough to rotate them.
    Oats, in general, include: rolled oats, steel-cut oats, whole oats (they look very much like wheat and can be sprouted or cooked as is), and ground oats (like flour) can be used to make pancakes or other bread type items. I practiced making oats in a thermos once. I added the oats, salt (just a pinch), and boiling water to a thermos. Then I let it sit overnight. In the morning, the oatmeal was perfect—a little milk and brown sugar and yum.

    SHORT TERM FOCUS: breakfast cereal
    My husband eats a lot of breakfast cereal. Me? Not so much. It’s not that I don’t LIKE breakfast cereal. I’d rather have leftover spaghetti, or enchiladas, or goulash for breakfast. Over the years, I’ve learned that

    * Cereal is not a LONG term item.
    * The bugs really like it.

    But, I like having it on hand so that we have a backup if we run out. AND, I really like Rice Krispie treats, so I try to keep Rice Krispie’s on hand.

    I currently have 5 open boxes of cereal in plastic containers that we eat out of. I have 7-8 cereal boxes stored, dated, and ready when needed. When I bring the boxes home from the store, I use packing tape to tape the top and bottom shut. That way, no bugs can get in, and if there are eggs in the glue (which I have heard can happen), they can’t get out. Once I started doing this, I have not had any problem with pantry flies in the cereal. (I have read, however, that this is not absolute. I’m only saying that it works for me.) I date the boxes with month and year of purchase, then stick them up on the highest shelf – out of the way. I only buy new cereal to replace what I take off that shelf. All the cereal I had that was two years old, or more was stale, and I threw it all away.

    Watch for cereal to go on sale, then pick up 2-3 extra boxes. Stick them aside.

    72 HOUR KITS: backpacks
    Before backpacks were popular, we carried our books to and from school in our arms. Yep, that was a thing. LOL Then, in the 1970s, bookbags were popular.  So, when I wanted to make individual backpacks for my kids, there really was no such thing. Hiking packs were super expensive. So I used old jeans. I tied a string around the pant leg openings, then folded the legs up and tied the closed openings to belt loops. That was their backpack. I just used a piece of rope to close the waist opening. Each child’s backpack had a change of clothes (buy these at a thrift store), some dried fruit, a flashlight, and I can’t remember what else.) We kept them in the garage.  Despite your “purpose” for having a 72-hour kit, you have to start with something you can carry, wheel, or throw into the car. Maybe you want to use 2 or 3 Lowe’s buckets. Maybe you want to use a rolling suitcase. Doesn’t matter, but get something. Think about that this week and try to come up with a plan. Then you can add to it over the next several months.

    MISC: Water
    Can you keep bottles of water in the car for long periods of time? Here is a good place to look for an answer: Is It Safe to Keep Your Plastic Water Bottle in a Hot Car?

    Bottom line: In a study of 20 bottles of water, kept at 158 degrees for several weeks, ONE of the bottles showed a small number of chemicals from the plastic. The FDA considers small amounts of Water stored in carBPA safe. A bigger risk is drinking from a bottle, then letting it sit in a hot car where bacteria can grow. A video on this site shows how the sun can be magnified by the water and burn the upholstery.

    Here is another site with some good ideas for keeping water in your car.  How to Store Emergency Water in Your Car – Super Prepper
    I DON’T keep water bottles in the car. But if I wanted to throw a few in there for a trip, they would be safe to drink. Just keep them out of the sun.
    You should have water that you can put in the car if you have to evacuate. Individual bottles of water are perfect for this: second choice, 1-gallon jugs from the store. Whatever you buy, you have to rotate. Trust me on this one.

    FOOD STORAGE RECIPE:

    Granola
    I’ve made this recipe several times and really like how it turns out. But it makes a lot, so I usually cut it in half.

    7 c. oats
    1 c. chopped almonds
    1 c. wheat germ
    1 c. sunflower seeds
    Mix together
    1/2 c. honey
    1/2 c. vegetable oil
    1/4 c. brown sugar
    2 tsp vanilla
    Mix wet ingredients together in a pan. Melt, but don’t boil. Pour over oats. Spread mix on 2 oiled cookie sheets. Bake 325 degrees 20-25 minutes, stirring occasionally. Remove from oven and add
    1 1/2 c. raisins

    No-Bake Cookies
    These are great in the summer because you don’t have to turn on the oven, which doesn’t heat the kitchen.

    In a saucepan, add:
    1/2 c. milk
    2 c. sugar
    1/2 c. butter (1 stick)
    1/4 c. cocoa
    Mix together and boil for 1 minute.
    Remove and immediately add:
    3/4 c. peanut butter (let it melt a little to cool off the chocolate)
    1 tsp vanilla
    3 c. oats
    Stir. Drop by teaspoons on parchment or tin foil. No need to bake. Just let cool.

    LIST OF LINKS:

    https://www.wideopeneats.com/plastic-water-bottle-safe/
    This link is titled, “Is It Safe to Drink Bottled Water Left in a Hot Car.

    https://www.superprepper.com/how-to-store-emergency-water-in-your-car/
    This one is How To Store Emergency Water in Your Car

  • Marti’s Corner – 01

    Marti’s Corner – 01

    Marti's Corner at City PreppingHi Everyone.  My name is Marti Shelley.  I’m so happy to be working with Kris and his team.  I’ve never thought of myself as a “prepper” – more like a “preparer”. (Is there even a difference?)   I’ve been canning food since the 70’s.  (Long time, right?)  I have seven children and 18 grandchildren.  I’ve learned so much over the years and made many mistakes, and am still learning.  I invite you to join me this year as I focus on getting better prepared for ANYTHING.  (Maybe not a Zombie Invasion, but I don’t discount aliens.)

    I’ve been thinking about my upcoming garden and when to start my seeds indoors for planting.  I’ve already started my tomatoes because I want them to be about 12 weeks old when they go outside.  And then I found this gem:  Seed-Starting Date Calculator | for Starting Seedlings Indoors | Johnny’s Selected Seeds  It’s an interactive worksheet.  YOU put in your last frost date (I put in March 1) and it tells you when to plant your seedlings indoors so they’ll be ready.  Awesome!  

    If you are wondering what that looks like at my house, here you go.

    Seedlings getting ready for the garden.

    The plants just sit on my kitchen counter.  If it’s a nice day, I take them outside for some sun, but I set a timer and only let them stay outside for an hour or so.  They’re babies after all.  All my windows are tinted, so they don’t get good sun inside.  Anyway, starting your plants inside is a good way to get extra growing time.  In my zone (9B), once the temps start reading 95-100, plants shut down.  They don’t like the excessive heat. So I want as much harvest as possible before that happens.

    If you don’t know your zone:  check out this page https://www.gurneys.com/hardiness_zone

    You put in your zip code and not only does it tell you your zone, but tells you which plants will grow best in your area.

    LONG TERM FOCUS:  January – Oats

    My focus this month is Oats.  Oats are part of the “whole grain” section of storage.  The recommended amount to store is 400 lbs of whole grains per person.  If this seems like a lot, consider that it includes wheat, rice, oats, and many other types of grains.  Also, consider that 400 lbs are barely over 1 lb a day.  

    We don’t eat a lot of oatmeal at my house, because we have access to fresh eggs.  But in a crisis, oatmeal could become a staple food.  My father remembers that during the depression, they often ate oatmeal for dinner just to have something filling to eat.Oats

    Oats are available in #10 cans through several sites (just google it).  But, your best bet is the grocery store.  Oats usually sell for about $3.25 for a large cylinder container.  I just buy them and stick them in the back of the closet – no special packaging necessary provided you don’t have rodents or a water leak.  I DO have oats in #10 cans, but I find they have a smell I don’t like when opened.  Some have suggested that you air them out by pouring the oats back and forth between bowls.  I’m sure that when the time comes, I’ll find a way to cook them or flavor them so they are edible.  Meanwhile, just buy and store as is.  Number 10 cans can be stored for years!  If you are storing as is, be sure to rotate.  Don’t like oatmeal?  Try making no-bake cookies.  (The recipe is below) Yum!

    SHORT TERM FOCUS:  Pancake mix

    You don’t need pancake mix, of course.  You probably already have ingredients to make pancakes.  But the mix is just so darn easy – and frankly, I like the Krusteaz mix better than homemade.  The problem with the add-water mix is that the leavenings will go bad after about a year.  You can add some baking powder to the mix for another year, but then, it’s just not good anymore – looks and tastes like sawdust (just guess how I know this?).  So now I only store what I can eat in a year.  For the two of us, this is a Family Size open on the shelf, and 2 more in storage – dated, so I can rotate them.  Is it enough for a year?  Probably not.  But then I’m not throwing away food either.

    72 HOUR KIT FOCUS: small water bottles and Sillcock key

    Water is heavy to carry around.  I don’t have any water in my 72-hour kit.  Instead, I have an empty water bottle and a Sillcock key.

    Never heard of a Sillcock key?  Check out this video from DropForged Survival  Key to the CITY! Most Important Urban Survival Tool!

    You will need a water bottle to carry water if you have any dehydrated or freeze-dried food in your kit. I do.  In fact, I have oatmeal.  Which means I need water and a small metal pot.  Something like a mess kit will work.

    I also have a flat of water I can throw in my car if I need to evacuate.  If that is your plan, make sure you write water on your “What I Need to Grab In An Emergency” sheet that is taped to the inside of your kitchen pantry door.

    FOOD STORAGE RECIPES: (just in case you actually have to eat what you have stored)

    Five-Grain Quick Bread

    From the Betty Crocker Whole Grains cookbook

    Quick breads do not have yeast and don’t need time to rise.  AND, this recipe is loaded with fiber from the oats and wheat flour.  Great to serve with soup or when entertaining.

    1 c. 5-grain rolled whole-grain cereal OR old-fashioned oats.  

    2 c. whole wheat flour

    1 c. all-purpose flour

    1/3 c. brown sugar

    1 tsp baking soda

    1 tsp cream of tartar

    3/4 tsp salt

    Whisk dry ingredients together.

    1/4 c. cold butter.  Cut into flour mix.

    1/2 c. golden raisins optional.  (I like raisins, but not always in bread.  I’ll probably omit this.)

    In a small bowl mix:

    1 egg

    1 1/2 c. buttermilk

    Reserve 1 TBS of this mix to brush on bread before baking.

    Stir buttermilk mixture into dry ingredients until moistened.  Turn out on the floured surface and knead 5 – 6 times until dough is combined.  Shape dough on a greased cookie sheet, into a 7-in round.  Cut a large X  1/4 inch deep into the top of the dough.  Brush top with reserved buttermilk mix.

    Bake 30-35 min at 375 degrees until the top is golden brown and the loaf sounds hollow when tapped.  Cool slightly before serving.


    No-Bake Cookies

    This is a pretty common recipe and can easily be found online if you want nutritional information.  (I’m pretty sure there is none — nutritional value that is)

    ½ c. milk

    2 c. sugar

    ½ c. butter 

    ¼ c. cocoa

    Boil together for 1 minute.  Remove and immediately add:

    ¾ c. peanut butter

    1 tsp vanilla

    3 c. oats

    Drop by spoonfuls onto tin foil or parchment paper.  Let cool.


    LIST OF LINKS:

    https://www.johnnyseeds.com/growers-library/seed-planting-schedule-calculator.html

    This is a link from Johnny Seeds.  I actually order a lot through them.

    https://www.gurneys.com/hardiness_zone

    This is from the Gurney’s Seed company.  It is an interactive page.

    https://www.youtube.com/watch?v=iEkooX5yjzQ

    This is a YouTube video explaining what a Silcock key is and how to use it.  I just chose one at random from another great prepper in the YouTube community.

  • 2 easy steps to start prepping

    New to prepping and not sure where to start?

    So you’re giving serious consideration to prepping. You’ve thought about the possibility of what could happen if you and your family are not ready for an event that leaves you without the basic necessities you rely upon every day. Whether it’s a hurricane, earthquake, flooding, riots, or whatever else is thrown your way, you want to be ready. You want to face the oncoming storm secure in the fact that you and your family have the basic necessities to survive.

    So now what? What’s the next step? Getting into prepping can be very overwhelming. If you Google “prepping” or any other combination of that phrase, you’ll be met with more information than you can possibly take in at once.

    My advice is to start with the rules of “3″. In any extreme situation the average person can not survive for more than:

    • 3 minutes without air
    • 3 hours without shelter
    • 3 days without water
    • 3 weeks without food

    Also consider this: after a typical local emergency (hurricane or earthquake), the infrastructure will be more than likely destroyed or temporarily disrupted while roads are made safe to drive on once again. During that time, expect the following:

    • Your normal first responder services (police and fire) will be overloaded focusing on saving as many people as possible. If a tornado hit a public school, movie theater or some other location with a lot of people, first responders will focus their efforts there, not the local neighborhood injuries. “Do the greatest good for the greatest number of people”. Don’t expect supplies and re-inforcements to come to serve you and your problems. You and your family might be on their own for awhile while the large groups are handled first.
    • Stores have enough supplies on hand for at least 3 days. If water to your house is disrupted, do you have enough water for your family for 2 weeks (or more)?
    • Gas stations will be down if electricity is knocked out. Expecting to escape town to go somewhere safer? Do you have enough gas to drive far enough to get away from the event (assuming everyone hasn’t already jammed up the roads trying to do the same)?
    • Roadways out of town. What if the major highways and interstates are destroyed during the event and you and your family can not get out?

    There is a real possibility you may not be able to just pick up and leave (or at least you need to consider this possibility). You might be stuck in-place for days or weeks. So assuming our house wasn’t destroyed in the event, what do we need to do to prepare? That leaves us with food and water as top priorities which in an urban environment, you’re not going to find these easily when there’s an emergency.

    1. Urban prepping and water

    Water needs to be a first priority.

    Water. Your body is composed of roughly 60% water. If your body starts losing it or if you drink water that is not sanitary, you’ve got a big problem. Without getting into a discussion about the stages of dehydration or water borne illnesses, let’s suffice it to say we want to avoid being unprepared when it comes to having enough drinkable water.

    In prepping, serious consideration needs to be given to getting a basic water backup in place. Out of all the things a prepper should be concerned about in an urban environment, having a clean supply of water (or the ability to filter/purify water) would probably top my list. While living in an area that doesn’t lend itself to having the ability to store large amounts of water can present challenges. But there are some easy remedies that are affordable and can be done incrementally to get you started.

    Storage space can be a limiting factor in urban water storage. You’re probably not going to have a 1000 gallon water storage tank sitting in your backyard. You may not have the room for it and the cost may be prohibitive to get something like this installed. The best solution that I have found that allows me to have small water storage units that are portable, affordable, stackable and can easily be carried or moved can be found here on Amazon. Small water tanks are portable in a time of crisis and you can incrementally purchase them as your budget permits.

    How much water do you need?

    The typical person takes in about 1 gallon/day. You might take in a lot less or more on some days, but that’s a good rule of thumb to start with.

    So if you have 2 adults and 2 kids in your home, let’s just go ahead and budget 4 gallons of water per day for drinking and probably cooking (that’s not even budgeting water for other things like sanitation), but that’s a good starting point. Don’t forget pets too in your considerations.

    How many days of water do you need?

    The typical starting point is 72 hours (3 days worth) and this is definitely nothing more than a starting point. Plan on building on top of that as finances permit. As pointed out above, the typical person can not live past 3 days without water. My long term goal is having a month’s supply of water. Start small and work up.

    How do you preserve your water to keep it from going bad?

    Water preservative is your friend. Water can begin to turn bad and develop some unwanted growth if not properly treated. You may think you can just toss the water into storage and clean it up when you need it. I wouldn’t recommend that. The time and energy you’d have to spend just to make the water drinkable isn’t worth the risk. Take a few simple steps now so when you need it, it’s ready.

    I use these water storage devices and rotate them every 5 years. When I dump them out, I clean them (soap and hot water), put in fresh water, drop in water preservative and then label the date on the side so I know when to rotate them next. Sure, it takes a few hours to go through and rotate all my water storage (done only once every 4 or 5 years), but if you’re life is on the line one day, it’s worth it I think.

    2. Urban prepping and food storage

    This one can be slightly simpler and easier to implement than the water approach above. With the water storage, there’s several steps that need to be taken, but with food, you can begin to simply add to your existing food storage. When you go to the store, grab a few extra cans of food. If something is on sale (that’d you actually eat), then load up on it. Got some coupons in the mail? Go and grab some of the products on your next trip to the store.

    Storage and organization

    Have a food pantry? Great, try to begin to organize things a little better. Put the older cans to the front and begin adding to the back with newer cans (be sure to rotate food and don’t let it expire if possible). In our house we rarely eat canned food. That’s fine, we still set up a small reserve in an out-of-way location that doesn’t tie up our pantry. In our home, we store the backup food in the closet under the stairs (I’ll discuss this a little more below).

    Comfort foods

    In your food preps, don’t overlook comfort foods. If you’re in a disaster, having comfort foods will help relieve stress to a degree and will help with the psychological effects of what’s happening around you. It might be small, but don’t overlook this.

    Which foods do I eat first in a disaster?

    After the power goes out, eat the perishable foods first. Those are going to be the foods that will go bad first so might as well get to them now before they’re not editable because you’re not going to be making a trip to the store anytime soon. Grab that milk and cheese or chicken you have in the refrigerator. There’s not a lot of time before they go bad, so better enjoy them why you can.

    Foods to store

    Try to store a good balance of protein/fats/carbs. Don’t have just a bunch of canned fruit, but be sure to grab canned tuna or chicken (or some other source of protein that can be stored away for periods of time). You may be required to do physical labor and having your body deprived of necessary macros like protein doesn’t help. Also consider the amount of sodium in the canned food. More sodium means more water you’ll need to consume. We want to make sure we’re not burning through our water if possible.

    Food rotation

    Keep an eye and food and water. If you’re keeping your oldest cans of food at the front of pantry and grab those first, rotate the ones from the back forward and put the new food you purchase at the back. It will become a habit and will help ensure you’re keeping food rotated at a basic level.

    Where to store your food and water

    Under your stairs is the strongest place in your house and is often the coolest and darkest area which is great to help prevent your food and water from spoiling prematurely.

    Do not store your food in the garage – the temperature fluctuation is not ideal for your supplies plus if a disaster strikes garages are not very strong (they’re often the first part of the house that collapses).

    Storing your food and water in multiple places in your house is also a smart approach. If a part of the house where you had everything stored gets hit (structural damage or theft), then you’re in luck…you had other supplies somewhere else. Ever heard “don’t put all your eggs in one basket”? This rule applies here.

    Types of food to consider

    Try and stock easy to prepare food. You’re probably not going to be cooking a full course dinner so try and find things that will go well together and that require minimum preparation. Also try and avoid foods that are going to require a lot of clean up afterwards. Remember, you’re probably not going to have running water so needing to clean up your cooking utensils is going to dig into your water supply quickly which is not good.

    This is why I’d advise having disposable utensils/plates/forks/spoons etc. as part of your preps. Cook the food, serve it on disposable plates/bowls and your clean process is to simply toss things into the trashcan. Easy.

    Future discussions

    Some may read this and ask where is medical and security? I would rank those #3 and #4 for starting preppers and we’ll get into those issues in a continuation of this article. They’re definitely important, but I’d recommend getting water and food in order. Following the steps above won’t break the bank and if you just start with a goal of 72 hours for food and water, you’re on the right path (and you’re ahead most Americans).