Your stored food is only useful if you can cook it.
Here, we’ll show you 4 meals you can easily cook after a disaster. We’ll use simple techniques to help you conserve your fuel, reduce cleanup, conserve water which may be precious, and maximize nutrition, leaving you with a satisfied, full feeling. We’ll also assume your home’s utilities may have been cut, so we’ll utilize practical and proven cooking. At the bottom of this page, you will find the ingredients and cooking instructions we use in this video, so let’s jump in.
NO BOIL PASTA
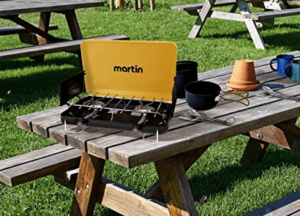
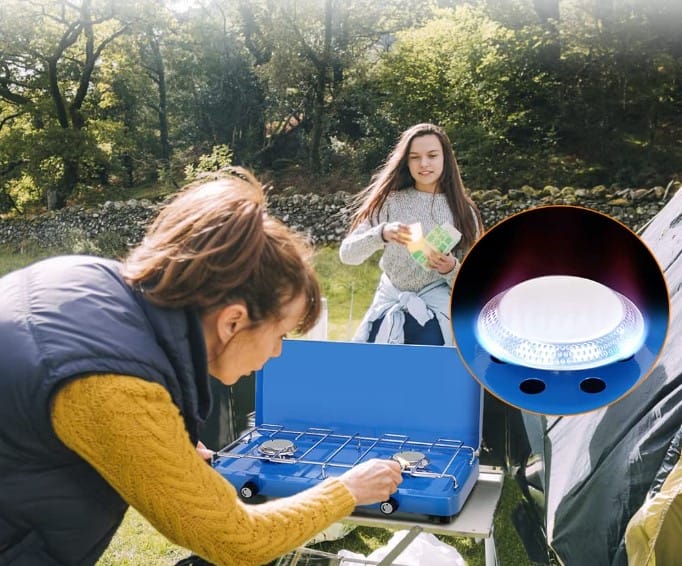 You don’t need to boil pasta, but you do need boiling water. For boiling water, we can use something like a simple camp stove with a propane tank or an induction plate connected to either a gas or solar generator. It’s important to understand that pasta does not cook because of the boiling water. It cooks because of the temperature of the boiling water. So, if you bring your water to a boil, add a pinch of salt to help maintain temperature, add your pasta, stir it, and put your lid on the pot. You can now turn off your heat source, thus conserving the fuel. The pasta will be softened and ready to eat in about 12-14 minutes. This is valuable information if you are trying to conserve cooking fuel or minimize outdoor open fires. Also, when cooking pasta, scoop the pasta out but don’t dump the water. The water can be used as a thickener for cooking because of its flour content. Wheat flour is 70-75% starch, so some of that separates
 out into the water. You can reuse all the pasta water as a base for soup or stew. Simply drop a bouillon cube in the water for a rich broth to sip throughout the day and night. Once cooled, you can drink it as a carbohydrate-rich energy drink. Mixing in the appropriate amount of powdered milk or drink mix will give back a richness that is sometimes lost in the dehydration, powdering, and packaging process.
PASTA CON CARNE IN WHITE SAUCE
Bring a pot of water to a boil. Add a teaspoon of salt or one 3-finger pinch. Add 2 ounces of dry pasta per planned plate served. Stir pasta with a few swirls. Turn off the heat source and place the lid securely on top. It will be done in about 12-14 minutes.
In a medium bowl, combine 2 cups dry milk powder, 1 cup flour, 1 teaspoon salt, 1/8 teaspoon pepper, 1 teaspoon garlic powder, and one stick butter. Or, if you don’t have butter, you can use butter powder which is shelf stable. Mix together with a fork until thoroughly combined.
 If you time this right, you will add the pasta to your mix, or you can scoop the pasta out and gently stir in a tablespoon of oil to keep it from sticking together. In a separate pan, warm 4 cups of water. You can use the already-warmed pasta water if your pasta is done cooking. With the water warm, turn up the heat source on the pan and slowly mix in your bowl of drier ingredients. Stir to prevent lumping. When smooth and slightly steaming, add seasoning to taste and any herbs, dried or foraged. The best herbs for this meal are basil, dill, or parsley. The herbs will freshen up the taste.
Finally, add 1 or 2 cans of canned meat with any of the canned liquid. Bring this to a strong simmer, then turn off the heat source, and add it to your cooked but strained pasta. Gently stir and serve.
The type of meat or additional additives will determine your end product. You have lots of latitude here. Add canned tuna, and you just made tuna with bechamel sauce, add canned chicken, and you have chicken alfredo, canned clams, and it is pasta in a white clam sauce. What we have created with this recipe is a basic white sauce. If you add dried parmesan, it leans towards an Alfredo sauce. Your white canned meats are going to be better in this sauce. Consider changing your herbs to more savory, like sage or rosemary, and beef bullion to your warm water before you mix in your dry ingredients.
PERPETUAL STEW/HUNTER’S POT/FOREVER SOUP/STONE SOUP
It has been a common practice, at least as far back as medieval times and likely even longer, to have a pot of stew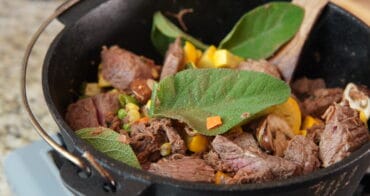 continually cooking. Your ancient ancestors survived on this. Pasteurization occurs if you keep the temperature above 145 degrees with the lid on for 30 minutes or more. If you use a can cooker or Dutch oven and keep that wrapped in blankets or a Wonderbag to slow the heat loss, you can easily store the food overnight and heat it up again in the morning with no health risks, so long as it stays above or relatively near while sealed that temperature point. If you have a campfire, you can simply set the pot in the proximity of the radiant heat of the fire in an area where you can hold your hand comfortably for around 10 seconds. Generally, when you can only hold your hand for a count of 6 to 8 seconds, the temperature is between 250 and 300 degrees.
Add 1 tablespoon of oil to a Dutch oven or a standard cooking pot with a lid. When the oil is heated, add 1/4 cup of dried minced onions, fresh green onions, or a bulb onion. Add a cube of beef bouillon, canned meat (such as roast beef along with the juices), or fesh meat–whatever you have. Once the meat is browned, add 2 or 3 canned vegetables or fresh vegetables or dehydrated vegetables that you have stored away: green beans, corn, potatoes, carrots, mushrooms, or whatever else you enjoy eating. Anything goes here with the vegetables. The only consideration is that some vegetables, over time, will completely cook down and thicken your stew like potatoes and carrots. The solution is to just add more water at the start of the day, Add 4-6 cups water, bringing the dutch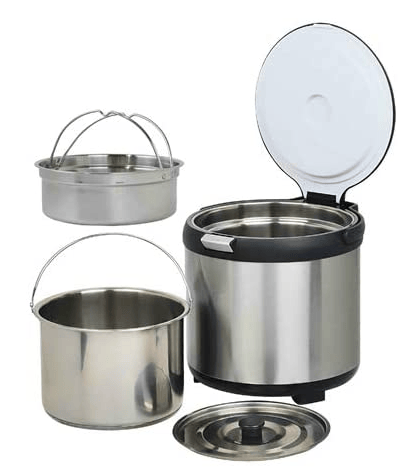 oven or pot to a near boil and add it to something like a Wonderbag to trap the heat and allow it to continue cooking. Or there are options on the market, such as the can cooker, which would allow you to get it up to a boiling temperature, then turn off the heat source and let it retain heat and cook. This minimizes fuel use and the scent of cooking food, attracting unwanted guests. You can transfer the entire contents of the pot to a thermal cooking container once it has been brought to a cooking temperature and allow it to cook for 4 or 5 hours slowly. Again, the advantage here is that we save fuel in the process. I cover 12 ways to safely cook after a disaster which explores all of these devices and methods in another video. I will link to that in the comments below.
I can add more water and seasonings, and ingredients the next morning and bring it back up to cooking temperature in a pot, put in a thermal cooker or Wonderbag, or next to an open flame, and repeat the process. If you add chunks of raw meat, you must go through the whole cooking process to ensure that the meat reaches an internal temperature of at least 165 degrees. Forty-five minutes on medium heat will accomplish this. Each day, you must add new vegetables, as these will cook down and thicken your stew. Over time, the flavors of your stew will gradually change, but you will have a consistent warm food source.
BEANS – UNCOOKED, COOKED, OR CANNED
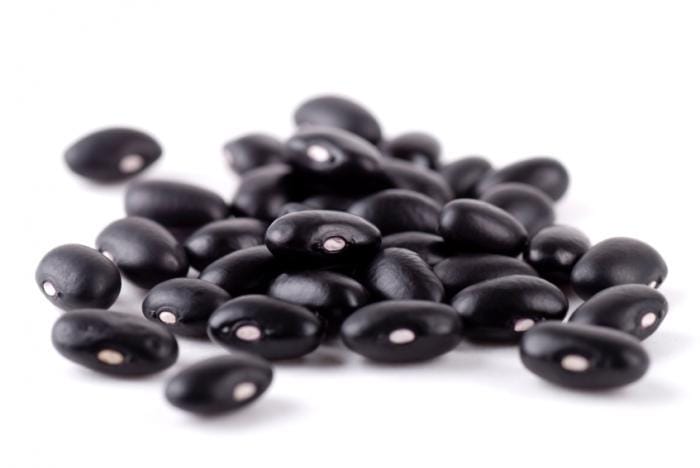 Canned beans are the easiest to work with because they are presoftened. The canning process pasteurizes and pre-cooks them. Don’t throw out the liquid. It contains salt and carbohydrates that your body will need in a post-disaster environment. Consider diluting it in water and adding some powdered drink mix. That will give you the salts, electrolytes, and carbs to keep you going. If you start with dry beans, you must soak them in water with a pinch of salt or a tablespoon of vinegar for at least 12 hours. You can skip this and just boil them until soft, but that will take more water and cooking time, and you will lose the shape of some of the beans. Since you can just boil these to make them edible and add seasoning, we will take this a step further and use bean flour.
To make bean flour, you simply have to pulverize it down to a powder with the dry beans of your choice. You can do this the old-fashioned way with a mortar and pestle. Because you want a powder with a small granular flour-like consistency, I used my backup battery and a blender. You don’t have to wait until after a disaster before making flour.
BEAN FLOUR BROWNIES
Mix the dry ingredients in a large bowl: 1 3/4 cups bean flour, 1/2 cup cocoa powder, 3/4 cup sugar, and 1 teaspoon baking powder. You will need to add an egg binder to this. If you have eggs, you will add 3 whole eggs. You can add the equivalent of 3 eggs in rehydrated whole egg powder. If you have no eggs, there are many egg substitutes, but many will give you a different texture in your brownie. For instance, you could use 1 tablespoon of ground flax seed, and 2 1/2 tablespoons of water. To this, you can add just a pinch of powdered milk to give it a little more richness. I’m going to use rehydrated whole egg powder because that’s what is in my prepper pantry for after a disaster.
Add 2 teaspoons vanilla extract, 2 tablespoons oil, ghee, or butter. Add 1/4 cup water. Mix all to a pourable but thick consistency. Pour into an oiled or greased 9×9 pan. If you have an oven, you would place this in there at 325 degrees for 20 minutes. If you only have a campfire, you can place foil over the top and place it on some heated rocks about 8 inches from the fire. Rotate the pan by 1/4 every five minutes. I’m going to use my solar oven. It will take about 30 to 40 minutes with this method. You will know when it is done with any of the methods when a toothpick can be inserted in the center and it comes out clean. If it has batter on it when you pull it out, cook it longer.
Variations of this could include peanut butter powder, nuts, chopped mint leaves, or chocolate chips. If little girls can make this in their easy ovens heated only with a light bulb, you can too. Don’t be intimidated because you’re using bean flour.
SAVORY RICE PANCAKES
 Rice has been found in archaeological sites dating to 8000 BC, so humans have some experience cooking and eating it. Rice is a grain belonging to the grass family and is consumed by nearly one-half of the entire world’s population. You may only be familiar with boiled rice. You may also only be aware of white and brown rice, though there are different varieties. White rice is preferred for long-term storage because it lacks the husk, which contains natural oils that can oxidize and cause spoilage.
Here are some things you might not know about rice. Like beans, they can be ground into flour and used in baking. It lacks the glutens of wheat, and glutens are what hold the food together in many cases. Because of this, many recipes will require an egg or binding agent to be added to get the correct consistency. Rice and beans together form a complete high-fiber vegetarian protein. The amino acids of each complement the other to create a complete protein– that is to say, it has all of the essential amino acids the body requires. If you want to add beans to rice, cook them separately, then add them together as they cook at different speeds.
I am going to assume you know how to cook rice, so I’ll take it a step further here and make rice pancakes. If you want to make pancakes similar to what you might have at a breakfast restaurant, there are recipes for that which use rice flour. Ours is more of a savory pancake that uses day-old rice and will taste much like fried rice. Leftover rice dries out a bit and makes it better to develop a bit of crunch. This recipe will add some type of allium like green onion, chives, wild onion, or ramps, depending on what you have to make it kind of a Korean version of what is called Panjeon. It’s savory and can be snacked on throughout the day. You could add some chopped spinach, kale, dandelion, or broad-leaf plantain for a less savory but just as flavorful version.
I’m going to create a one-egg version of this, and you can scale up depending on how many eggs you have. Double the ingredients for two eggs, triple them for three, and so on. Take 1 1/2 cups rice and give it a few chops on a cutting board. You don’t want to reduce it to a paste, but it will come together and cook better if the grains are at least halved in size. Add 1/2 cup chopped allium or other green. Add 1/4 teaspoon of pepper or chili flakes. Add a pinch of salt. Add one egg or the equivalent egg substitute. When mixed, scoop about 1/4 cup onto a hot skillet with about a tablespoon of cooking oil on it and mash the mix down to a level 1/4 inch thickness.
After a few minutes, the bottom will begin to brown, and the eggs will firm up the pancake. When it is flippable, do so. Give it an equivalent amount of time on the other side. Remove from heat and let cool a bit while you cook the next one. As it cools, it will release more moisture and firm up even further. This will make about 6 small pancakes.
These are very tasty and can be cooked on an open campfire or any griddle or cast iron pan. It’s the simplicity and versatility of this savory rice pancake that makes it a winner. For a breakfast version of this, leave out the savory ingredients and try adding a pinch or two of cinnamon or nutmeg and a teaspoon of vanilla extract.
COOKING METHODS
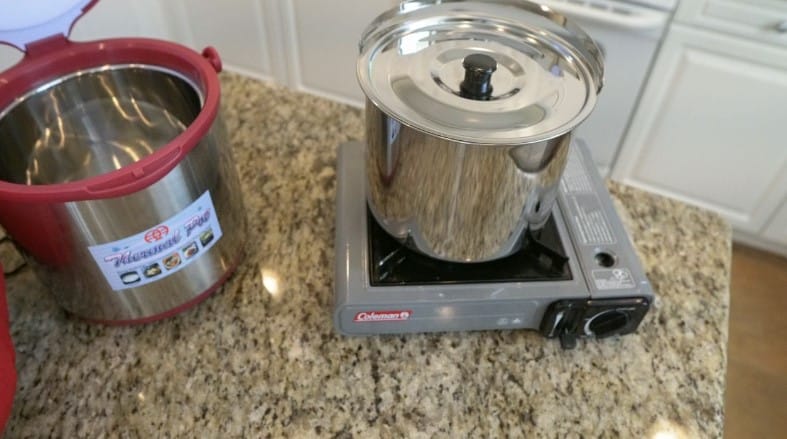
In this video, I have demonstrated thermal cooking because that’s one of your best “go-to” options after a disaster. All you need is a heat source and a means to retain the heat for as long as possible. One advantage of cooking in this method is that it contains much of the smells and minimizes the open flame period. From a security standpoint, this makes it less likely that anyone will come around looking to eat your meal.
With proper ventilation, you can accomplish thermal cooking with a small propane or butane camping stove indoors, a natural gas burning stove if the use of natural gas is safe and it is still flowing, chaffing dishes arranged under bricks, a bbq grill, open fire, or a solar oven. You could even use a hot plate if you have some type of backup power. The key is raising the temperature and then retaining the heat, as I showed with the pasta and with the can cooker. For safety reasons, if you cook with an open flame of any kind indoors, make sure you have a working carbon monoxide alarm and a means to extinguish a fire.
If you would like to see more recipes cooked in non-traditional ways, like this video and leave a comment or suggestion below. Knowing how to cook after a disaster could mean the difference between dying or thriving. In the aftermath of a disaster, you won’t last long if you are forced to crunch on dried beans or rice to survive. Approach cooking like any of your preps and have a few recipes for food you can bring to the table. You’ll be glad you took the time now.
As always, stay safe out there.
LINKS:
Easy Cooking Option When the Grid is Down: Can Cooker Review
12 Ways to Safely Cook After a Disaster
PASTA CON CARNE IN WHITE SAUCE
 Bring a pot of water to a boil. Add a teaspoon of salt or one 3-finger pinch. Add 2 ounces of dry pasta per planned plate served. Stir pasta with a few swirls. Turn off the heat source and place the lid securely on top. It will be done in about 12-14 minutes.
In a medium bowl, combine:
2 cups dry milk powder,
1 cup flour,
1 teaspoon salt,
1/8 teaspoon pepper,
1 teaspoon garlic powder
1 stick of butter or equivalent substitute
If you time this right, you will add the pasta to your mix, or you can scoop the pasta out and gently stir in a tablespoon of oil to keep it from sticking together.
In a separate pan, warm 4 cups of water. You can use the already-warmed pasta water if your pasta is done cooking. With the water warm, turn up the heat source on the pan and slowly mix in your bowl of dry ingredients. Stir to prevent lumping. When smooth and slightly steaming, add seasoning to taste and any herbs, dried or foraged. The best herbs for this meal are basil, dill, or parsley. The herbs will freshen up the taste.
Finally, add 1 or 2 cans of canned meat with any of the canned liquid. Bring this to a strong simmer, then turn off the heat source, and add it to your cooked but strained pasta. Gently stir and serve.
PERPETUAL STEW
 Add 1 tablespoon of oil to a Dutch oven, can cooker, or cooking pot with a lid. When oil is heated, add at least 1 chopped onion or 1/4 cup of dried minced onions. Cook raw onions until semi-translucent, stirring to prevent burning. Add any raw or canned meat, cubed, and cook until browned. Add any or all chopped or rehydrated vegetables, including but not limited to celery, carrots, cubed potatoes, root vegetables, corn, cubed squash, mushrooms, kale, spinach, or foraged greens. Add 4-6 cups water and simmer pot for several hours. Add herbs or spices as desired. If you are unsure of the final taste by adding an ingredient, start by adding just a little at first.
Each night wrap pot in a blanket. In the morning, return to the heat source and add water and fresh ingredients. You could simply add a little water at night and leave it sealed near but not on your fire. You can eat it all up and start new each time. It doesn’t have to be perpetual. In that case, consider this a basic stew or soup.
Calories and nutrients will wildly vary depending upon your mix of ingredients, but it’s a good idea to keep track of the calories, protein, and carbs of new food you add to your pot.
BEAN FLOUR BROWNIES
1 3/4 cups black, pinto, or chickpea flour
1/2 cup cocoa powder
3/4 cup sugar
1 teaspoon baking powder

–
2 teaspoons vanilla extract
3 eggs or equivalent
2 tablespoons oil, ghee or butter
Mix dry ingredients together. Add in wet ingredients and enough water tablespoon by tablespoon to get a thick but parable consistency. Pour into a lightly greased or buttered baking dish at least 9×9. Cook at around 325 degrees until a toothpick inserted in the center comes out clean.
Estimated nutrition in the whole meal:1034 calories, 10 grams fiber, 75 grams protein, 200 grams carbohydrates.
SAVORY RICE PANCAKES
 Take 1 1/2 cups rice and give it a few chops on a cutting board.
Add 1/2 cup chopped allium or other green.
Add 1/4 teaspoon of pepper or chili flakes.
Add a pinch of salt.
Add one egg or the equivalent egg substitute.
When mixed, scoop about 1/4 cup onto a hot skillet with about a tablespoon of cooking oil on it and mash the mix down to a level 1/4 inch thickness. To keep the spatula from sticking to the top of your pancake, pull it slightly towards you as you release it from the top.
After a few minutes, the bottom will begin to brown, and the eggs will firm up the pancake. When it is flippable, do so. Give it an equivalent amount of time on the other side. Remove from heat and let cool a bit while you cook the next one. As it cools, it will release more moisture and firm up even further. This will make about 6 small pancakes.
Estimated nutrition in the whole meal: 13 grams protein, 69 grams carbohydrates

