Author: cityprepping-lucy

  • Marti’s Corner – 142

    Marti’s Corner – 142

    Hi Everyone,

    NOTES:

    We have a small portable solar panel that is similar to this one:
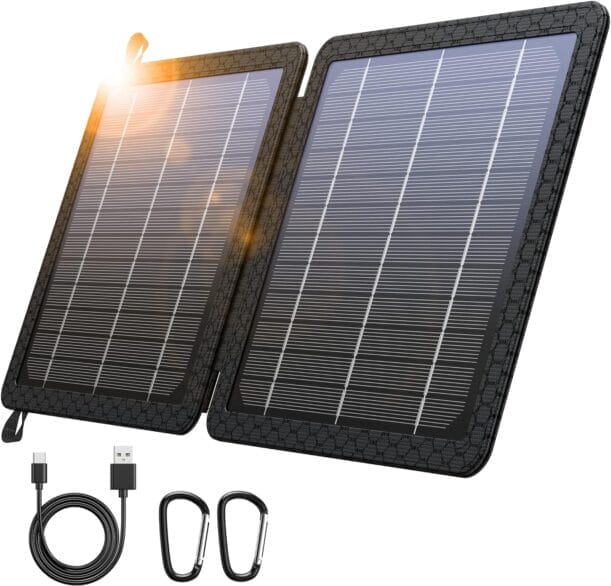
    It’s only $29 on Amazon.  

    BLAVOR 10W Portable Solar Charger(5V/2A Max), Waterproof IPX4 Foldable Solar Panel with Dual Smart USB Output Compatible with iPhone Xs/X/8/7, iPad, Samsung for Outdoor Hiking Camping Backpacking : Cell Phones & Accessories

    The advantage to this is that the battery will never “go bad”.  This happens when the battery starts to expand and bulge.  I had to throw all my cell phone chargers with bulging batteries away.  I thought they were going to explode!  
    This solar panel has no battery.  So…. it won’t work at night.
    But, you could use this one to charge your other cell phone chargers so they won’t have that battery issue from sitting in the sun all day.  (Weird, that they are DESIGNED to charge in the sun, but doing just that is not good for the battery.)

    As a note:  if you DO use this charger to charge your phone or other device, make sure your phone is behind the solar charger – in the shade.  Cell phones do NOT like to sit in the hot sun!!!

    **  Consider learning how to sprout.  This is my favorite thing to sprout:  Organic Lentil Salad | Crunchy Lentil Fest Sprouting Lentils | True Leaf Market Seed Company

    It takes all of 2 days (3 at the most).  I do NOT have any fancy equipment.  I use a glass jar with a ring (no lid) and a piece of mesh or netting.  Put about 1 TB seeds in the jar.  Cover with water.  Soak overnight.  The next day, cover the jar opening with the netting and stain out the water.  Rinse and drain.  Then set the jar tilted in a soup bowl to drain. I keep my sprouts covered with a dishtowel, but others put the jars in the sun.  ???  Must not matter that much.  That night, rinse, drain and set in the bowl.  Repeat each morning and night.  I do NOT like long squirmy sprout roots.  I like mine to be about 1/4 inch long.  When the sprouts are the length you want, put the jar in the refrigerator.  It’s THAT easy.  Sprouted seeds are PACKED with nutrition and all kinds of good stuff that is absent in the seeds themselves.  In an emergency, you would have nutritious food to supplement your storage in just a matter of days.  Gardens are great but all your neighbors know you have one.  Sprouts are done privately.  They are SOOOO good on salads or sandwiches.  I like mine on scrambled eggs.  

    ** Do you know how to turn off the gas to your house (in case of an earthquake)?  

    HOW TO shut off and restart your gas line in case of emergency

    GARDEN HAPPENINGS:

    **Time to harden off your seedlings…. at least in MY grow zone.  Start about 1 week before you plan on planting outside.  Baby plants need time to acclimate to the sun.  The hot sun is from about 1-4.  Start with 2 hours.  Take the seedlings outside in the sun for TWO hours.  No more!!!  Then, move them inside or in the shade.  Increase the time by 2 hours for another day or 2.  By the time you get to 8 hours, you can be pretty sure they will be safe outside all day.  
    Even seedlings you buy at a nursery need some hardening off.  IF you get an overcast day that does not have full sun, you can leave the plants out all day.  Don’t neglect this important step.  

    Once the plants are hardened off, you can plant them in the garden.  This week, I’m going to get the broccoli, cauliflower, and any other cool weather plants in the garden.

    Generally, you want to wait until the evening temperatures are mostly above 50 degrees before you set out the tomatoes, peppers, and cucumbers.  

    Here are just two of my trays outside for the second day. 
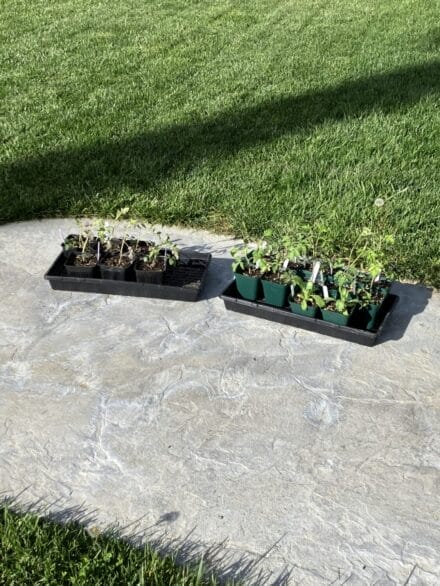
    You are not REALLY supposed to put them on the ground, but I don’t have any dogs, or chickens, or any other animals that might hurt them.  Nor do I have anything that might eat them.  
    Another option would be to put them in a place that gets a few hours of direct sun, then afternoon shade.  
    I really dislike this part of the job, because bringing them in and out and in and out is a pain.

    THIS WEEK’S PURCHASE:  cooking oil, shortening

        Back in the old days, there was no such thing as spray Crisco.  We used cooking oil or shortening to grease all our pans.  I don’t use shortening very often (except for pie crusts and the occasional cookie).  But I use cooking oil quite a bit.  Shortening is supposed to last three years, unopened, but in my experience, that’s pushing it.  It tends to yellow and go rancid (depending on where it is stored.)  If you just HATE to throw it away, know that you CAN use it as a candle.

    Magic Crisco Shortening Candle Recipe I like this video because he uses cotton twine as a wick – nothing fancy.  Here’s a version that the City Prepping team created, which uses Crisco, a candle, and an upcycled pickle jar for an incredible 300 hours of burn time. 300 Hour Crisco Candle.

    MISC. PURCHASE: plastic zip lock bags 

    I go through a lot of bags.  I buy snack bags, sandwich bags, quart bags, and gallon bags.  I use so many that I’ve started washing them out and reusing them!!!  
    Small bags (like for a small trash can) might come in handy if the plumbing stops working and you need a make-shift potty.  Large bags might come in handy if trash services are suspended for any length of time.  I’m not sure how I could possibly store enough bags to last me a year.  BUT, I CAN store several boxes of each.  We have a couple of shelves in the garage where we store non-perishable items:  candles, plastic bags, soaps, etc.  Whatever you use, start with an extra 2 of each.  Set them aside.  When you run out, use one of your stored boxes and then replace with two more.  

    FOOD STORAGE RECIPES:

    Every time the teachers had any kind of pot luck, one of them would ALWAYS bring this breakfast casserole (kind of like a coffee cake).  I really liked it:

    Mix:

    2 c. Bisquick
    2/3 c. milk
    2 TB sugar
    1 egg

    In a separate bowl:  Mix the topping
    2 TB Bisquick
    1/3 c. brown sugar
    1/2 tsp cinnamon
    2 TB butter
    1/2 c. oatmeal

          Use a fork (or your fingers) to work the butter in with the Bisquick and brown sugar.  

    Add 1/3  of the topping mix in with the 2 c. Bisquick and milk mix.
    Pour batter in a greased 13X9 pan.
    Sprinkle topping on top.  Bake 375˚ for 25 min.  Drizzle vanilla frosting (powdered sugar and milk)
    Now, I almost NEVER buy Bisquick.  Here is a recipe for a substitute:

    DIY Bisquick

    2 c. all purpose flour
    1 TB baking powder
    1 tsp salt
    1/3 c. vegetable shortening

         The fastest way is to use a food processor to mix,  It will make about 2 1/3 c. which is just a little over what you will need for this recipe.  

    Baked Fudge Pudding

    from Lois Wurtz

    I like this one because everything is already on my shelf.
    1 c. flour
    3/4 sugar
    2 TB cocoa
    2 tsp baking powder
    1/4 tsp salt
         Mix together.
    1/2 c. mil
    2 TB vegetable oil
    1 tsp vanilla
          Add and stir until smooth.
    1 c. chopped nuts (optional)
          Add nuts if desired.  Spread mixture evenly in 9X9 baking dish.
    1 c. firmly packed brown sugar
    1/4 c. cocoa
         Mix sugar and cocoa and sprinkle over the mix.
    1 3/4 c. VERY hot tap water
          Slowly pour water over the batter and brown sugar mix.  
    Bake 350˚ for 40 minutes.  Let stand 15 minutes.  Serve with whipped cream or ice cream.

    Tortilla Soup

    from Amy Morris

    1 small onion, chopped
    1 small can chopped green chilies
    2 crushed garlic cloves
    2 TB vegetable oil
         Saute onion, chilies and garlic in oil for 5 minutes.
    1 large chopped tomato 
    2 c. beef broth
    2 c. chicken broth
    1 tsp chili powder
    1 tsp cumin
    1 tsp salt
    2 c. water
    2 tsp Worcestershire sauce
    1 can tomato soup
    4 chicken breasts, cubed (in an emergency situation, could probably substitute 2-3 cans of chicken shredded
    1 can corn (or frozen)
         Bring to a boil and simmer 1 hour 10 minutes.  
    To serve:  place tortilla chips in a bowl, add soup, and a dollop of sour cream, a sprinkle of green onions, and shredded cheddar cheese.

    Marti

  • Egg Preservation

    Egg Preservation

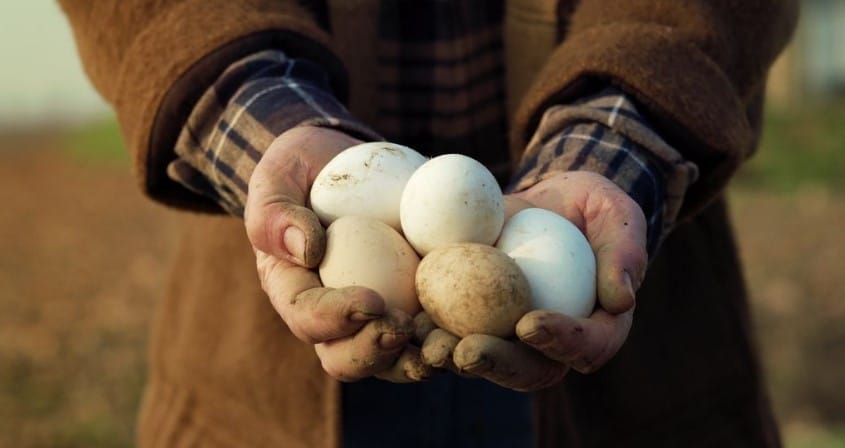
    In this video, we will walk you through five ways to preserve farm-fresh eggs for up to a year without refrigeration. I will launch right into the five methods, but you’ll want to stick around to the end to understand why knowing how to do this is so important. Let’s get cracking.

    WARNING: Avoid using store-bought eggs for the processes described in the video. Use farm-fresh eggs with intact bloom, resembling dried slime or tea stains. The bloom allows for breathability while guarding against bacteria. Store-bought eggs have their bloom removed and are chemically sanitized before sale, leading to a shorter shelf life of 2 to 3 weeks even when refrigerated. 

    Mineral Oil Preservation – 9-12 months

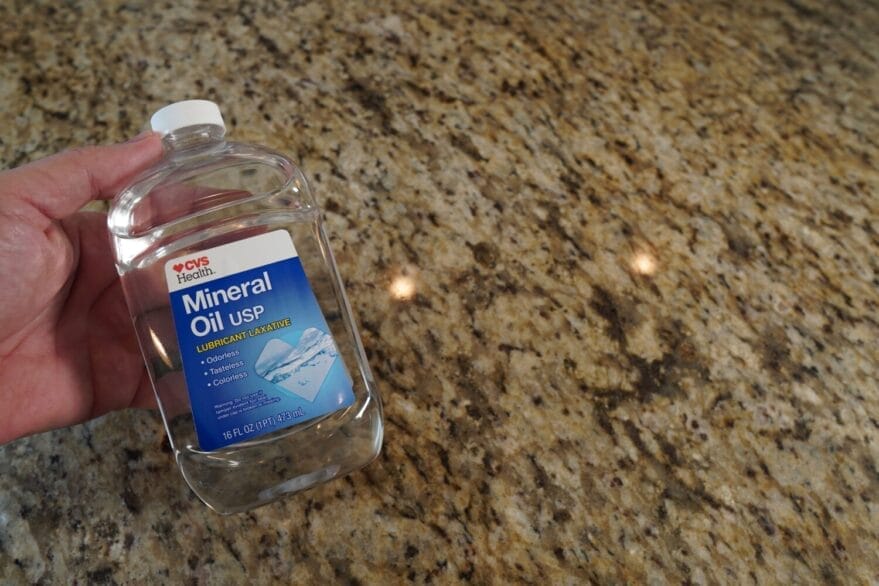
    Mineral Oil preservation is by far the easiest method. For mineral oil preservation, use food-grade white mineral oil or light mineral oil from the drug store, which is safe for consumption. 

    Washing the eggs: Washing the eggs removes most of the bloom, but your process is gentler than commercial operations that seek to sanitize the egg thoroughly. The preservation methods described here work with the bloom residue. There are different suggested methods for washing the eggs. The key is not to overwash them or soak them. I simply use the spray setting on my kitchen sink with warmish to hot water and then wipe them with a clean paper towel. This is the same wash technique I suggest for all the methods described in this video. Let air dry completely by setting them on a clean dish towel. 

    Just a tablespoon of the mineral oil is probably enough to coat and cover a dozen eggs. Put that amount in your hands and thoroughly rub it around each egg. The oil will have been completely absorbed into the eggshell in a week or so, but this will make them, initially, pretty slick.

    Place the eggs, pointy end down, in clean egg cartons. The broader part of the egg you want at the top has the air chamber. If you store it with that broader base on the bottom, the yolk may work to the top and touch the shell, encouraging it to spoil. I like to use wax or parchment paper around each and store them in a jar with the pointed side down. This allows me also to write the date I put it away on the paper. The jar gives an added layer of protection from critters or eggshells cracking. Store eggs in a cool, dark place with 75% humidity for 9-12 months of long-term storage. 

    Why this works: The shell of an egg serves as a protective barrier against bacteria and other pathogens while still allowing for the exchange of gases like oxygen and carbon dioxide, which is essential for the developing chick’s respiration. White or light mineral oil forms a protective coating on the eggshell, sealing pores, preventing moisture loss, inhibiting bacterial growth, and extending shelf life. 

    Wax Preservation – 9-12 months

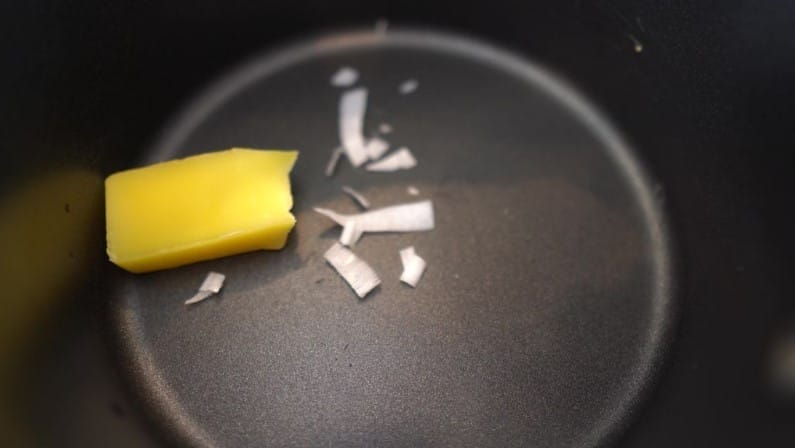
    This method is also easy, but I think it gives you a better seal around your eggs and doesn’t absorb into the egg like the oil may. To preserve eggs using wax, utilize either food-grade paraffin wax or organic beeswax. Begin by melting either beeswax or household paraffin wax until it becomes liquid. You want to make sure your wax is all-natural or FDA-approved, so you know you’re not putting potentially harmful chemicals on the shell, which could be absorbed into the egg. While the wax is melting, clean the eggs as directed earlier and allow them to dry completely.

    Once the wax is melted, carefully dip each egg into the wax, ensuring an even coating on all sides. Allow the wax to cool and harden around the egg, forming a protective layer.

    After the wax has solidified, store the eggs in a cool, dark place with consistent temperature and humidity levels. It is recommended to place the wax-coated eggs in fiber egg cartons, pointy end down, to prevent rolling and potential damage to the wax coating. 

    Why this works: The wax acts as a barrier, sealing the pores of the eggshell and preventing moisture loss and bacterial contamination. Unlike the oil, it will not absorb into the shell. This protective layer extends the shelf life of the eggs for approximately 9 to 12 months under proper storage conditions. 

    Isinglass Preservation – 9-12 months

    During World War I, this technique began to be used. Often, the solution of Isinglass was thicker and goopy, and the eggs were stored directly in it instead of just coating the eggs as I will do here. Their method resulted in some off-tastes in the egg so this method may have fallen out of fashion.

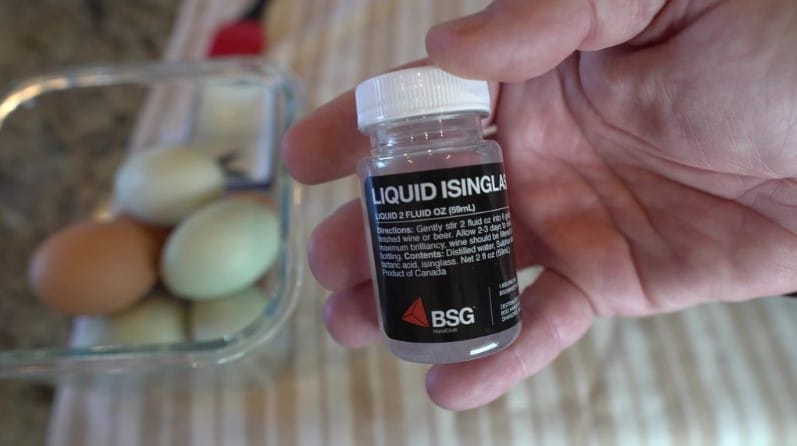
    Prepare the isinglass solution: Isinglass is a gelatin obtained from fish bladder membranes and commonly used in food preservation. Dissolve isinglass powder or sheets in water according to the manufacturer’s instructions, ensuring that it is food-grade and safe for consumption. Here, I will use a premixed solution commonly used for brewing.

    Wash the eggs using the method detailed earlier. Allow them to air dry thoroughly. Dip each egg into the prepared solution, ensuring the entire surface is evenly coated. Alternatively, you can use a brush to apply the isinglass solution to the eggs. This is my preferred method, as it guarantees an even coating. 

    After coating, allow the eggs to air dry completely. Once dry, place the eggs in clean egg cartons with the pointed end down or use the jar method previously described. Store the eggs in a cool, dark place with a humidity level of around 75%. 

    Why this works: The isinglass solution forms a protective coating on the eggshell, sealing pores and inhibiting bacterial growth. It’s essentially adding a more thorough bloom. This helps to extend the shelf life of the eggs by preventing moisture loss and preserving their freshness. 

    Wood Ash Preservation – 9-12 months

    Colonists and early settlers often used wood ash to preserve eggs. This technique, known as “water-glassing with wood ash,” involves coating eggs with a paste of wood ash to create a protective barrier on the eggshell.

    Prepare the wood ash solution: Collect wood ash from hardwood sources such as oak or maple. Ensure the wood ash is free from contaminants like charcoal or unburnt wood. Mix the wood ash with water to create a paste-like consistency. I use a standard wire mesh for the kitchen to sift out any particles.

    Clean the eggs as described earlier. Coat eggs with wood ash paste by dipping each egg into the prepared wood ash paste, ensuring the entire surface is evenly coated. Alternatively, you can use a brush to apply the wood ash paste to the eggs.

    After coating, allow the eggs to air dry completely. Once dry, place the eggs in clean egg cartons with the pointed end down or use the jar method previously described. Store the eggs in a cool, dark place with a humidity level of around 75%. Regularly check the storage area to maintain the appropriate temperature and humidity levels. Inspect the eggs for any signs of spoilage and discard any eggs that appear compromised.

    Like the other methods, wood ash paste preserves eggs by coating and sealing the shell, preventing air and bacteria from entering. The high pH and low moisture of wood ash also discourage spoilage.

    Pickling Lime Preservation – 12-18 months

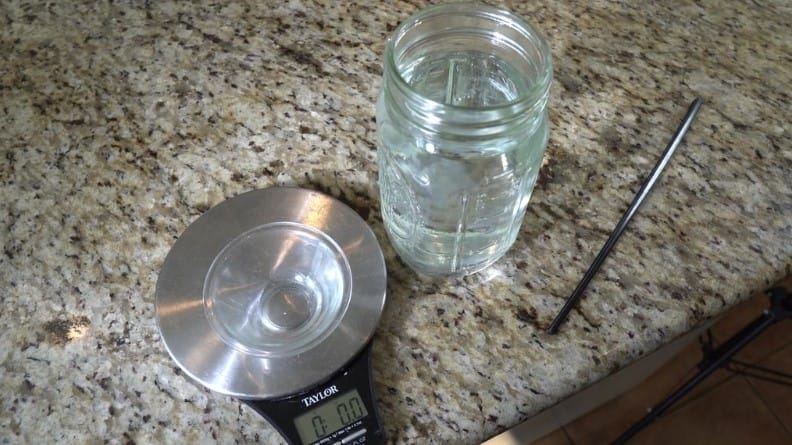
    Prepare the pickling lime solution: Use non-chlorinated water or leave your water out on the counter for 24 hours to allow any chlorine to gas off. In a non-metallic container, mix pickling lime (calcium hydroxide) with water according to the recommended ratio provided by the manufacturer. If no ratio is provided, use 1 ounce per quart of water. Ensure that the pickling lime is food-grade and safe for consumption.

    Wash the eggs as previously described. Next, carefully submerge the eggs in the pickling lime solution, ensuring they are fully covered. Putting the eggs in the mixed solution instead of just pouring it on top is essential because you want to ensure that even the spots the eggs touch have been in contact with the lime solution. Ensure the container is covered to prevent evaporation and contamination.

    Store the eggs in a cool, dark place. The lime will fall out of suspension, clearing the water and leaving a lime powder residue over the tops of the eggs. This is fine..

    Why this works: The pickling lime solution creates a protective barrier on the eggshell, sealing pores and inhibiting bacterial growth. This helps to extend the shelf life of the eggs by preventing moisture loss and preserving their freshness. 

    Why Preserve Eggs?

    You might have never thought of needing to preserve eggs, given the modern convenience of agricultural egg operations, supply chains, and modern refrigeration, but here’s why knowing how to preserve eggs is valuable information to have. The modern, fragile supply chain is susceptible to failure, and eggs are not always available throughout the year, so our ancestors needed to find ways to preserve them. Egg production depends on the length and temperature of the day, which affect the hens’ ovulation cycle. That’s why hens lay more eggs in spring when the days are long and warm and less in winter when the days are short and cold.

    To avoid running out of eggs or buying them too often, especially in winter, preserving some eggs when they are plentiful makes sense. If you are considering or have a small backyard egg-laying flock of your own, you’ll want to check out our video on that, which I will link to, and you’ll definitely want to know these five methods to preserve eggs without refrigeration. They all extend the shelf-life of eggs. With some of these methods, you might even be able to keep eggs for over 12 months.

    As always, stay safe out there.

  • Marti’s Corner – 141

    Marti’s Corner – 141

    Hi Everyone,

    NOTES:

    There are several sites where you can find information on preparedness.  One is here: Temporal Preparedness Resources . You can find disaster plans for every area of the country.

    Another is fema.gov  Plan Ahead for Disasters

    Locally, you can go to rivco.org (stands for Riverside County) Disaster Preparedness | County of Riverside Emergency Management Department There is good information there as well.

    They all have this in common:

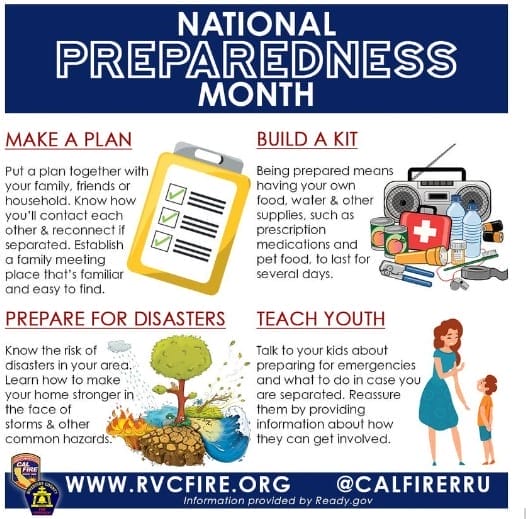
    Start with a plan.  Prepare food and necessities for a disaster.  Make an emergency kit for evacuation OR for staying home.  Teach your kids what to do.  Practice with the family.

    GARDEN HAPPENINGS:

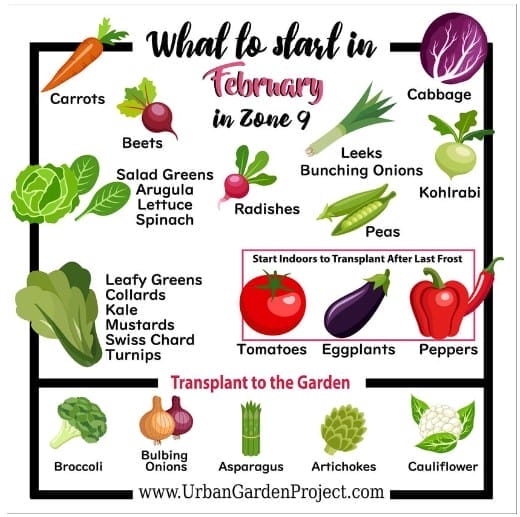
    We are inching toward our last frost date at my house.  About 2 weeks to go.  That means:

    I can plant my broccoli, cauliflower and peas outside.  IF there is a frost, it will not kill the plants, but I will probably cover them anyway.  My tomatoes are 5-6 inches high, but will have to wait another 2 weeks at least.  My goal is to have everything in the garden by the end of March, so I can get a crop before the summer heat sets in.

    THIS WEEK’S PURCHASE:  chicken

    Boneless, skinless chicken breast is on sale at my local Winco store for $1.99 a pound.  When chicken is this cheap (well, cheap by today’s standards), get a lot and can it.  

    Don’t want to can???  Then buy some already canned chicken.  At $2.85 or so per can, it is pricey.  MUCH cheaper to can your own. 
    Don’t have a canner?  Don’t know how?  Check around.  I’m SURE there is someone in your vicinity who will help you!  Otherwise, YouTube is your friend.  Learning how to do this simple thing will save you so much money in the long run!

    If you are used to using canned chicken, the chicken you can yourself is exactly the same, except that each pint jar equals about 1 pound of chicken.  

    MISC. PURCHASE:  seeds

    Even if you are NOT going to plant a garden, this is a good time to get seeds.  Grab a packet of everything you MIGHT want to grow.  Wrap a rubber band around them, put them in a sandwich bag, and throw them in the back of the Crisper.  (Have you ever known anything actually to get crisper in the crisper???)  Discount stores will usually discount their seeds.  Think of it as insurance you hope you won’t need to use.

    FOOD STORAGE RECIPES:

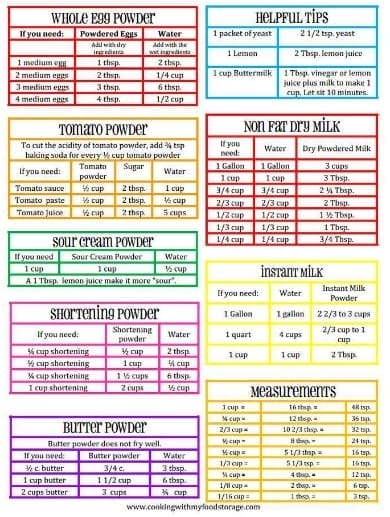
    Using food storage powders in cooking:

    Craig has been sick all week.  I made him some chicken noodle soup–which as you know–makes everything better.

    This made A LOT, and I was able to share it with a few friends.

    8 c. chicken broth

    2 c. cooked chicken diced (sometimes I use chicken breast browned and diced and sometimes I use canned chicken)

    2 carrots chopped – I used dehydrated

    2 stalks of celery chopped – I used dehydrated

    1 onion chopped – I used dehydrated

    1 c. noodles (I really like fettuccine noodles for this soup.  I actually used about  1 1/2 c.  I like noodles!)

    1 TB minced garlic (less if that sounds like too much–but garlic is really good for colds)

    1/4 tsp rosemary

    1 tsp thyme

    1/2 tsp black pepper

    1/4 tsp turmeric powder (also good for you)

    4 tsp salt

         Simmer until the veggies are fully rehydrated and cooked.  Usually about 20 minutes for me.

    It dawned on me that flour tortillas could be a great substitute for bread at all three meals.  Who doesn’t like breakfast burritos???

    My last attempt at tortilla making was interesting.  Maybe I’ll have better luck with this recipe.

    2 1/2 c. flour

    1/2 c. Lard

    1 c. room temp water

    1 tsp salt

    (909) How to make EASY FLOUR TORTILLAS from SCRATCH, The BEST Step BY Step Recipe, SECRET TIPS + MEAL PREP

    Snickerdoodles

    I like this recipe because it lets me use and rotate my shortening (which I don’t use very often).  

    1 c. shortening

    1 1/2 c. sugar

         Cream together

    2 eggs – add

    1 tsp baking soda

    2 tsp cream of tartar

    1/2 tsp salt

         Add and mix

    2 3/4 c. flour

      Mix and refrigerate 30 min.

    Roll in 1 inch balls and then roll in cinnamon sugar mix.  (I don’t measure this, I just put about 1/4 c. sugar in a small dish and add cinnamon until it looks good)

    Place on parchment.  Bake 375˚ for 8-10 min.

    It’s getting crazy out there.  Be safe.  Pray.  Be Prepared.

    Marti Shelley

  • Marti’s Corner – 140

    Marti’s Corner – 140

    Hi Everyone,

    NOTES:

    Here are some ideas for expanding on canned goods you may have on hand, and creating meals to feed more people in a pinch:

    1. 1 can beef stew – add 2 can mixed veggies and 2 c. cooked barley
    2. 1 can beef stew – Add 1 c. water and a packet of beef gravy mix and serve over cooked egg noodles
    3. 1 can chili – Add 1 can kidney or black beans and 2-3 c. cooked rice.
    4. 1 can chili – Add 1 can diced tomatoes, 1 can black beans, and 1 can corn
    5. 1 can chili – Add 2 prepared packages of macaroni and cheese
    6. 1 can baked beans in tomato sauce – Add cooked rice along with 1 can condensed tomato soup, 1 c. water, and 2 tsp. Cajun seasoning
    7. 1 can baked beans in tomato sauce – Add 1 can flaked ham, 1/4 c. barbecue sauce, and 2 c. cooked barley

    ** On another note:  We tried to fill our propane tanks and they were expired!  I didn’t know there was such a thing.  Every 12 years, you have to “recertify” your tanks.  They replace the valves and such.  The trick was to find a place that had this service and wasn’t a 3 hour drive.  Today, we found just such a place.  The cost was nominal–only $15 per tank for the recertification.  Of course, the cost of the propane is expensive, but we’re going to have them done next week.  I’m just glad we don’t have to buy new tanks!

    GARDEN HAPPENINGS

    My tomato seedlings are starting to get true leaves.  But I was curious to know exactly when it is time to “pot up”.  In other words, when do you move the seedlings to larger pots?  I liked this video the best:  how do you know when it’s time to pot up

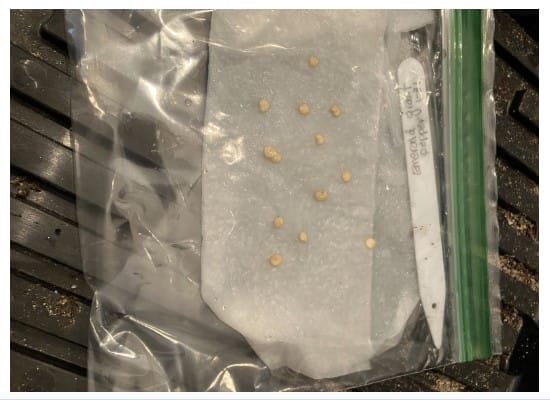
    Maybe they are not quite ready, but I think they will be soon!!!  It’s exciting.**  NONE of my pepper seeds sprouted.  (They were from 2022–maybe too old?)  So, I replanted a different variety this morning and decided to do a seed test before I totally throw the seeds away.  Simply put several seeds on a wet napkin.  Stick it in a baggie for 4-5 days and see if any of them sprout.  If they do, you can then move them into some potting soil.

    I’ll let you know how these turn out!

    I went ahead and planted beets and carrots.  We have another big rain coming soon, so I thought I would cover the plants with a tarp to keep them from getting washed away. However, Craig mowed the lawn and I put about 2 inches of grass clippings on them.  California rain is usually NOT heavy and they should be okay.  

    THIS WEEK’S PURCHASE: Tuna Fish or another canned fish.

    Tuna has been on sale for $.88 where I shop.  I’ve been picking up 3-4 cans every time I go in.  I grew up on tuna casserole, although I seldom make it now.  However, I really like tuna sandwiches, tuna casserole, and Tuna Helper.  

    All three things can be made with shelf stable foods.  A little mayonnaise, a box of Tuna Helper, or some macaroni and Cream of Mushroom soup and you have two dinners and a lunch.

    MISC. PURCHASE: can opener – or two

    Two days ago I tried to open a can of tomato paste to make spaghetti sauce.  NONE and I mean NONE of my four can openers would open it.  It’s so frustrating knowing what you want is in the can and yet, you can’t get it open.  I was almost ready to use a churchkey can opener (you know, the kind with the pointy end that you use to open canned milk.)  I figured I could puncture a hole all around the top and scoop out the tomato paste.  Even my electric can openers would not work.  This is just NOT acceptable!  

    I DID finally get it open but not without a temper tantrum or two.  And I’ve already repented about any bad words that I may have accidentally said.

    FOOD STORAGE RECIPES:

    Kidney Bean Stew

    From Pioneer Cookbook by Miriam Barton

    Have you ever read the story, “Stone Soup”.  I feel like all vegetable soup recipes are just like that.  Add a lot of veggies and some spices and everything else you add will only make it taste better.

    2 pounds of dried kidney beans (This is A LOT of beans BTW)

       Place in a large stockpot, cover with water, bring to a boil.  Let sit for one hour, then drain the water.

    3 potatoes, peeled and cubed

    4 large carrots

    6 c. beef or vegetable broth

    8 c. water

    1/2 onion chopped

    3 tsp salt

    1 tsp onion powder

    1 bay leaf

    1/2 tsp sage.

         Cover the pot and cook over medium heat, stirring occasionally for 5-6 hours or until all the beans are tender.

    Hush Puppies

    When my kids were little, we lived down the street from a family from Georgia.  Her kids said, Yes Ma’am, and Yes Sir, which I thought was pretty amazing in and of itself.  One day, she brought me some Hush Puppies.  I was in heaven.  They are SOOOOO good.  I haven’t made them for years though.  I might have to do that this week.

    1 c. cornmeal

    1/3 c. flour

    1/3 tsp baking soda

    1/3 tsp salt

    1/2 c. finely chopped onion

    3/4 c. buttermilk

    1 egg

        Mix all together in a large bowl until smooth.  

    Cooking oil: vegetable, peanut, canola, olive)

    Heat oil on the stove.  Carefully drop in large teaspoons of batter into the oil.  Turn after 2-3 minutes and cook some more.  Remove with a slotted spoon and dry on paper towels.  Yum!!!

    Hot Fudge Sauce

    I’m not a fan of plain vanilla ice cream, but I have some that I bought for company and we didn’t eat it.  Looks like I’ll have to make some hot fudge sauce!

    1 1/4 c. sugar

    2/3 c. milk

    1/4 tsp salt 

         Cook 5-6 min over medium low heat and whisk till sugar is dissolved.  When it begins to boils around the edges, turn down to low and add

    1/3 c. cocoa    Whisk until smooth then add

    3 oz. unsweetened chocolate

        Whisk smooth and let rest for 3 minutes

        Whisk again and add

    1/2 stick of butter cut in 8 pieces.  Whisk smooth

    Add 1 tsp vanilla   Blend!

    You can store it in the refrigerator and it heats up over and over.  Here is the video from America’s Test Kitchen:  recipe for hot fudge sauce made with cocoa

    Please, please, please make sure your family is prepared.  You will rest much easier knowing you can feed your children.  

    Marti Shelley

  • Marti’s Corner – 139

    Marti’s Corner – 139

    Hi Everyone,
    NOTES:
    *  I dehydrated another 20 pounds of carrots.  It seems that 10 pounds fits nicely into a quart jar. 
    *  I tried the “Best Chili” recipe from my 1/27 email.  Not only did Craig love it, he actually requested it the next day for lunch!  It really WAS good!
    GARDEN HAPPENINGS:
    *  My tomatoes sprouted!  They are under the grow lights with broccoli and butternut squash.  No sign of sprouting from the peppers.  Better replant.  In my neck of the woods, I’m about 6 weeks out from our last frost date.  
    *  I have a few carrots still growing from fall, and four celery plants.  I’ve been watching night temps because they’ll need to be covered if it freezes–those and the geraniums.  Meanwhile, there is plantain growing like crazy in the backyard.  As soon as the rain stops, I’ve got to get out there and pick some before the lawn gets mowed.
    *  If you are looking for a natural solution to pests, you might look into the JADAM method.  Never heard of it?  Yeah, neither had I, but I’m impressed.  Watch this.  I think I might try it .  JADAM pesticide – Google Search
     
    THIS WEEK’S PURCHASE: sauces (spaghetti, pizza, alfredo)
    If you are cooking for two, just use 1/2 of the jar of sauce and freeze the rest in a baggie.  
    I usually make my own spaghetti sauce.  But this week I wanted to make some lasagna, and didn’t feel like making the sauce too.  So I grabbed a can of Hunt’s spaghetti sauce I bought in April 2023, and it was fine!  The lasagna was delicious!  
    When my kids were little, I used to make spaghetti with chicken.  I’d grill chicken and use fresh veggies:  zucchini, carrots, mushrooms, and add it all to the spaghetti sauce and serve over pasta.  They loved it! What’s not to love?
    Get at least 5 jars or cans—–10 is better.  Remember one jar = 1 meal.  
     
    MISC. PURCHASE: baking soda; baking powder
    Start the new year off with a fresh container of each.  Both baking powder and baking soda lose their effectiveness after a year or so.  Even if you haven’t used it all, get new.  Date the box.  Then in 6 months, get another box and put it on the shelf.  If you suddenly have to start making your own biscuits or pancakes, you’ll have at least a six-month supply of leavenings!
     
    FOOD STORAGE RECIPES:
    Beef Minestrone Soup from The Prepper’s Cookbook by Tess Pennington
    1 jar spaghetti Meat Sauce
    4 c. vegetable broth
    1 can red kidney beans undrained
    1 can small white or Great Northern beans undrained
    1/3 c. green beans, fresh or dehydrated
    1/4 c. chopped zucchini, fresh or dehydrated
    1/2 c. sliced carrots, fresh or dehydrated
    1 tsp dried oregano
    2 tsp dried parsley
    1 tsp salt
    1/2 tsp pepper
    1/4 tsp dried thyme
    1 1/2 c. water
       Bring to a boil and reduce to simmer for 20 minutes
    1/3 c. small shell pasta
       Cook for an additional 20 minutes or until the soup has the desired consistency.  Ladle into bowls
    3 c. fresh baby spinach – add in  (hmmm?  I think I might put this in earlier and let it reduce some, but do what you prefer)
    Top with grated Parmesan cheese
    NOTE:  I actually have all these dehydrated veggies and think I’ll try this soup this week.  Sounds yummy!!
     
    Dottie’s Easy Chicken Pot Pie from The Prepper’s Cookbook by Tess Pennington
    1 basic pie crust recipe
    1 stick butter, softened (I usually use Crisco or lard)
    1 1/2 c. flour
    1/8 tsp salt
         Cut the butter into the flour with a fork)
    4-5 TB cold water.  Just add 1 TB at a time until the dough holds together when you squeeze it.  Shape the dough into a disk.  Wrap in plastic and refrigerate at least 30 minutes.  Roll out.  If you have NEVER made a pie crust, watch a YouTube video!  Award Winning Pie Crust, The Most Buttery Flaky Crust You’ll Ever Make. Easy Comprehensive Guide – YouTube (he uses butter, and a food processor)
    Filling:  
    1 can chunk white chicken
    1 can mixed vegetables drained
    1 can cream of mushroom soup
    salt and pepper to taste
        Mix in a large bowl and add to the pie shell.
    Top with a second pie crust.  Crimp the edges together.  
    Slit the top for steam vents
    Bake 350˚ for 40-45 minutes.
     
    Baked Potato Meal
    Cook some large baking potatoes.  I like to scrub them well and wrap in tin foil.  Then pierce with a knife in several places.  Bake 350˚.  The last potatoes I cooked took 2 hours, so give yourself plenty of time.
    Toppings can include:
    1.  canned chili and cheese
    2.  condensed cheese soup with ham, Spam, or bacon
    3.  salsa
    4.  Powdered and prepared sour cream
    5.  Homemade plain yogurt, garlic powder, and season salt
    6.  Baked beans and sausage crumbles
    7.  leftover spaghetti sauce with meat
    8.  leftover meat and gravy
    9.  refried beans and salsa
    10. leftover chopped roasted veggies
    11. fajita filling
    12. ground beef, mushrooms, and condensed cream of mushroom soup
    When my kids were little, we put baked potatoes under a big green salad.  I was skeptical at first because of the hot potato under a cold salad.  But it was delicious and the dressing on the salad provided all we needed for the potato, so it eliminated butter and sour cream.  My kids really liked it!  We called it Potato Surprise!  
     
    Marti
  • Marti’s Corner – 138

    Marti’s Corner – 138

    Hi Everyone,

    NOTES:

    **Ham radios.  I have one.  I even have a license to use it.  I even bought a super-duper antenna.  Someone else programmed it for me.  Someone showed me how to use it, and that is the extent of my knowledge and experience.

    Before COVID, there used to be a HAM group that met in person every other week or so.  That has not come back that I know of.  JUST this week, I found this:  Anemoi Incident Response – Amateur Radio Technician Class #1 – YouTube

    Yeah!  “Don’t miss out on the opportunity to enhance your communication abilities and connect with a global community.”  There are a bunch of FREE videos about Ham radios.  THIS is my next project.  AND…. there is a transcript!  I counted 21 videos, so it looks like they go nice and slow.  

    GARDEN HAPPENINGS:  

    This week I planted tomatoes, peppers, cauliflower, and broccoli.  I’m still harvesting carrots from last fall, so I haven’t planted new ones yet, but want to do that soon.  Also, I don’t plant peas.  It’s not that we don’t like them, they are just not my favorite.  Oh, and beets.  As soon as the weather settles, I’m going to plant my beets.  They were so good and sweet last year!

    THIS WEEK’S PURCHASE: vegetables

    Recommended is 90 pounds per person.  7 1/2 cases of 12.  That seems overwhelming.  But, that’s 1 can every 4 days.  If you consider that 1/2 is one serving (approx.), then you get one serving every other day.  

    Here is a comparison of different types of vegetables:

    canned:  $.85 at Winco = $.43 per serving

    freeze-dried corn:  22 servings @$14.99 = $.68 per serving

    dehydrated carrots:  106 servings @ $19.49 = $.18 per serving

    dehydrated green beans 40 servings $56.99 = $1.42 per serving

    You can see there is quite a variety and range of prices.

    The prices above are from Augason Farms and beprepared.com  

    I just bought 1 lb. of frozen corn from Winco for $1.49 or so.  There is just a little less than 7 1/2 servings =  $.21 per serving.  BUT, you have to dehydrate them yourself.  Which involves spreading the frozen veggies on the trays!  No work needed.  

    A dehydrator is a GREAT INVESTMENT.  And they are not near as much money as a freeze dryer.  

    I dehydrate and use carrots, celery, and bell peppers.  I buy dehydrated onions.  I also dehydrate frozen vegetables, especially when I can get them on sale.  Also, hash browns dehydrate beautifully from frozen!  

    The dehydrated and freeze-dried vegetables take up much less space and last longer.  The canned vegetables don’t need water.  In fact, you can save the water from the vegetables to use as a base in cooking.  

    THIS WEEK:  Get 2 cases of vegetables (24 cans) OR get a least one can of freeze dried or dehydrated vegetables.  

    MISC. PURCHASE:  can opener....other kitchen needs.

    If you are a camper, you probably already have a box for cooking.  If not, get a small plastic container, about the size of a shoebox.  You can put a can opener in it.  Then go through your drawers and see what else you can spare.  Me?  I have like a dozen large spoons that just take up space.  Other items could be a large knife, a pair of tongs, a hot pad, a rolled up dish towel, a small cutting board, etc.

    Label the box and keep it in a place that will be easy to reach in case of emergency.   

    FOOD STORAGE RECIPES:

    Oatmeal Cake

    1 1/2 c. boiling water

    1 c. oatmeal

        Pour water over oatmeal and let stand for 10 minutes.

    1 c. brown sugar

    1 c. white sugar

    1/2 c. Crisco

    2 eggs

    1 tsp baking soda

    1 tsp cinnamon

    1/2 tsp salt

    1 1/2 c. flour

        Bake in a greased 9 X 13 pan at 350˚ for 30 min.  Serve warm.  Can serve with Dream Whip for a topping.

    Vegetable Beef Stew

    Submitted by Emily Romney

    This recipe calls for 8 c. water, so I’m guessing it serves 5-6 people.

    1/2 c. dehydrated carrots

    1/2 c. dehydrated onions

    1/2 c. dehydrated celery

    1/2 c. dehydrated green peppers

    2 TB Italian seasoning

    7 TB beef bouillon

    1 large can Roast Beef, (15 oz.) be sure to include the gravy

    8 c. water

    1/2 c. small pasta

         Combine everything but the pasta into a medium pot.  Cook for at least 20 minutes.  Add in the pasta and more water if needed.  Cook another 10-15 min.  

    Optional – Serve with either shredded cheese on top or sour cream.

    6 Can Mexican Soup

    1 can whole kernel corn with liquid

    1 can chicken broth

    1 can Cream of Chicken soup

    1 13-oz can chunk chicken

    1 can black beans, rinsed well

    1 can Rotel, any flavor.

         Heat through

    Marti Shelley

  • Marti’s Corner – 137

    Marti’s Corner – 137

    Hi Everyone,

    It’s been 4 years since COVID shut everything down.  Do you remember?  Were you panicked that the stores had empty shelves?  Do you remember how long it was before you could find everything you were looking for at the stores?  

    Time to rethink your situation.  You should have at LEAST 3 months of food to feed your family.  

    3 MONTHS  

    (This is a minimum!)

    Stock up while the shelves are full.

    NOTES:

    I’m finally getting around to checking out my lantern situation.  Here’s the good and bad:

    1. We have 2 propane lanterns and 3 oil lanterns
    2. We have extra wicks, but I can’t find them, of course!  New plan is to store the wicks WITH the lanterns.  (I bought a few at Army/Navy Store)
    3. We don’t have any oil.  They don’t have any at Walmart (probably a seasonal thing).  (They had “1” quart of oil left at the Tractor Supply)
    4. I don’t know how to work a Coleman lantern.  We’ve looked all over for Coleman fuel for the lanterns.  Can’t find any.  Amazon won’t deliver to my house.  Thanks, California, for keeping me safe from my dangerous lanterns.

    SOOOO, the first and obvious thing is to watch a YouTube video.  I found this to be the most helpful for me:

    https://youtube.com/shorts/W19le1jPOoY?si=diVx37UYHmtzDXGL As soon as I get fuel, I’ll be able to use my lanterns.

    My new plan includes practicing more often:  once a week?  once a month?  Just like a fire drill.  THIS is a skill I know I will need some day.  

    Success:

    Success with the oil lanterns.  We put in new wicks, filled the oil (the quart of oil only filled two of them), let them soak overnight so the wick would soak up the oil. And…..voila!!!!

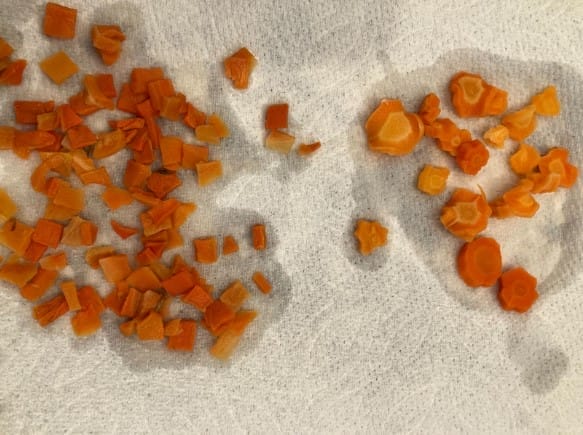
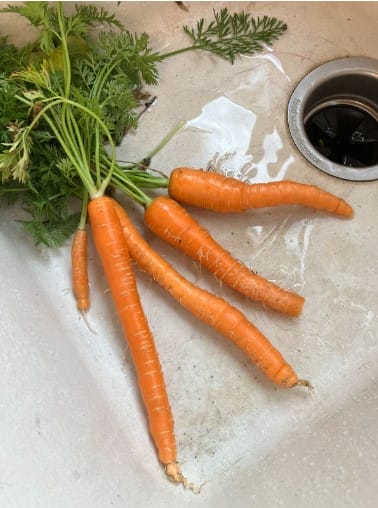
    ** Let’s talk about carrots.  For a while now, I’ve been dehydrating my own carrots.  This involves peeling, slicing, blanching, and dehydrating.  It’s a chore, but I really like the results.  However, the cost is about the same as buying a can of carrots from the Home Storage Center.  So this week, that’s just what I did.  I was beyond surprised when I opened the can.  I was expecting to see small dehydrated carrot slices.  Oh no, mon ami, not so.  They were like baby carrots chips.  About 1/4 in long, tiny, flat squares.  NOT appealing at all!  So I rehydrated them, along with a few of my own to show you the difference.

    I’ve decided to use the small carrot “chips” in recipes that call for diced carrots, which for me includes spaghetti sauce and maybe chicken noodle soup.  Then I can use my dehydrated carrots in recipes where I’d prefer that carrots look like carrots:  chicken tortellini soup, chicken pot pie, beef stew, etc.

    GARDEN HAPPENINGS:

    Something is eating my carrots!!!  How rude!

    The leafy greens are being stripped clean.  I can’t see what is eating them.  But I sprayed with BT and hopefully it will halt the destruction.

    I’ve also planted celery inside, and a bunch of herbs.

    No planting this week.  Next seeds will get planted later this month:  broccoli, cauliflower, and tomatoes.

    THIS MONTH’S PURCHASE: Potatoes

    I like potatoes.  Not only that, they are gluten free for those who have that allergy.  There are many ways to store potatoes.  

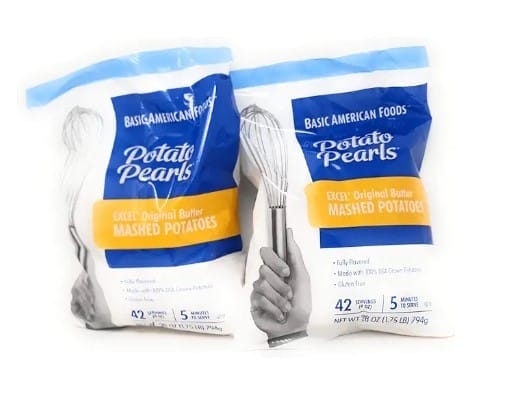
    1. I used to have these:

    These are “add water only”, and they are delicious.  But I finally ran out and went to buy some on Amazon only to find it was $27 for these two bags.  Sheesh.

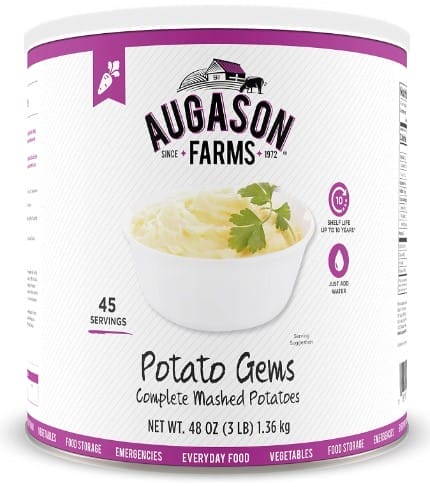
    These are also “add water only” and are under $15 a can from Amazon.

    2.  You can get potato flakes from the grocery store or in #10 cans from the Home Storage Center. (I paid $7.83 per can at the Home Storage Center).  BUT, you have to add butter and milk.  HOWEVER, the shelf life is longer because “fats” will go rancid after a few years.

    1. You can buy canned potato dices, slices, and whole potatoes.  But the shelf life is short, and when I opened my cans after 5-6 years, they were almost black.  Ewwww.
    2. You can get dehydrated potato slices from Augason Farms.  They make delicious scalloped potatoes.  You CAN dehydrate your own potato slices, but it involves peeling, slicing and blanching.  
    3. You can get dehydrated milk-carton size shredded potatoes from Costco.  We bought some, took them camping, and they were delicious.  Just fill the container with water, let sit, drain and fry.  You can dehydrate your own hash browns by just buying them frozen, spreading them out on the trays and turning on the dehydrator.  Presto!

    14 Ways to Use Instant Mashed Potatoes

    MISC. PURCHASE:  tomato sauce.  Winco had 8-oz. cans of tomato sauce for only $.27.  I bought a flat of 24.  $4.80.  Really?  Do you know how much work goes into making your own tomato sauce?  I’ve got a pretty good rotation system going with my cans of sauce.  I can get through them and rotate them in about 3 years.  I’ve never opened a “bad” can if I can keep it under 5 years.

    FOOD STORAGE RECIPES

    Idaho Potato Chili

    Taken from “Great-Tasting Potatoes”

    (I’m not sure about this one.  But, in a pinch, I might like something different)

    1 pound potatoes, peeled and cut into 1/2 inch cubes (about 2 1/2 cups).  This is the equivalent of 2 cans of diced potatoes,

    1 TB vegetable oil

    1 large onion, chopped (can use dehydrated)

    1 green bell pepper, diced (can use dehydrated)

    1 clove garlic (can use dehydrated)

         Sauté vegetables in oil.  If using dehydrated, then soak in water for about 20 minutes to rehydrate first.

    8 oz. ground turkey (or ground beef)

         Add and cook and stir until no longer pink.

    2 TB chili powder

         Add in and cook for 1 minute

    1 28 oz. can undrained diced tomatoes

    1 can kidney beans, drained and rinsed

    Potatoes from above

    1 c. water

    1/2 tsp salt

         Add all and bring to a boil.  Reduce to simmer for 30 min, stirring occasionally.  

    Toppings optional:  fresh cilantro, sour cream, sliced green onions, chopped tomato.

    Corn and Potato Chowder

    1 TB vegetable oil

    1 c. chopped onion

    1/2 c. sliced green bell pepper

    1/2 c. sliced red bell pepper

    1 large clove garlic, minced

         Sauté vegetables in oil until tender.

    2 cans chicken broth

    1 can no-salt cream style corn

    1 can whole kernel corn drained

    1 can diced potatoes drained

    1/4 tsp cumin

         Simmer uncovered 15-20 minutes.  Add 1/4 tsp black pepper, and 4 dashes hot pepper sauce if desired.

    Toppings:   cheese; cook, drained and crumbled bacon; green onions, parsley

    Cheesy Beef and Bean Bake​ (with potato flakes)

    A great recipe for those days when you want a tasty main dish without spending a lot of time in the kitchen.

    Recipe by Maggie Bomis 

    ​Ingredients

    • 1 pound ground beef
    • salt and pepper to taste
    • 1 (6 ounce) can tomato sauce
    • 1 onion, chopped
    • 1 tablespoon Worcestershire sauce
    • 1 (15 ounce) can vegetarian baked beans
    • 6 cups prepared instant mashed potatoes
    • 6 ounces shredded Cheddar cheese

    Directions

    • Preheat oven to 375 degrees F (190 degrees C).
    • In a large skillet over medium high heat, combine the ground beef and salt and pepper to taste. Saute for 10 minutes, or until well browned. Add the tomato sauce, onion and Worcestershire sauce. Reduce heat to low and simmer for 10 minutes.
    • Prepare potatoes according to package directions. Place beef mixture into a casserole dish. Layer the beans over the beef and smooth prepared potatoes over the beans.
    • Sprinkle the cheese over the potatoes and bake uncovered at 375 degrees F (190 degrees C) for 30 to 40 minutes.


    Marti Shelley

  • Marti’s Corner – 136

    Marti’s Corner – 136

    Hi Everyone,

    NOTES:

    ** I used the last of my dehydrated carrots and having done the math a few times, I’ve decided it’s just as economical to buy carrots already dehydrated.  So today, I looked up the location for my local Home Storage Center.  You can find the one nearest you here:  Home Storage Center Locations   They are open to the public.

    Also, from this page, there is a link for the prices.  Carrots are $8.67 for approx. 11 cups of dehydrated carrots = about 33 cups of rehydrated carrots. 

    **  CERT Training 

    Most CERT training involves 4 hours on a Friday, and then 8 hours on both Sat and Sun.  If you are interested, you can check out this website to find a location near you: https://community.fema.gov/PreparednessCommunity/s/cert-find-a-program?language=en_US

    GARDEN HAPPENINGS:

    I was reminded about this website:  Seed-Starting Date Calculator | When to Start Seeds Indoors | Johnny’s Selected Seeds

    Type in your last frost date, which you can find by zip code here:  Lookup your first and last freeze/frost dates by zip code

    On the seed starting calculator, you look down to the list to see what you want to plant, and the calculator will tell you how many weeks ahead to plant indoors (if you want to do that), AND what date that would be for you and your area.  Then it gives you the dates you should set them out in your garden.  So helpful!

    What I found out was that I should have started my celery already.  So, I’ll be doing that soon.  Also, for my area, Jan 19 is the day to plant broccoli, cauliflower, and beets inside.  *Beets can be directly sown, but I have transplanted them for the past two years and it has worked well.  

    As for herbs and flowers, it looks like I’ll be starting my yarrow as well.  

    THIS WEEK’S PURCHASE: rice 10 pounds (20 would be better)

    Rice is part of the recommended 400 lbs of grain per person per year.  Divided by 12, you should store about 33 lbs of grains per month.  Grains include wheat, rice, barley, pasta, and corn.  

    Ten pounds of rice = 20 c.  Each cup of rice = 3 c. cooked rice.  SOOOOO 10 pounds of rice = 60 cups of rice.  

    You can buy rice in #10 cans (5.4 pounds) at the Home Storage Centers for under $8.  You can get rice cheaper at the grocery store.  Store rice in clean 2-liter bottles, OR vacuum seal it in smaller portions.  You can also repackage in Mylar Bags, but you must use an oxygen absorber.  This will help kill any bugs and remove the oxygen.  You MUST repackage or you will get pantry flies!  The #10 cans of rice have a shelf life of 30 years.  

    MISC. PURCHASE: trash bags

    What kind?  How many?  Who knows?  

    I have some small ones for sanitation purposes in case we have no water or plumbing.  I also have some large ones for trash in case there is no trash pickup.  It’s just a good idea to have a variety.  Even just getting an extra box of several sizes and setting them aside is a start.

    FOOD STORAGE RECIPES:

    This is from the “Cannery Cookbook” prepared by the Welfare Services division of the Church of Jesus Christ of Latter-Day Saints.

    Here is what it says about rice.

    “Cook rice in beef or chicken broth instead of water.

    Mix cooked rice with a variety of things:  sliced mushrooms, sautéed onions, crumbled pieces of bacon, slivered almonds, or grated cheese.

    Try sour cream and chives mixed into cooked rice.

    Substitute 1/2 c. fruit juice (orange, apple, cherry) for 1/2 c. water when cooking.  OR vegetable juice cocktail or tomato juice may also be exchanged for 1 c. of water.

    Add one of the following herbs to the cooking water when preparing rice:

    1/8 tsp dried thyme, oregano, sage, rosemary, basil or savory

    1/2 tsp celery seeds or dried dill

    seasoned salt instead of salt

    3/4 tsp dried marjoram

    1 small bay leaf

    To cook rice:  1 c. uncooked rice equals 3 cups of cooked rice or 4 servings.

    1 c. rice + 2 c. water + 1 tsp salt.  Bring to a boil, cover and lower the heat to simmer.  Cook about 15 min without removing the lid or stirring.  

    Browned Rice

    This is a great way to use up extra vegetables and/or meat from a previous dinner.

    1 c. rice

    1/4 c. shortening (or vegetable oil)  Heat the oil and add the rice.  Cook, stirring constantly for about 10 minutes or until lightly browned.  Add

    1/4 c. chopped, pre-cooked meat:  chicken, sausage, beef, pork.  Add

    onion, celery, or any other vegetables

    Continue cooking for 2-3 minutes.

    Add 3 1/2 c. water and 1 tsp salt.  Simmer over low heat 20-25 min or until rice is tender and excess liquid has evaporated.

    Hawaiian Haystacks

    This is one of my favorite meals, but I seldom (okay never) make it because it’s kind of a lot of work for just 2 people (a little like tacos – I never make those either)

    2 cans Cream of Chicken soup

    1 can chicken, drained and flaked

         Combine soup and chicken

    2 c. rice + 4 c. water + 2 tsp salt = 6 c. rice

    Prepare the rice.

    Serve the chicken over rice THEN add toppings:

    1 can pineapple chunks – drained

    green onions

    cashews – the best part

    coconut

    LaChoy noodles

    shredded cheese (also my favorite although you wouldn’t think it would be good.  But really, when is cheese NOT good???

    It’s a good meal when you’re feeding a lot of people.

    Marti Shelley

  • Marti’s Corner – 135

    Marti’s Corner – 135

    Hi Everyone,

    NOTES:

    I came across this video today and got all excited about making, using, and experimenting with my lanterns.

    INDOOR Emergency Heat and Light | Power Outage Heat | SHTF – YouTube

    I’m pretty sure I have a few lanterns somewhere, and they are probably still wrapped in plastic!!!  Also, I just checked at WalMart last week and there was no kerosene to be found.  I suspect that as we get closer to summer and the camping stuff goes on the shelves, it will reappear.  You can also order paraffin lamp oil on Amazon.

    In the meantime,  I want to find and try out my lanterns.  I think they are in a container somewhere in the garage.  LOL

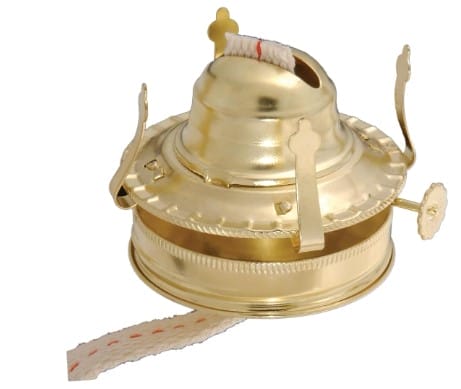
    I also think I will order some of these:  

    It’s a lantern top that screws onto a mason jar!!!  $12 on amazon.  Here is the link:  B&P Lamp® #2 Kerosene Lamp Burner for Mason Jars and Fruit Jars to DIY Oil Lamp (Brass)

    You can pick up an extra roll of wick-33 ft roll for $12.  That price is $.36 per foot.  

    Although I think this is a really good idea, you want to be careful with glass.  If you drop this when it is lit, you could have a real disaster.

    *** IN OTHER NEWS:  We’ve passed the winter solstice.  Our days will continue to get longer- slowly, to be sure, but longer nonetheless.  And wow!  2024.  I gotta admit that growing up in the 60’s, 2024 was the year of science fiction.

    GARDEN HAPPENINGS:

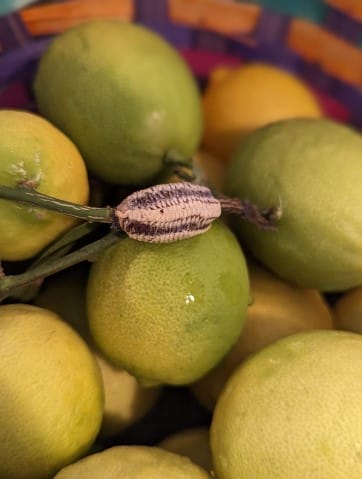
    Yeah, there is STILL stuff happening in the garden.  I found something that looks like this:

    Only mine is attached to a branch of my green pepper plant.  I’m so glad I didn’t destroy it.  Evidently, it is the egg sack of a praying mantis.  Who knew??  Score for me!!!  I hope it’s a good omen for the garden.

    The tomatoes are finally all pulled up.  Still have carrots growing, and bell peppers struggling on.  And…lettuce….always lettuce.

    THIS WEEK’S PURCHASE: pasta, macaroni = 10 pounds/packages.  Last week, I noticed that the price of pasta had come down somewhat.  Grab a couple packs of what you use the most.  For me, that’s linguini, spaghetti, macaroni, small shells, and penne.  Get 2 of each, date them, (vacuum seal if you are able), and stick them in a closet.  They will last at least a year.  It may seem like a lot, but if you use one pack per meal, that’s only 10 meals (less than 2 weeks.).  For the two of us, I usually use 1/2 package, and we still have leftovers.  I vacuum seal the remaining pasta and stick it on the shelf for next time.

    MISC PURCHASE(s):  Do you have an alternative cooking source?  Even a BBQ will work.  I had friends who cooked their entire turkey dinner on a BBQ because their stove was broken. 

    The best solution is to have a few choices:  a campstove, a thermal cooker, a kerosene burner, etc.  Even a $15 hibachi and some charcoal will work.

    Your alternative to this is to have food you can eat cold:  crackers, cereal, cans of beans, whatever.  That might get you through a day or two, but it will quickly get old!!!

    Already have a secondary cooking source??  Consider some colloidal silver

    American Biotech Labs – ASAP 22 Plus Silver Solution – Immune System Support, 22 ppm Silver Solution Dietary Supplement – (16 oz) : Health & Household

    This is only one of many options available on Amazon.

    Of all the “witch doctor” holistic medications I use, THIS is my favorite!  I love it so much, I have given samples to people I know who are suffering.  

    I have used it for eye infections, including styes.  One drop in my eye a few times a day and the infection will clear right up.

    I have used it in my mouth for irritated gums or cold sores.  It is amazing.

    I have used it for wound care, externally.

    Some people drink 1 TB a day for health and immune properties.  Anti bacterial.  Anti viral.

    Uses:  abscesses, acne, bladder infections, boils, burns, diaper rash, psoriasis, sore throats, warts.  

    FOOD STORAGE RECIPES:

    I made split pea soup from leftover ham on Christmas.  I used the recipe from 12/24/23.  Oh my gosh!  It was delicious.  Craig was not so sure about eating green soup, but I ate the leftovers for almost a week.  So delicious!  Best I’ve ever made!

    Easy Chili

    I’m always searching for a really good chili recipe, but usually end up making this instead.  

    1 pint canned ground beef, or 1 pound browned ground beef

    1/4 c. chopped onion

    1 large can pinto beans  (I think I prefer these over red beans but either one will work, right?)

    1 can tomato soup

    1 can diced tomatoes

    Chicken Cacciatore

    I like that you can use fresh chicken breasts, canned chicken or freeze dried chicken.  If you use freeze dried chicken, reconstitute before dusting with flour or just add it in.  Canned chicken can probably just be added to the sauce with the onions and garlic.  No need to brown.

    4 boneless, skinless chicken breast halves (This is way too much for us.  I’ll probably only use one, just cut it up a bit)

    In a baggie:

    3 TB flour

    1 tsp oregano

    1/2 tsp salt

    1/4 tsp pepper

        Shake the chicken in the flour mix to coat.  In a skillet, heat

    1 1/2 TB olive oil or vegetable oil.  Add chicken and cook to golden brown.  Turn and add:

    1 medium chopped onion  (I use dehydrated)

    2 cloves garlic  (I used garlic from a jar)

    Continue cooking until onion is translucent and garlic is fragrant.  Add

     1 can stewed tomatoes, undrained

    1 large green bell pepper, chopped (I use dehydrated).

    Cook about 8 minutes until chicken is no longer pink inside and sauce is thickened.  Turn chicken after 4 minutes.  

    Serve over hot cooked rice or noodles so plan ahead.

    Chili Ravioli Bake

    This is one of those throw-together recipes.  

    1 can ravioli

    1 can corn, drained

    1 can chili, no beans

    1/2 c. grated cheese

    1 c. crushed corn chips

    In a casserole dish, layer the ravioli, corn, and chili

    Top with grated cheese and crushed corn chips.  Bake

    350˚ for 10-15 min until hot and bubbly.  

    Marti Shelley

    Make a plan for 2024

  • Marti’s Corner – 134

    Marti’s Corner – 134

    Hi Everyone,

    NOTES:

    ** One of the things I have seldom had to deal with is mice.  But I was reading comments this morning on a FaceBook post as people were telling their mice stories.  One person suggested that everyone should have some kind of defense against mice stored away.  I thought this was a good idea.  Most people were averse to using poison.  I have used spring traps before, but have a horrible memory of hearing the trap spring only to find it had caught the mouse by the back leg and the mouse was limping across the living room floor, dragging the trap behind it!  A LOT of people use sticky traps and are happy with the results, but how many of these can you store?  The option that appealed to me was to mix equal parts of baking soda and cornmeal.  Evidently, they cannot digest this and will die quickly.  Also, it was suggested to seal every opening to the house with steel wool.  They cannot chew through it.  If you have an empty #10 can, this would be a good use for it: large baggie of cornmeal and baking soda, AND some steel wool.

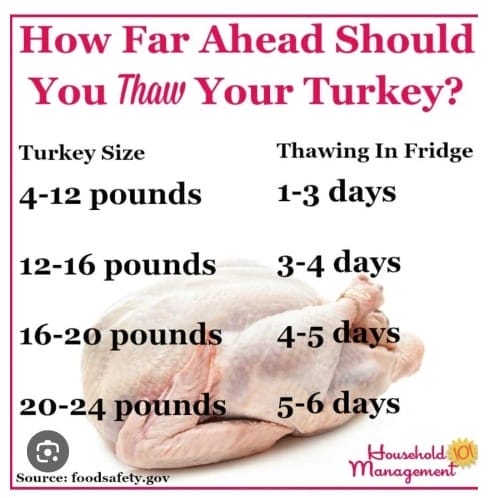
    ** Then there was the year I put the frozen turkey in the refrigerator three days before Thanksgiving, and on that special Thursday morning, it was still frozen!!!

    THIS WEEK’S PURCHASE: stew, chili 10 cans

    Cans of chili and stew will include some meat as protein.  Making your own chili and stew is preferable, but as a quick meal, canned will keep the hunger away.  In addition, both these items can be stretched to feed more people.  Most canned stew has meat, potatoes and carrots.  Add a can of corn and a can of beans and you can stretch it out to feed a few more.  Add biscuits and you’ve got a whole meal.

    Chili over a baked potato, or over hot dogs, or added to a pot of macaroni and cheese can stretch one can to feed many.

    MISC. PURCHASE: bathroom tissue

    Time to check your supplies.  Try to have at least a 3 months supply of bath tissue on hand. Also, check your supplies for any feminine supplies you might need.  Three months for those should be a minimum.  

    In an emergency, you will NOT want to run out of either one!

    FOOD STORAGE RECIPES:

    Last week I made scalloped potatoes from my dehydrated potato slices.  They were good!

        Place 3 cups of dried potato slices in a casserole dish

    1/4 c. powdered milk

    2 TB flour

    2 TB cornstarch

    2 tsp onion flakes   (I rehydrated first, but you don’t need to)

    2 TB dried chives (I didn’t have these, so I left them out)

    1/2 tsp salt

    1/8 tsp pepper

          Mix together

    Add 2 3/4 c. water, whisking as you go so there are no lumps.  Pour over potatoes

    2 TB butter, cut in small pieces and place on top of sauce.

    Bake 350˚ for 40-45 min.

    Split Pea Soup

    This is such a warm, comforting meal.  I like to use a ham bone left over from dinner.  OR ham hocks.  But, in a pinch, maybe Spam will be an alternative.

    16 oz. dried peas

    1 pint canned ham, or left over ham

    7 c. water

    1/4 c. dry onion flakes

    1/2 c. dried carrots

    1/2 c. dried celery

    3/4 tsp salt

    1 bay leaf

    1 clove garlic

           Simmer until peas are done.

    I like recipes like this because you can tweak them to suit your likes and whatever leftovers you have.  In fact, one of my favorite things to put in split pea soup is diced potatoes.  It’s really good!

    Bourbon Chicken.  No, there isn’t any bourbon so I have no idea why it is called this.

    Prepare rice 

    2 c. water + 1 c. rice + 1 tsp salt = 3 c. cooked rice

    Sauce:

    1/4 c. apple juice

    1/4 tsp garlic powder

    1/4 tsp ground ginger

    1/3 c. brown sugar

    2 TB catsup

    1 TB apple cider vinegar

    1/2 c. water

    1 TB cornstarch

    1/4 tsp crushed red pepper optional

    Mix, heat until thickened

    Add 1 pint chicken or 1-2 cans chicken

    Heat through and serve over rice

    Tuna Casserole

    I’m not sure how YOUR mother used to make this but I just cook up some macaroni

    1 can Cream of Mushroom soup

    2 cans of tuna drained

    That’s it.  I usually heat it in the oven for 30 min.

    Add peas, or not.

    Add onions or not.

    This is such an easy meal to prep for